I love Paò Caí. It’s a staple in my refrigerator. It’s great as an appetizer while you’re cooking or as a side accompaniment. You can add different vegetables or use vegetables other than cabbage but white cabbage is usually present. Additions might be carrot matchsticks, thin radish slices, green onion segments, daikon radish matchsticks, green beans cut is 1-2” segments. You can also use Napa cabbage instead of white cabbage if you like but I prefer white cabbage. All that’s truly necessary is salt and vegetables. You can make it not spicy at all or burn your tongue off hot. It’s very simple and there’s a variety of things you can use as a fermentation vessel. It’s sour like sauerkraut and can be ready in a week to three or longer. It all depends on how crunchy you want it versus how sour you want it to be. You can start to sample it at 5-7 days.
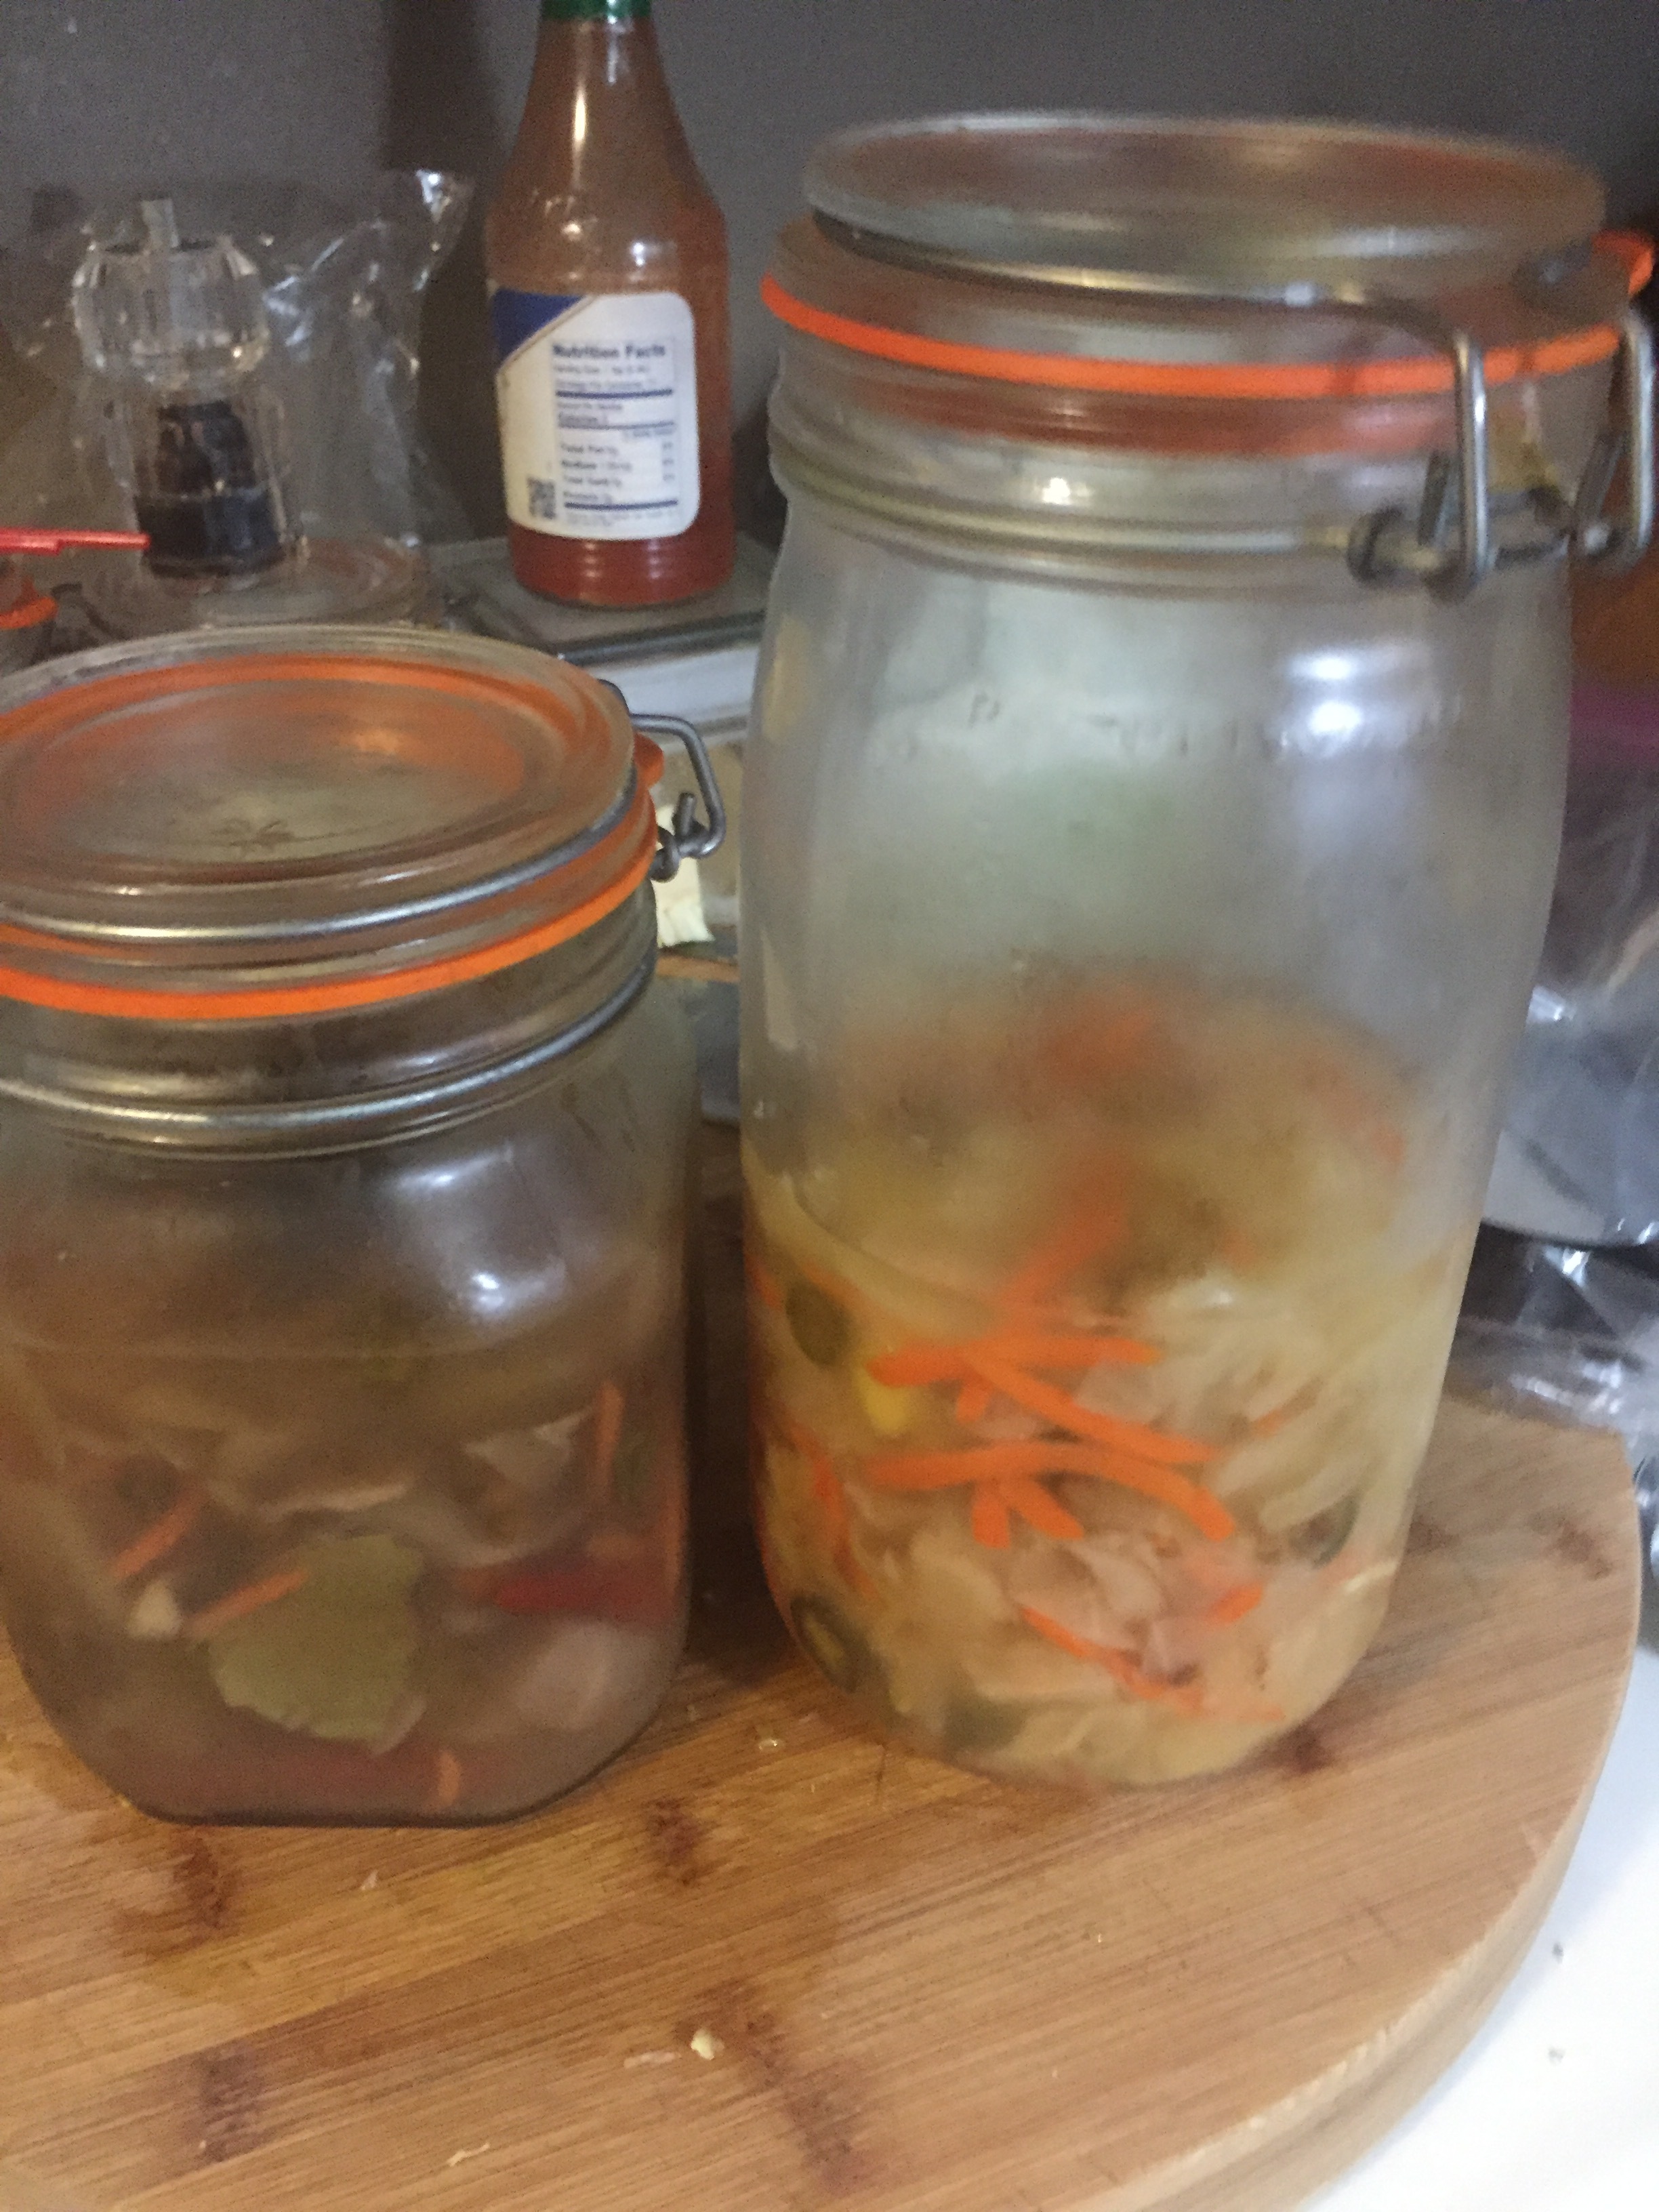
Here’s a picture of two varieties that I made around Thanksgiving, 3 months ago. You refrigerate it to slow fermentation to a crawl when it gets where you want it and can last up to a year under refrigeration but it will loose it’s crunch by then. No problem, cook with it!
Three weeks gives the full spectrum of probiotic bacteria. This is very safe to do, it’s not rocket science. You can eat it raw or add it to a stir fry, use it creatively adding to tuna salad or fried cauliflower rice. Whatever strikes your fancy.
Equipment
Your very largest mixing bowl or two if you need it
A sharp knife and cutting board
A suitable fermentation vessel; a jar at least 1.5 to 2 liters, a fermentation crock, or something suitable from glass, food grade plastics or ceramic. You can google improvised fermentation vessel if you’re having a problem. I like using my old spaghetti storage jars since I don’t eat pasta anymore and I had them at home. Thrift store buys average $2-3. I like them because they are deep with a small surface area. Any 1.5 liter or larger Fido jar will work. At the restaurant where I worked we made it in 5gallon plastic soy sauce buckets with a dinner plate for a weight and plastic wrap on top. So you can always figure out something inexpensive to do this in. Home cooks in China use 2liter soda bottles and all kinds of things.
A quart or sandwich sized ziplock bag depending on the width of your fermentation vessel
A kitchen scale is best but not required
Always use the freshest vegetables you can get. Look at the cabbage stem, is it brown or freshly cut. You get it. Don’t use veggies that have been unrefrigerated for a while, they will have begun breaking down even if you can’t see it mold spores can be present. Don’t worry though, this is safe to do and the salt pretty much keeps anything undesirable from getting a foothold like making bacon or anything salt cured. So here we go. You don’t need to sterilize anything. We’re fermenting not canning here. Hot soapy water for cutting board, bowls, knives, and your fermentation vessel of choice. And get your hands really clean too!
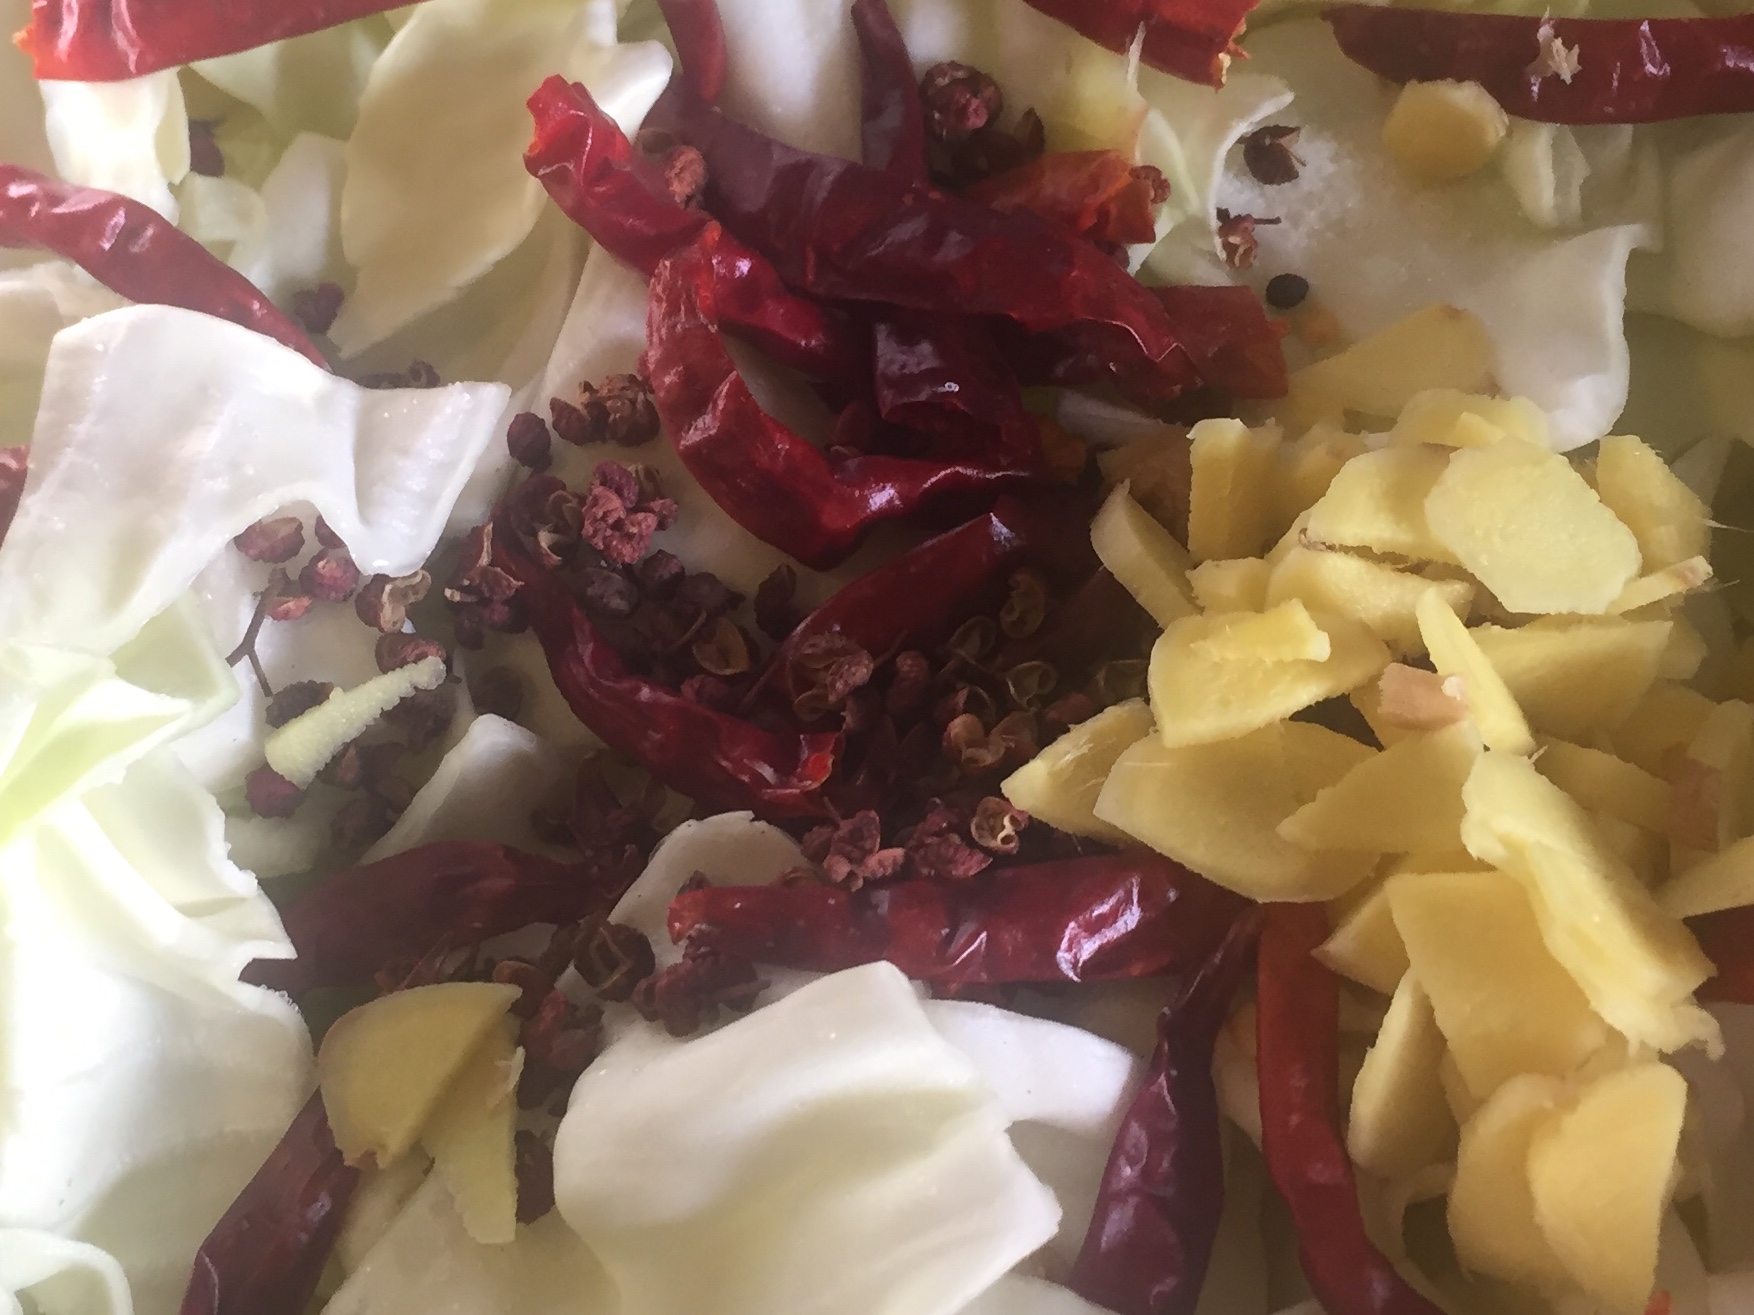
Take off an outer leaf layer and set it aside. This is the washed cabbage cored and cut into roughly 1 1/4” or 2.5cm. chunks with the spices I am adding, dried chili peppers (Chili de Arbol) in this case, fresh cut ginger slices and Sichuan peppercorns. Sichuan peppercorns are something you might need to get online if there’s not an Asian grocery near you, but you don’t have to have them. Some people don’t like them, they cause a tingling sensation on the tongue and are a from the prickly ash tree family. Also I use a couple of Serrano chilies instead of dried red ones about half the time. See first picture. Also a few carrot shreds or match sticks can be good, most sugars are eaten by the fermentation process so not a carb worry. You can also do it the lazy way with a peeler.
The basic thing is to weight your cut vegetables in grams, multiply by 2% or 0.02 and that’s the weight of salt to use. If you don’t have a scale weight the vegetables in the store or hang on to the receipt for reference. Or you could just use a tablespoon of salt for a large head of cabbage as a basic guesstimate.
So today’s cabbage weighed 850grams so I added 17 grams of salt. I like to use pickling and canning salt but really anything that’s NOT IODIZED will work. Sprinkle the salt in the bowl over the cabbage and mix it in. Let it sit for 10 minutes or so and then squeeze and kneed it with your hands. Squeeze out as much juice as you can and let it rest again and repeat working for 3-5 minutes. There should be a fair amount of juice in the bottom of your bowl now. This is where you pack your vessel.
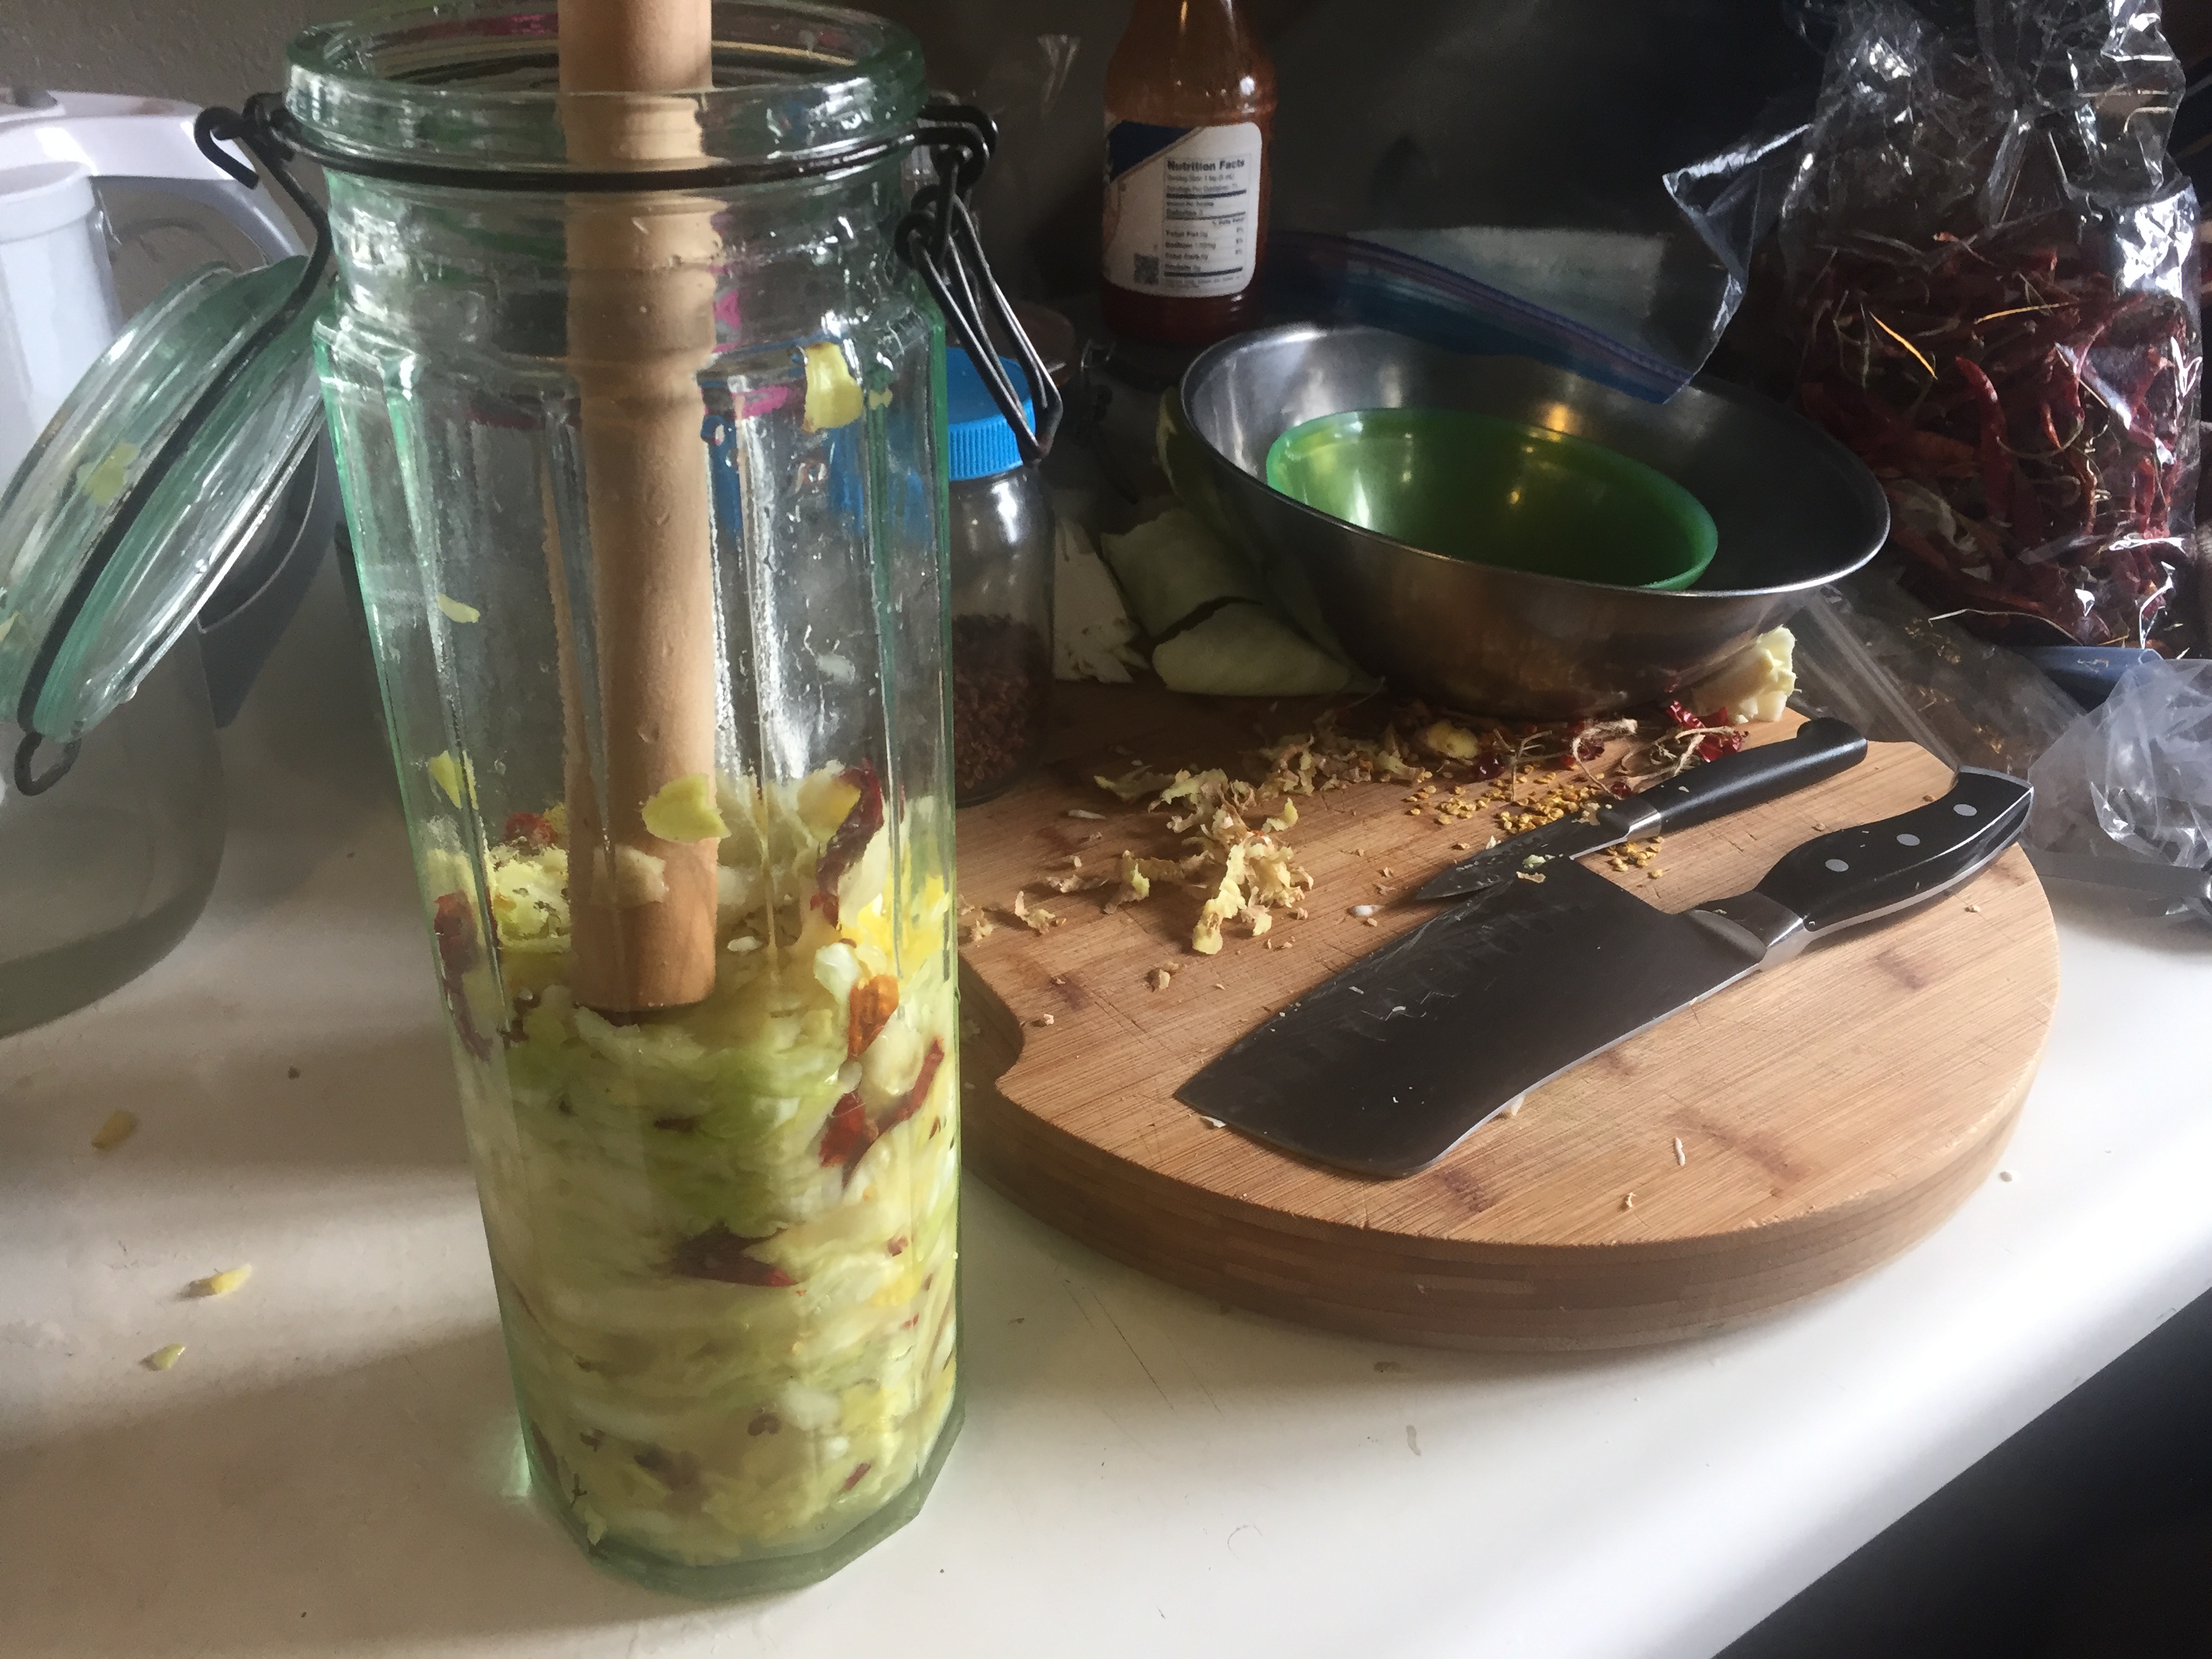
I use a wooden rolling pin to smash the veggies tight to the bottom but a fist is fine and I ended up packing it that way at the end. Put a layer across the top of the cut vegetables with the cabbage leaf you saved. Put a teaspoon of salt in the ziplock with a cup of water. Seal, shake and get all the air out of the bag you can. This is your cap weight and air seal. The reason for putting salt in is that if your bag leaks it won’t dilute your brine. Cover the vegetables with an inch of water, filtered, distilled or boiled and cooled. It’s best to use filtered or spring water that’s chlorine free but boiling and cooling and letting the water sit for a while will work.
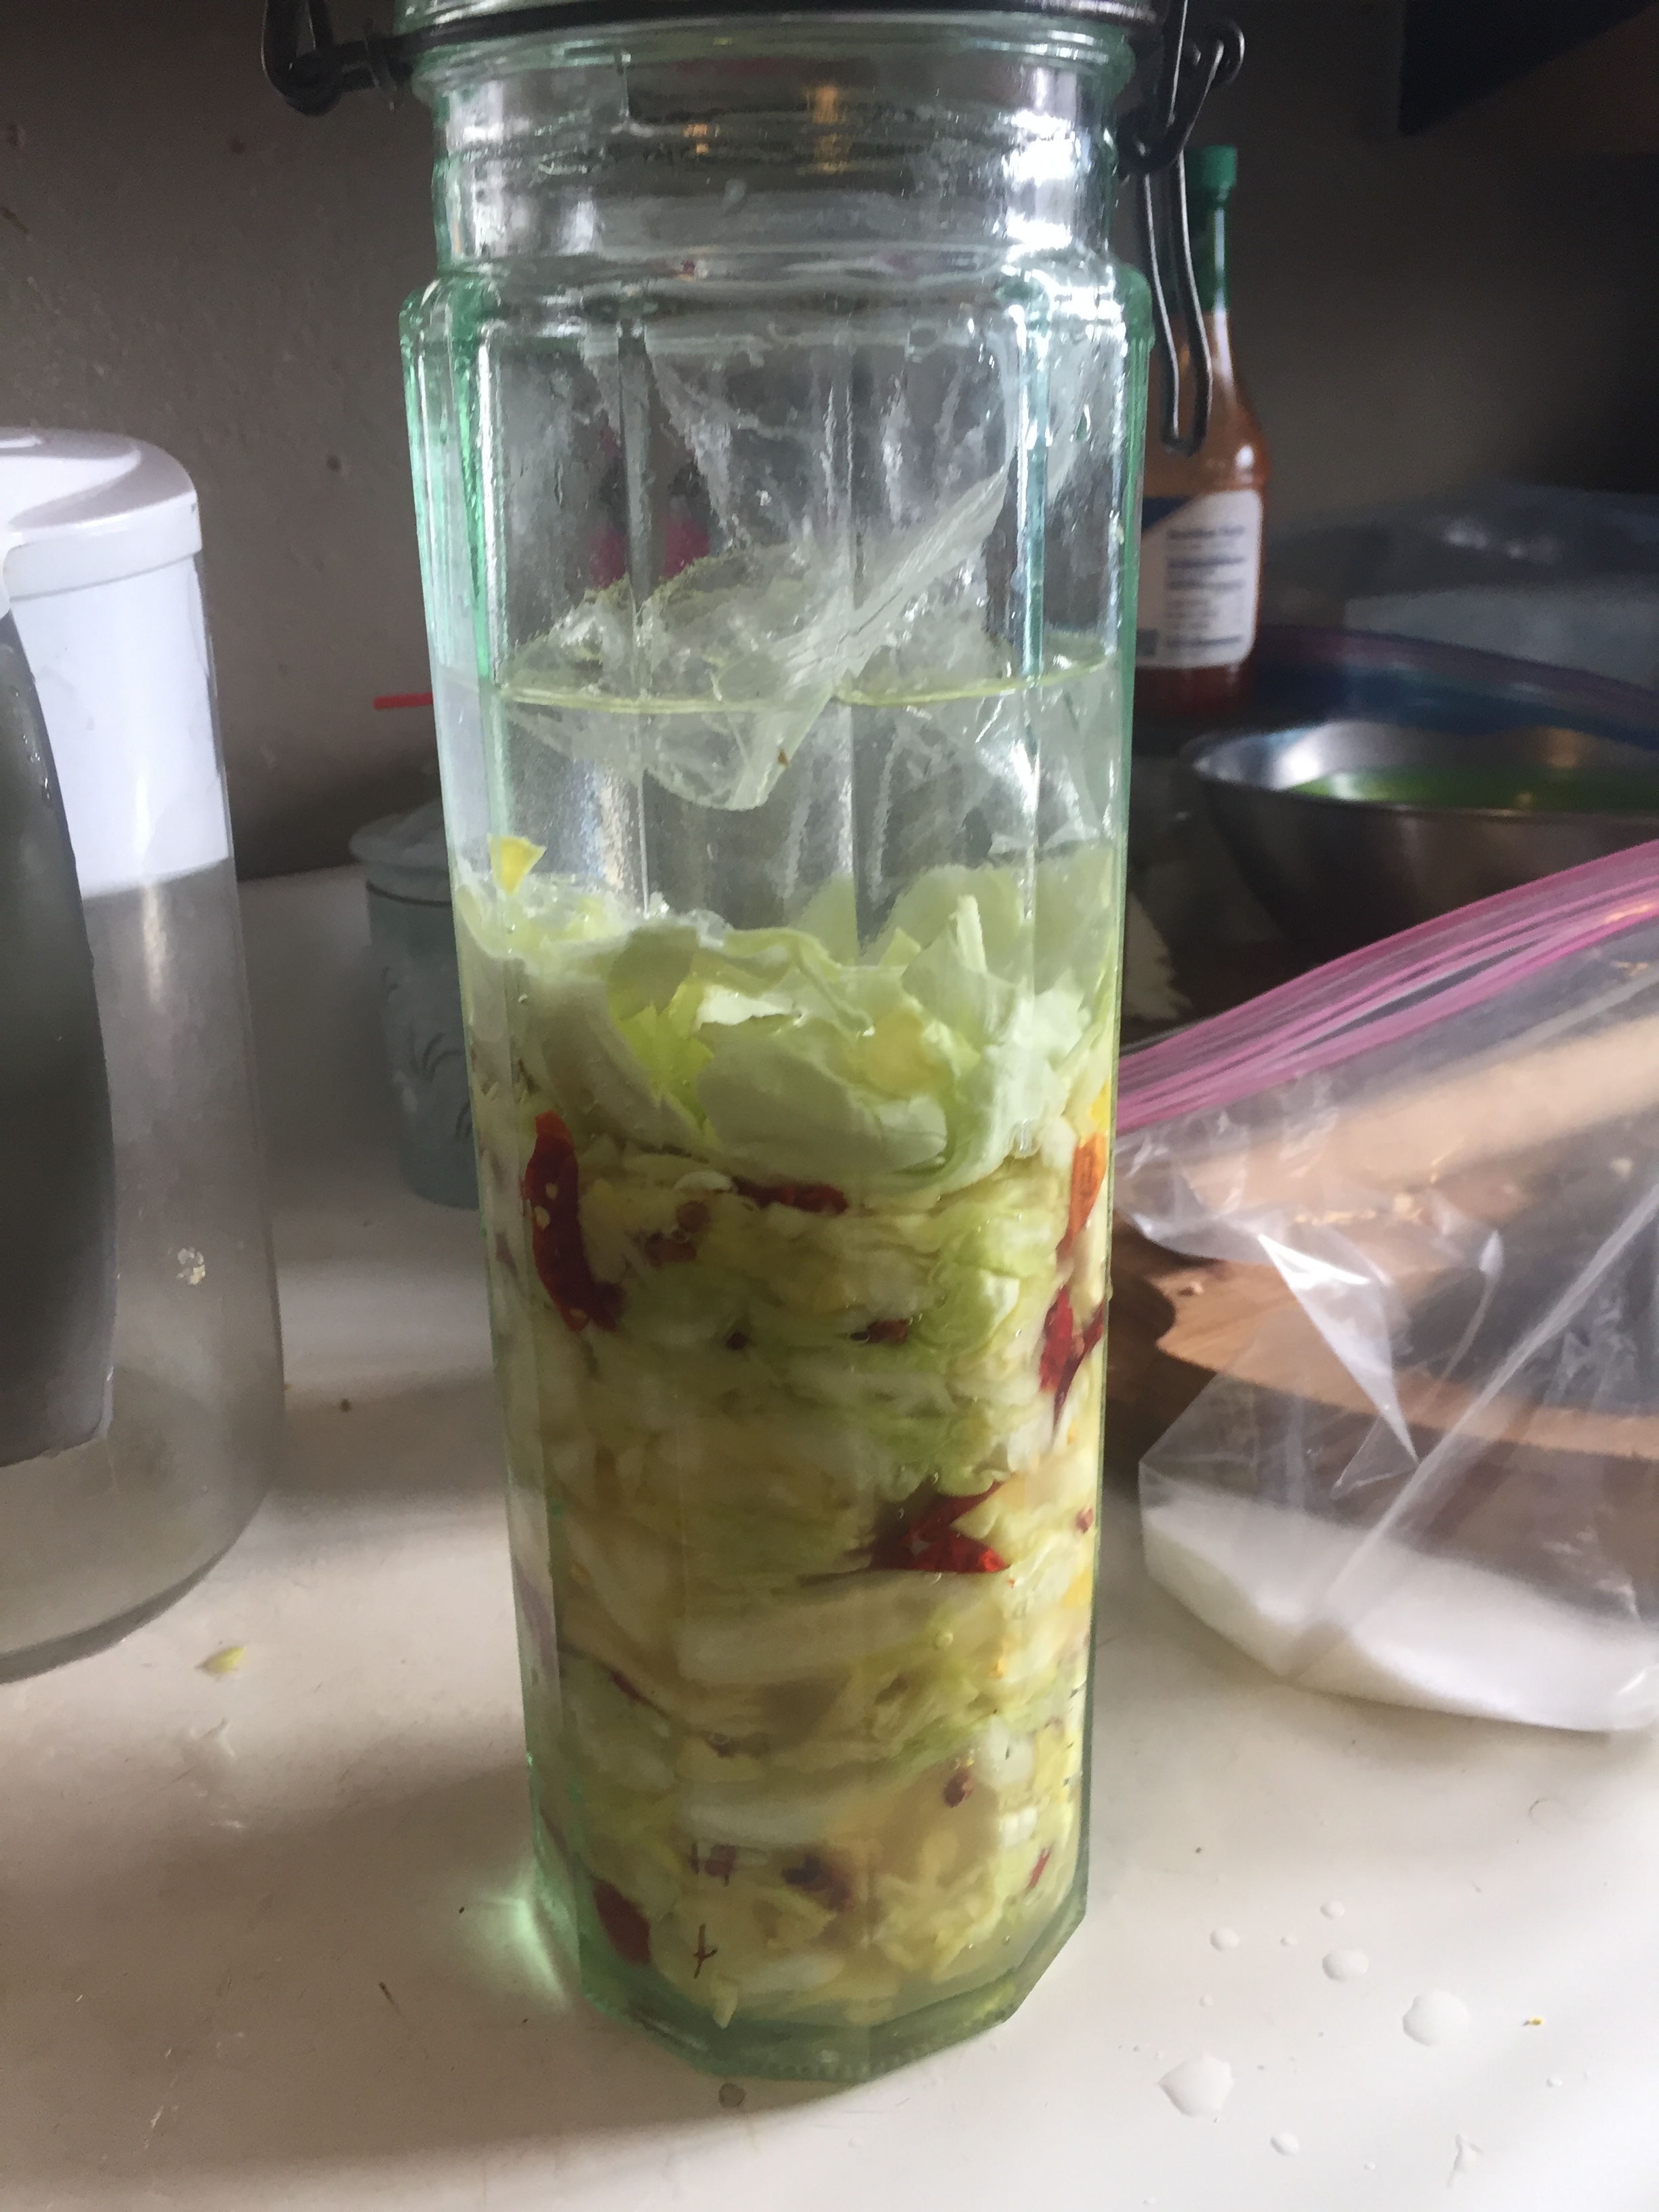
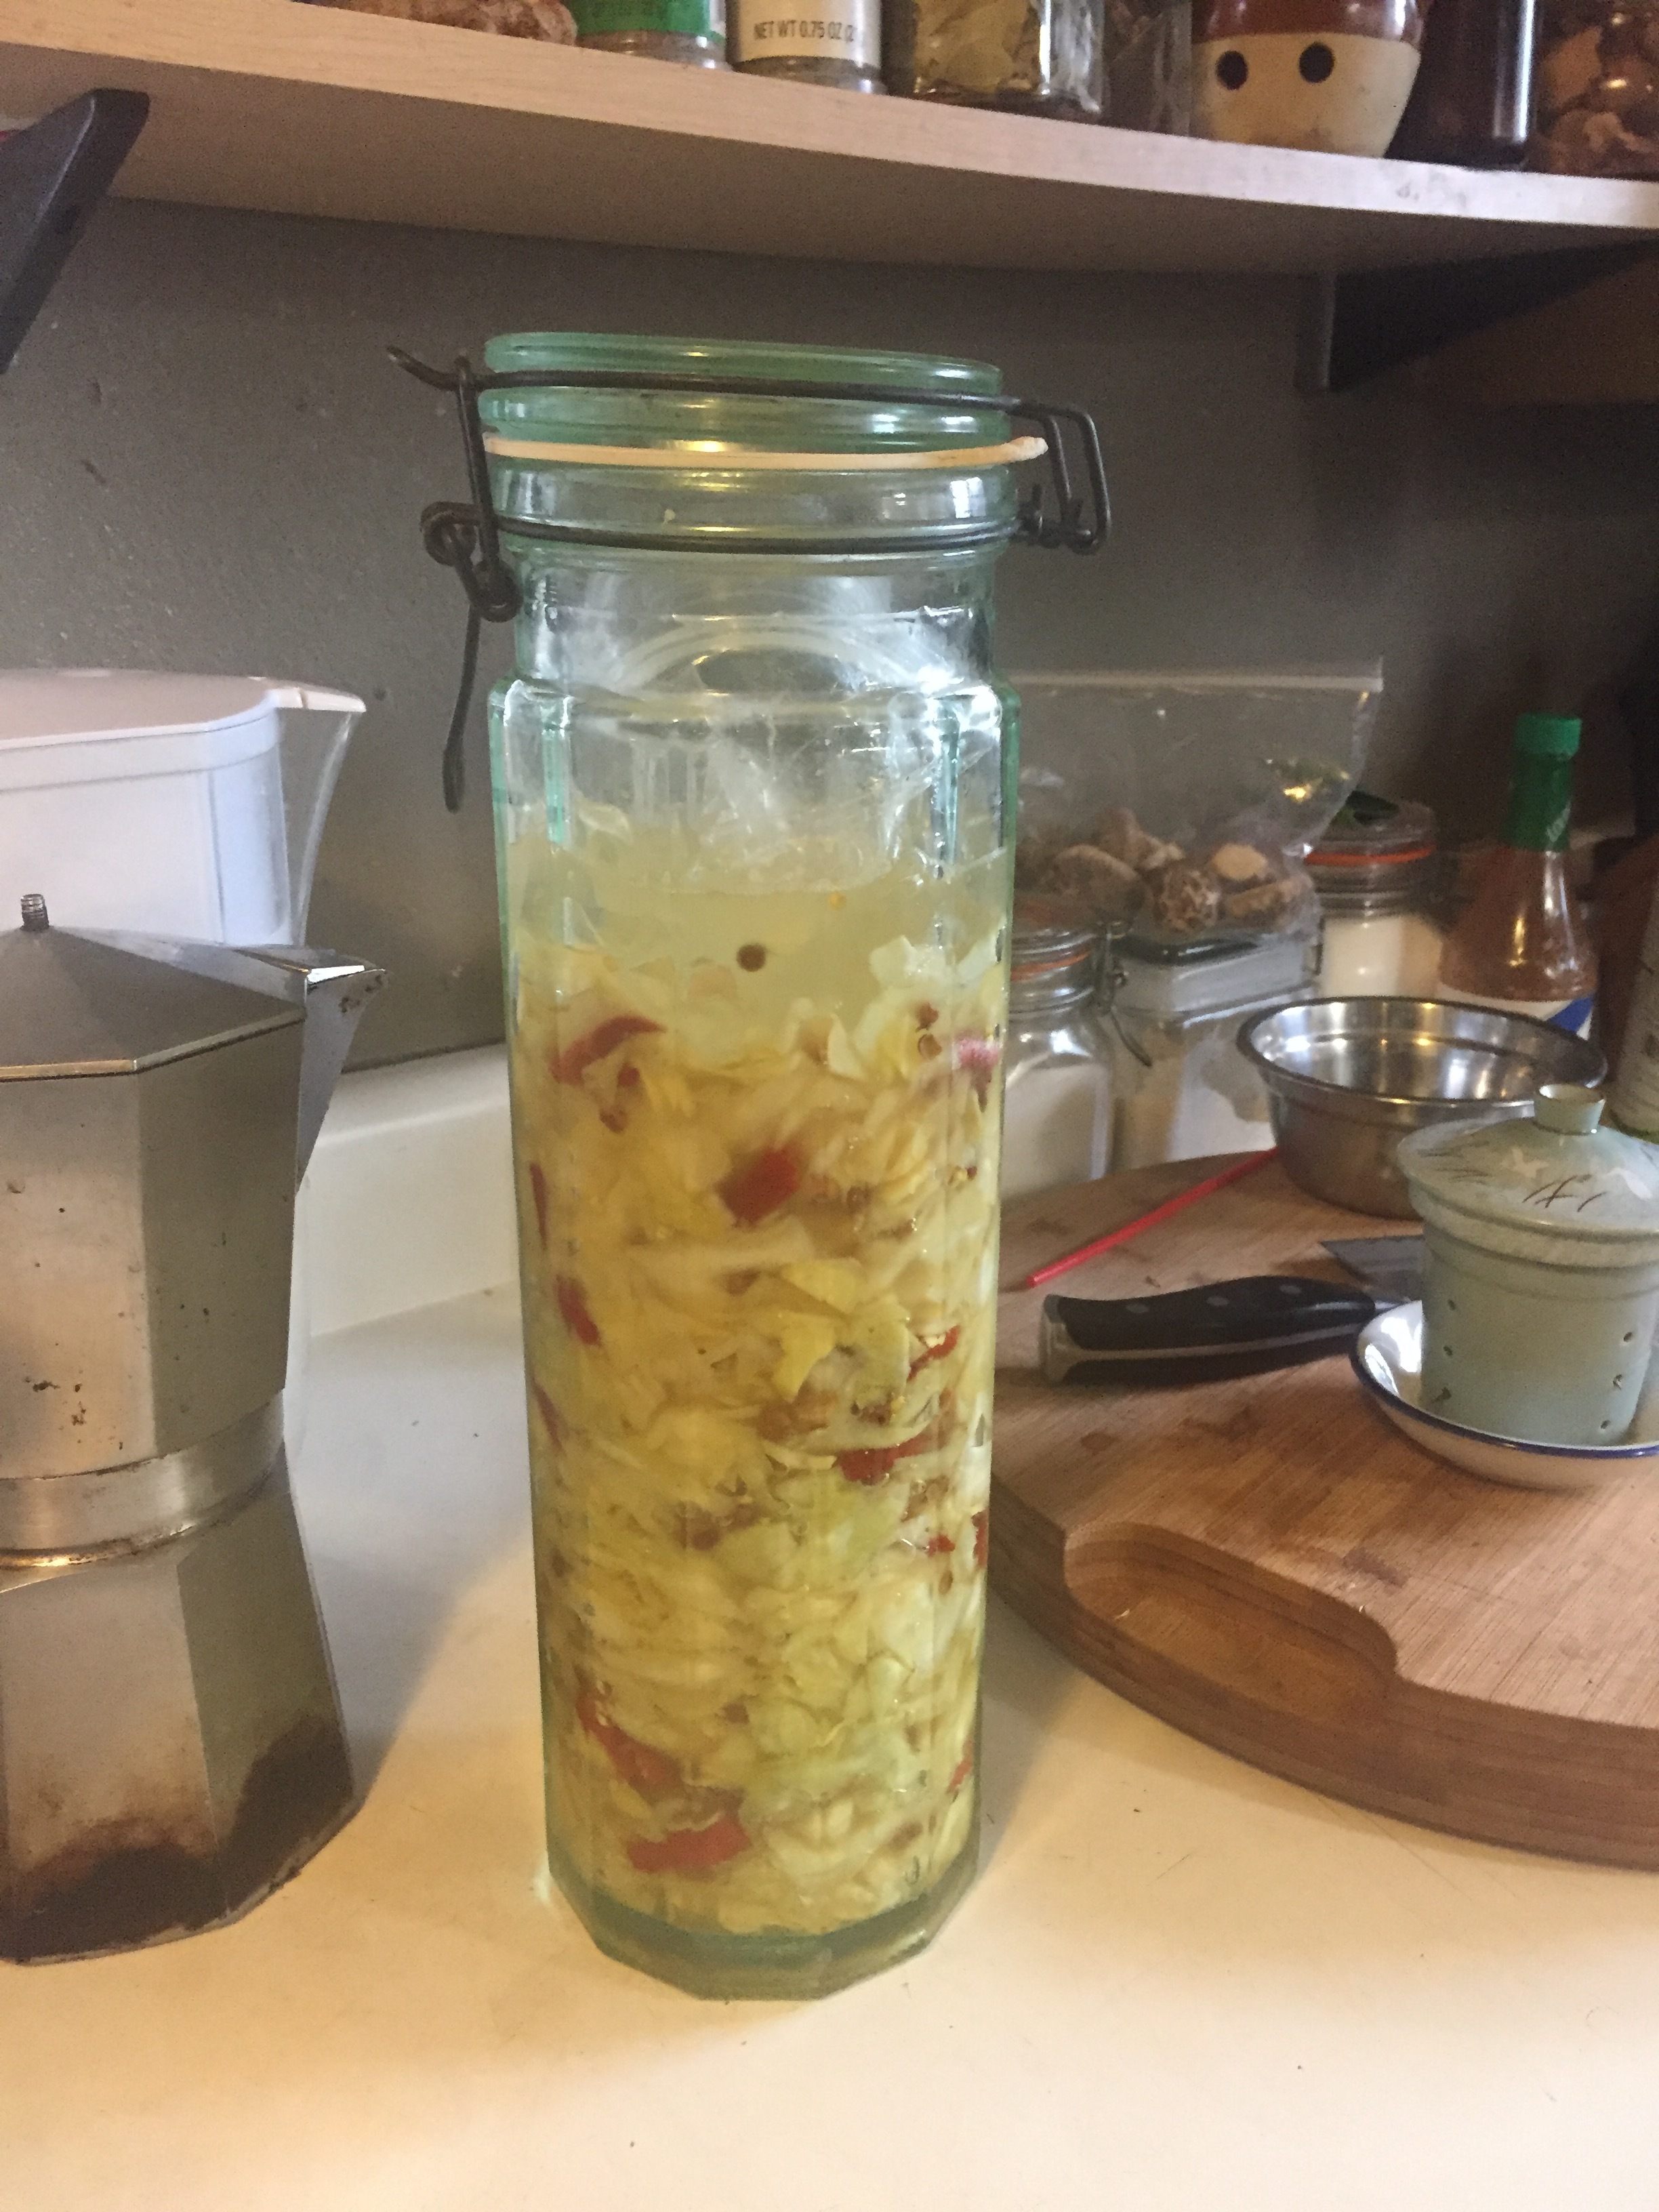
Here’s the finished jar ready to ferment. Put it in a bowl or something Incase it boils over so it doesn’t make a mess. It will expand and start producing CO2. I give the bottle a good twisting every morning for the first week. I grab the top and twist back and forth to help the gas bubbles release. They will come up around the ziplock. You can loosen the bail for a second and close again if you like but the jars should release pressure around the seal. The less your ferment is exposed to air the better. In other words don’t open often you’ll be letting in mold spores and undesirable bacteria. You definitely don’t want anything growing with red black or green color. I don’t want to get into trouble shooting here. Pay attention to your brine bag if it’s pushing up too much you’re headed towards a spill over, just agitate the jar to help the gas escape. This should stop happening pretty much at one week the gasses subside.
Put the jar in a place out of the sunlight or in a dark cabinet even. If you see some white scum forming on top of the bag don’t worry, it’s harmless but not tasty kahm yeast not mold and is a natural thing to form on a lactic fermentation that’s had some exposure to oxygen. It doesn’t always happen. Just clean it off before you take out the vegetables. If you get some on your pickle taking it out of the brine you can rinse it off. Use clean chopsticks or fork or tongs to get veggies out when you sample, don’t use your fingers. You can repack them in any jar to refrigerate when you’re happy with the taste as early as one week but three weeks is my favorite. Keep the brine with the vegetables, some people like to drink a bit like you hear about people drinking pickle juice. You can also use some to jump start your next batch. Ideal temperature is 65-72F for fermentation. The point of the bag and leaf is to keep the vegetables under the liquid in an anaerobic environment so mold can’t form. Message me personally for any advice of help.
I love this as a small side or stir fried with ground beef, or ground or pulled pork. If you make some I will be happy to give you stir fry suggestions. I hope some of you guys give this a shot, this batch only took about 20 active minutes of work and it’s so convenient to have when you cook some meat but are out of fresh vegetables as an instant side you can have without cooking. And probiotic ferments are known weight loss accelerators the strengthen the digestive system, help to heal leaky gut and other GI issues. They are so inexpensive and easy to make compared with store bought live ferments and compared to expensive and inefficient probiotic capsules and supplements. This has way more lactobacilis than you could ever get from yoghurt and is virtually carb free. Enjoy in good health my friends.