
Okay. I thought sous vide meat was just too much work. But I just cooked flank steak sous vide, 133 F, 8 hours, I’m sold.
My Keto Recipes
Janie
(Jane)
#183
I bought a sous vide to make cheese (perfect for maintaining the temperatures) and yogurt.
But after using it for meat, I’ve become a fan. Takes a not-so-tender piece of meat and cooks it to tender w/o turning it to leather. Still pink/red and juicy!
Digital_Dave
#184
Yeah, we pretty much Sous Vide all our steaks now religiously. Got mine back in August of 2018, and pretty much wear the hell out of it!  … The book I have only calls for 2-3 hrs. for steak, but then after some time, there was one night we decided not to eat, so we just left them in until the next day. So at 24 hrs., it was extremely tender. So now a lot of times, we will drop some in the night before and it works great. Like Jane said, it will tenderize the hell out of tougher cuts, like London Broils.
I do 130° since they say that’s the recommended lowest temperature for steak and kills off bacteria, etc. Plus, you cook it some further when you sear. So a quick sear leaves the nice pink, and for someone who wants it cooked a little more, a simply longer sear will take care of that. … Always say that if mine breaks, I’d be ordering one the same day. We use ours so much I’m surprised it still works.
ctviggen
(Bob M)
#185
For steak, I’ve been using this, which is not sous vide:
I just took out a whole turkey breast we had frozen around Christmas. Let it defrost overnight, put in the sous vide at 145F for 5 hours (recipe called for 3, but mine was still partially frozen), plunged into ice water. Cut up for my lunches, and my kid’s lunches. I think it’s great.
Another sous vide trick: Buy some hunks of beef, like any of the beef round roasts (eg, eye of round, top round, bottom round…), or chuck steaks. Leave them fairly large, vacuum seal, freeze.
For the roasts, take out in morning before leaving for work, take you when you get home. Sear then or just plunge into ice water and have lunches. I usually use 132F or so.
For the chuck, this can go longer, 24+ hours, though I’ve cooked less too.
The roasts are lean, and if you want, you can add your favorite fat (eg, suet, ranch dressing, whatever).
ctviggen
(Bob M)
#186
Oh yeah, for that Alton Brown recipe, I have an infrared thermometer I use to test the surface temperature of the pan. I have a one-burner electric induction and a gas cook top. I put pans on each, and the gas has to run way longer to get to 600F.
I also use tallow or ghee and not oil to lightly coat the steaks.
And if you buy very thick steaks, such as from Costco, it can take 2+ hours to get to the correct temperature. I usually estimate 2:30.
Alton Brown recommends 120F, but my wife thinks that’s too rare. I cook to at least 128F before the sear.
Digital_Dave
#187
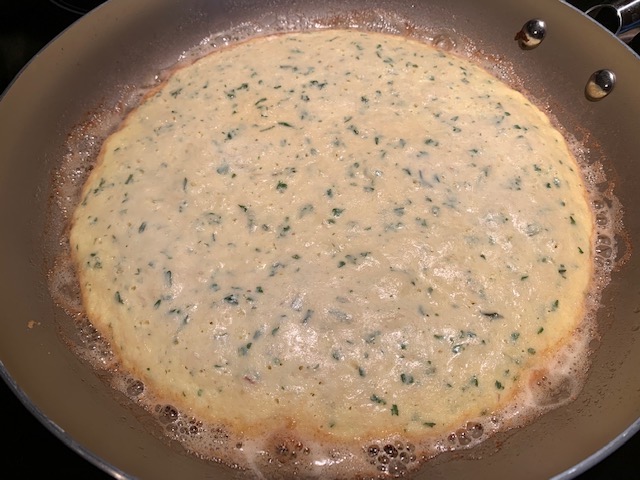
Wanted to throw this one in here. … With most stuff frozen, we didn’t have much stuff to choose from as far as mixing up meals. So I went back to something I’ve been working on here and there, another Crust type for Pizza. - Decided to try to add some fillers this time and see if I could thicken up the crust some.
First, sometime soon here, I think I might purchase a deeper pan that can be used in an oven as well.
Pan Type Pizza (Frying Pan Size, which really can feed two or even three folks)
For this attempt…
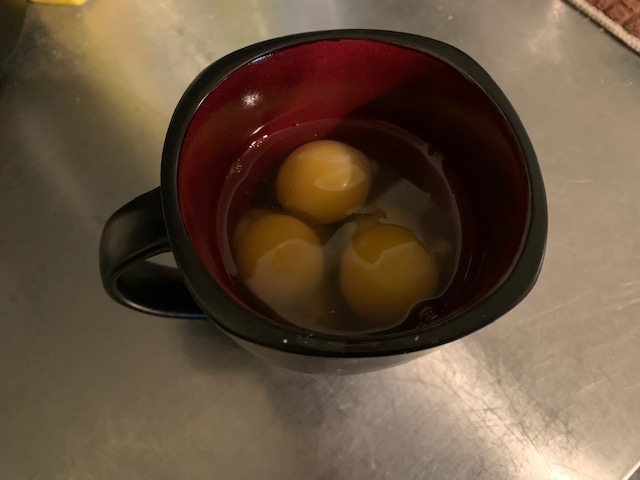
5 Whole large Eggs (may try adding more, but removing some yolks next time)
1/2 Cup Almond Flour (Wanted to add Coconut too, but didn’t this time)
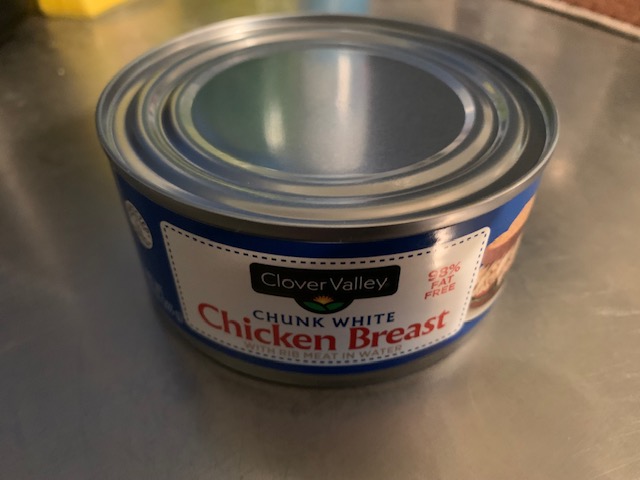
1 - 10 oz. Can of Chicken Breast (Similar to Tuna Fish)
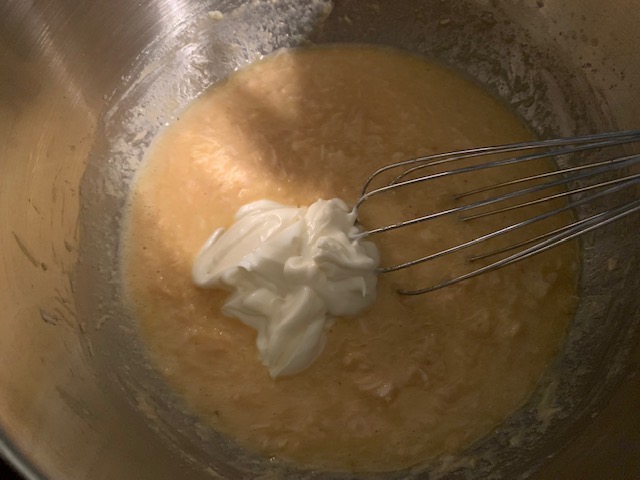
1/3 Cup Mayonnaise
1 Tbsp. Parsley Flakes
1 Tsp. Sea Salt
First opened up 1 - 10 oz. Can of Chunk White Chicken Breast, and after draining well, put it in the bowl and broke up the chunks to smaller pieces, resembling Tuna Fish. (Might also try two cans next time.)

Cracked 5 Eggs into a cup & mixed well, then added them to the Chicken and mixed until incorporated.
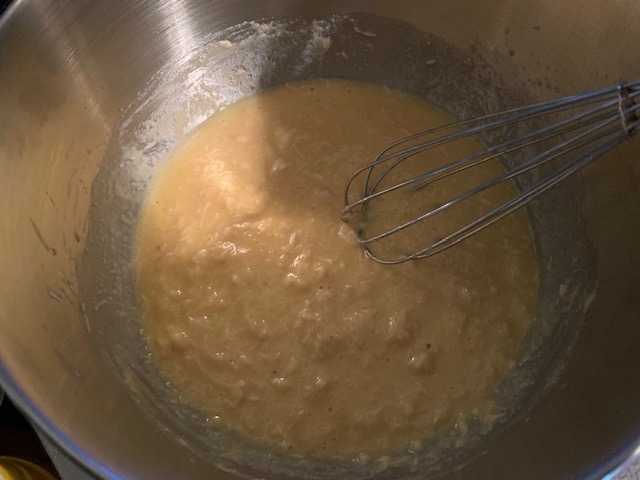
Added 1/3 Cup Mayo and 1 Tbsp. Parsley Flakes. (Would have used Oregano, but didn’t have any.)
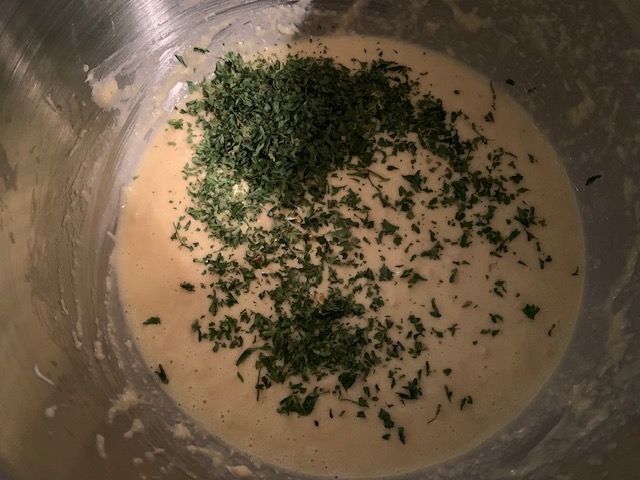
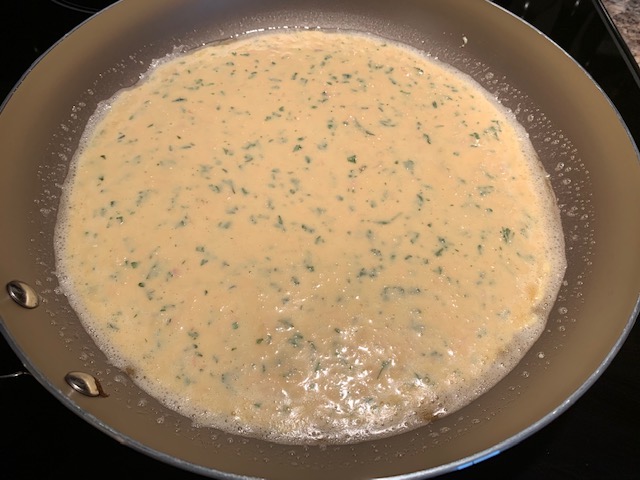
Mixed this well, making sure it was all broken down and uniformed. Then added some butter to the pan and had it on low heat (#2 of 9 on my stove.) I wanted to give it a bit more time to cook, being so thick & not overdo the bottom too soon. Also kept it on this temp the entire time on the stove-top. It poured into the pan nice, and I only had to push it all in place slightly, since it was still quite loose, but took maybe 10-15 seconds to get it smoothed out to edges. Then covered it with a lid to help cook it throughout.
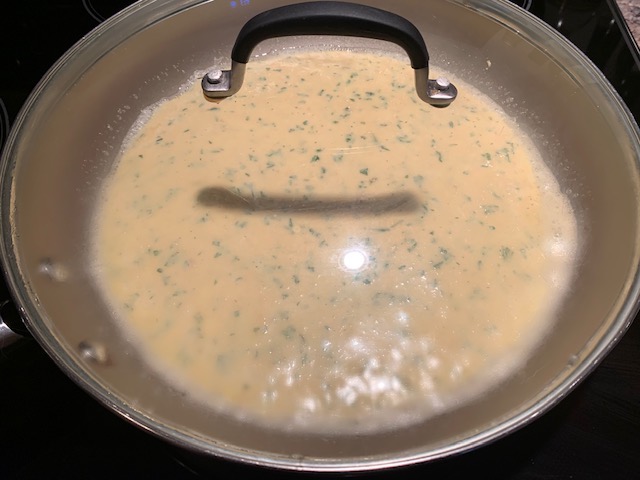
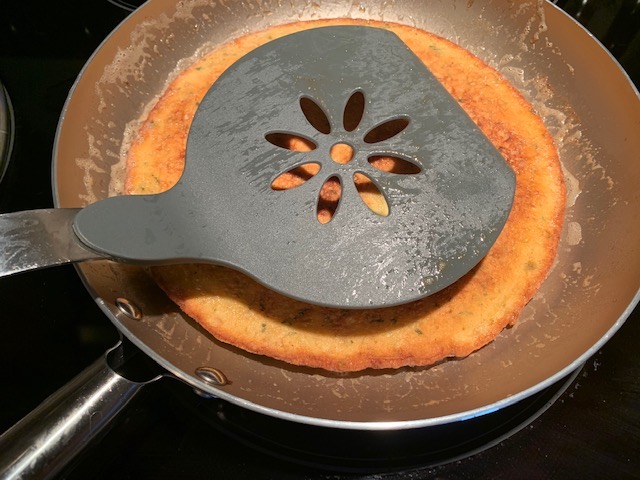
Being I was winging it, I watched it for signs, such as browning edges, drying of the top, etc. So I set the timer for 10 minutes, and this seemed to work well for the first side. With slight browning & drying of the top, I just hoped I was able to flip it with relative ease. And I did. - The additional meat and fillers helped to tighten up and with the use of a large spatula, I flipped it with little effort, using the pan/spatula together.
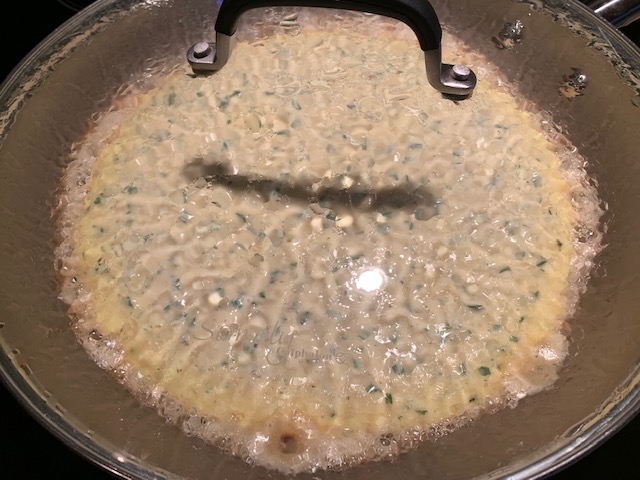
After flipping the first time, I already knew it was more solid than any other attempts and not too flimsy like a basic egg omelette. Looked like it was going to work well. - I let it cook another 10 minutes on the other side, while I was cutting up the Italian Sausage and then flipped it again, back to the original side.
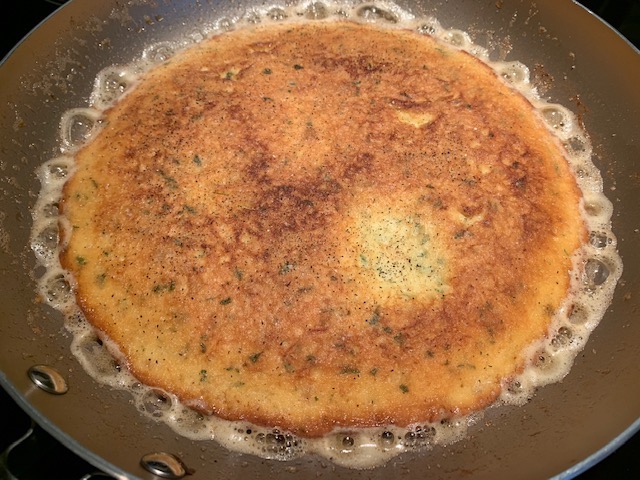
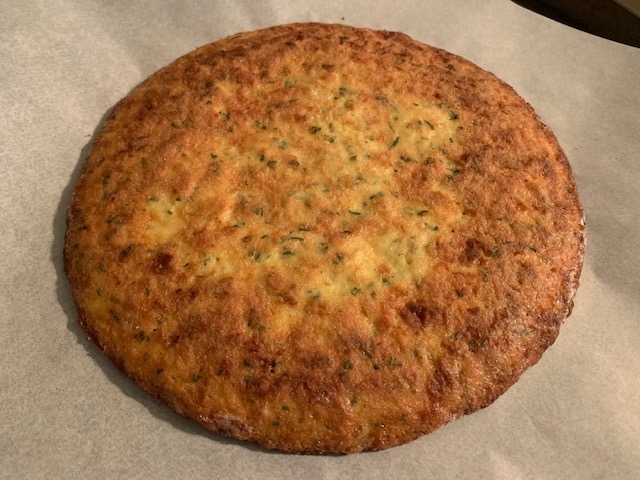
I could pick it up and more it around, without too much worry about tearing it. Then added some sauce, cheese, Italian Sausage and Pepperoni, with a bit more cheese on top to help pin down toppings.
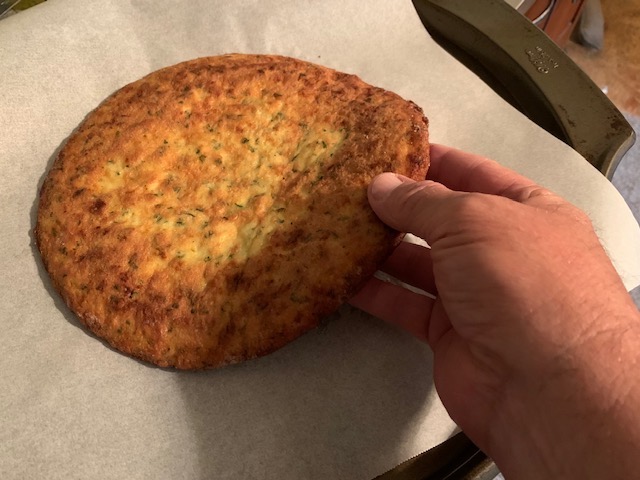
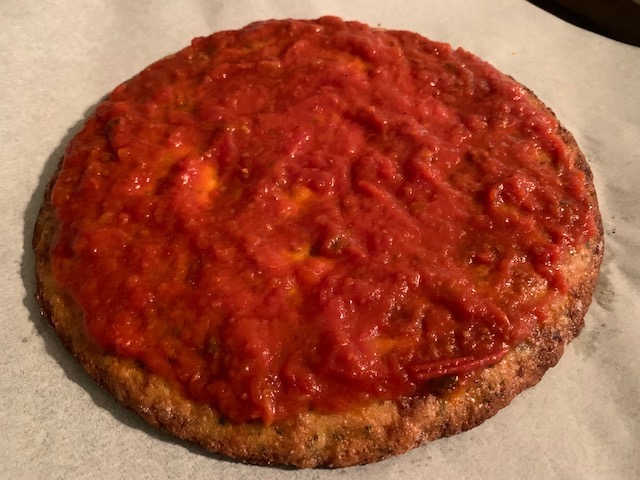
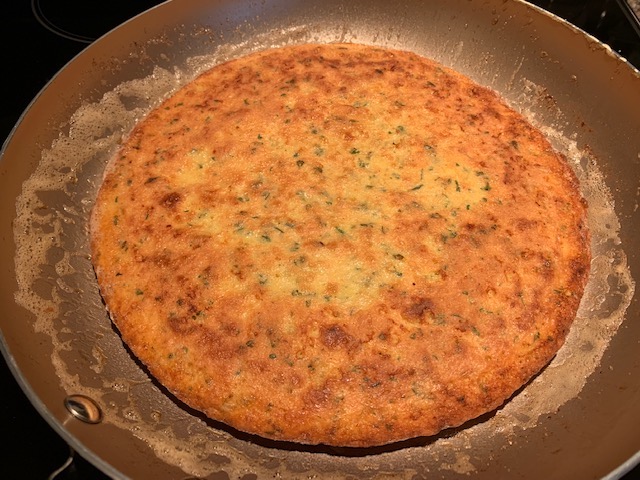
I cooked it for about 15 minutes, at 400° confections, and it could have been left in for more crispiness. But since it didn’t have real squared edges to this one, being done in a regular frying pan, some toppings were sliding off some, but I do like the cheese browned more myself personally. (Bacon would be nice.)
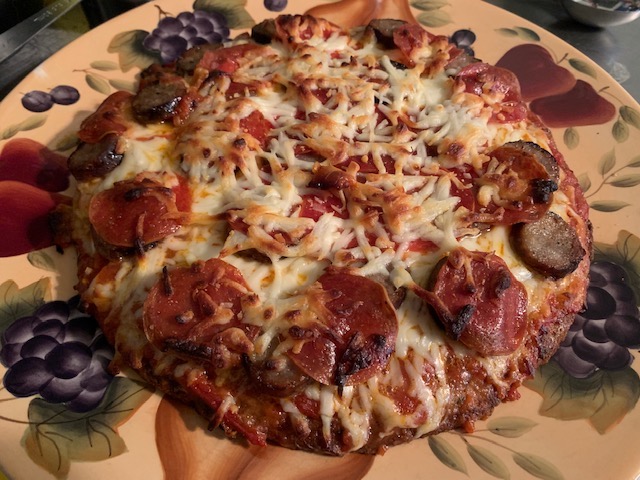
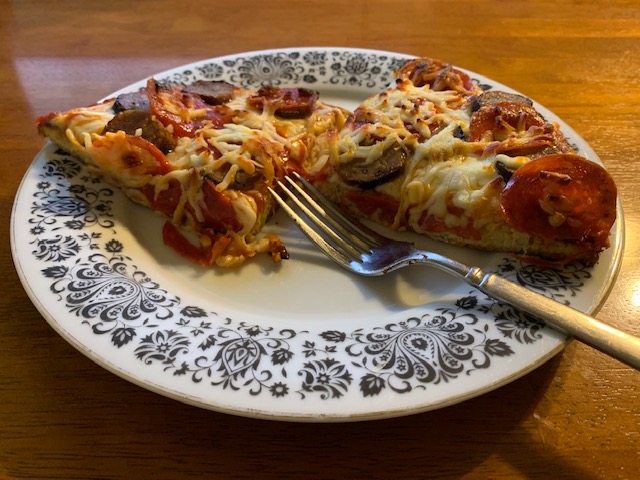
I myself ate half (or two 1/4 slices) and it did me quite well. And as some might have noticed, I don’t eat smallish meals to begin with.  The Wife ate one 1/4 piece and was full. So it is quite filling & overall nice and thick. - It was probably close to an inch in thickness, crispy bottom and I do think I will be looking into getting a deeper, squared side pan, that can also be used in the oven so I can cook it from stovetop to oven in the same pan. - Might look for a slightly larger pan, and if possible, a square shaped one too. I’ve been wanting to fool around with making some dough type crust to make stuff like Calzones, etc. and a nice deep squared pan might just be what I need to experiment more with.
DiMo
(Diane)
#188
This seems nice and simple. The other chicken based pizza crusts I seen require one to dry out the chicken in the oven after breaking it into smallish pieces. It takes quite awhile.
The one I tried came out quite salty. I plan on trying low sodium canned chicken breast next time.
Nice job!
Digital_Dave
#189
Yeah, it came out quite nice, but the edges were thinned due to being cooked in a frying pan. I’m going to look at getting a pan that can be used on both the stovetop and oven, as well as having 90° edges like a baking pan. Not sure what I’ll find, but if not will come up with something. … I just drained the chicken I used and it seemed to work well. Not sure if I could just form it onto a Pizza Pan? But the one I have is quite large, so would maybe want to get a smaller one. Or possibly a squared Deep Dish type?
But would also like to try some other things with a nice crust, like the Calzones I mentioned. - I have to place an order for some other stuff here soon, so will probably research it some after grass mowing.
DiMo
(Diane)
#190
Was this a 12 inch sauté pan then? I’ve seen skillets with straight sides, but they were pretty large.
I might try an 8x8 or 9x9 baking pan, like I always used for brownies. I would need to experiment to see how thick this would make the crust.
Digital_Dave
#191
Yeah they are 12", so it’s probably getting around the 10 or 10-1/2" diameter, since it goes up the sides about an inch or so. - I do like using it, since it doesn’t stick at all and ease of getting it out, just sliding it onto the Pizza Pan. Plus I can flip it to get the crust where I want beforehand. But does make the edges tapered. … I’ve looked at a few so far & like the idea of just going from stove to oven, but guess it could all be done in the oven too? Just will make sure to get a non-stick pan for ease of removal either way.
We do have some frying pans with squared edges, but they are not oven safe. And I do have plenty of cake type pans, and some even non-stick, but they wouldn’t be no larger than the 10" themselves, so just checking what else they might have available. Not just for Pizza’s of course, but would be nice to find something to play around with some.  It’s always nice to put something together and just toss it in the oven to bake. Especially something cheesy. I do cheese by itself at times.
DiMo
(Diane)
#192
Maybe I’ll look for my springform pan. I think it’s about 10” diameter. Maybe that would work for me.
Digital_Dave
#193
I actually thought the same, but I had tried some stuff in some before and found that anything that has any liquidity (If that’s a word) tended to drip out some. You would have to have one that doesn’t allow any liquid to run through the gap. And though I have some really nice ones here, they all will allow this unfortunately, which really sucks, since removing the rim would help immensely in removal of the item that was cooked. I even wondered if I could put something along the rim to help ‘water-tighten’ it.
I have mini-spring forms, as well as 8", 9" and 10" for my Cheese Cakes. And would love to use them more for other things. But they have to be like my Dungeness Crab Cakes to stay within the pan.
Digital_Dave
#195
I would probably need to use that new Keto-Mail delivery system… Just hope the delivery person isn’t Keto as well! Might turn out to be one of those packages that gets “mysteriously misplaced”
I’ve had some fun playing with the Egg-based ones, and they are pretty easy prep IMO. And I just got some more things I ordered, so might be playing some more. If I can get the Eggy Taste down just a little bit more, the Wife might not mind it as much. Plus, I’m trying to get a bit more crunch to the crust.
Janie
(Jane)
#196
Which recipe do you use for cabbage lasagne?
I searched this site and didn’t find a recipe. I searched the net and found dozens.
Digital_Dave
#197
We just make it as we always have, just switching out the noodles for the Cabbage Leaves. Not sure I ever posted the recipe? But basically just the Hamburger, Rao’s Marinara Sauce, Ricotta Cheese and Mozzarella, as well as Parmesan used on top and after it’s done. - We have done it with full leaf layers and shredded, and think we tried cutting it all up in longer strips too. Found that the full leaf method is not bad, but has a tendency to pull out of the piece if a knife isn’t used to cut pieces while you eat. The shredded method is the Wife’s favorite I believe. I personally don’t care myself, as long as we can get some nice layers created. But it is nice to just use a fork to cut your bites though. … I just woke up, so I might be forgetting something? But I’ll check to see if I noted it all down somewhere when I get back home later tonight.
Digital_Dave
#198
Well, it’s been a while since I added anything in here… but truth be told, we haven’t been doing much differently in recent times. And I sort-a took a break for the winter, and just got busy with work and life.
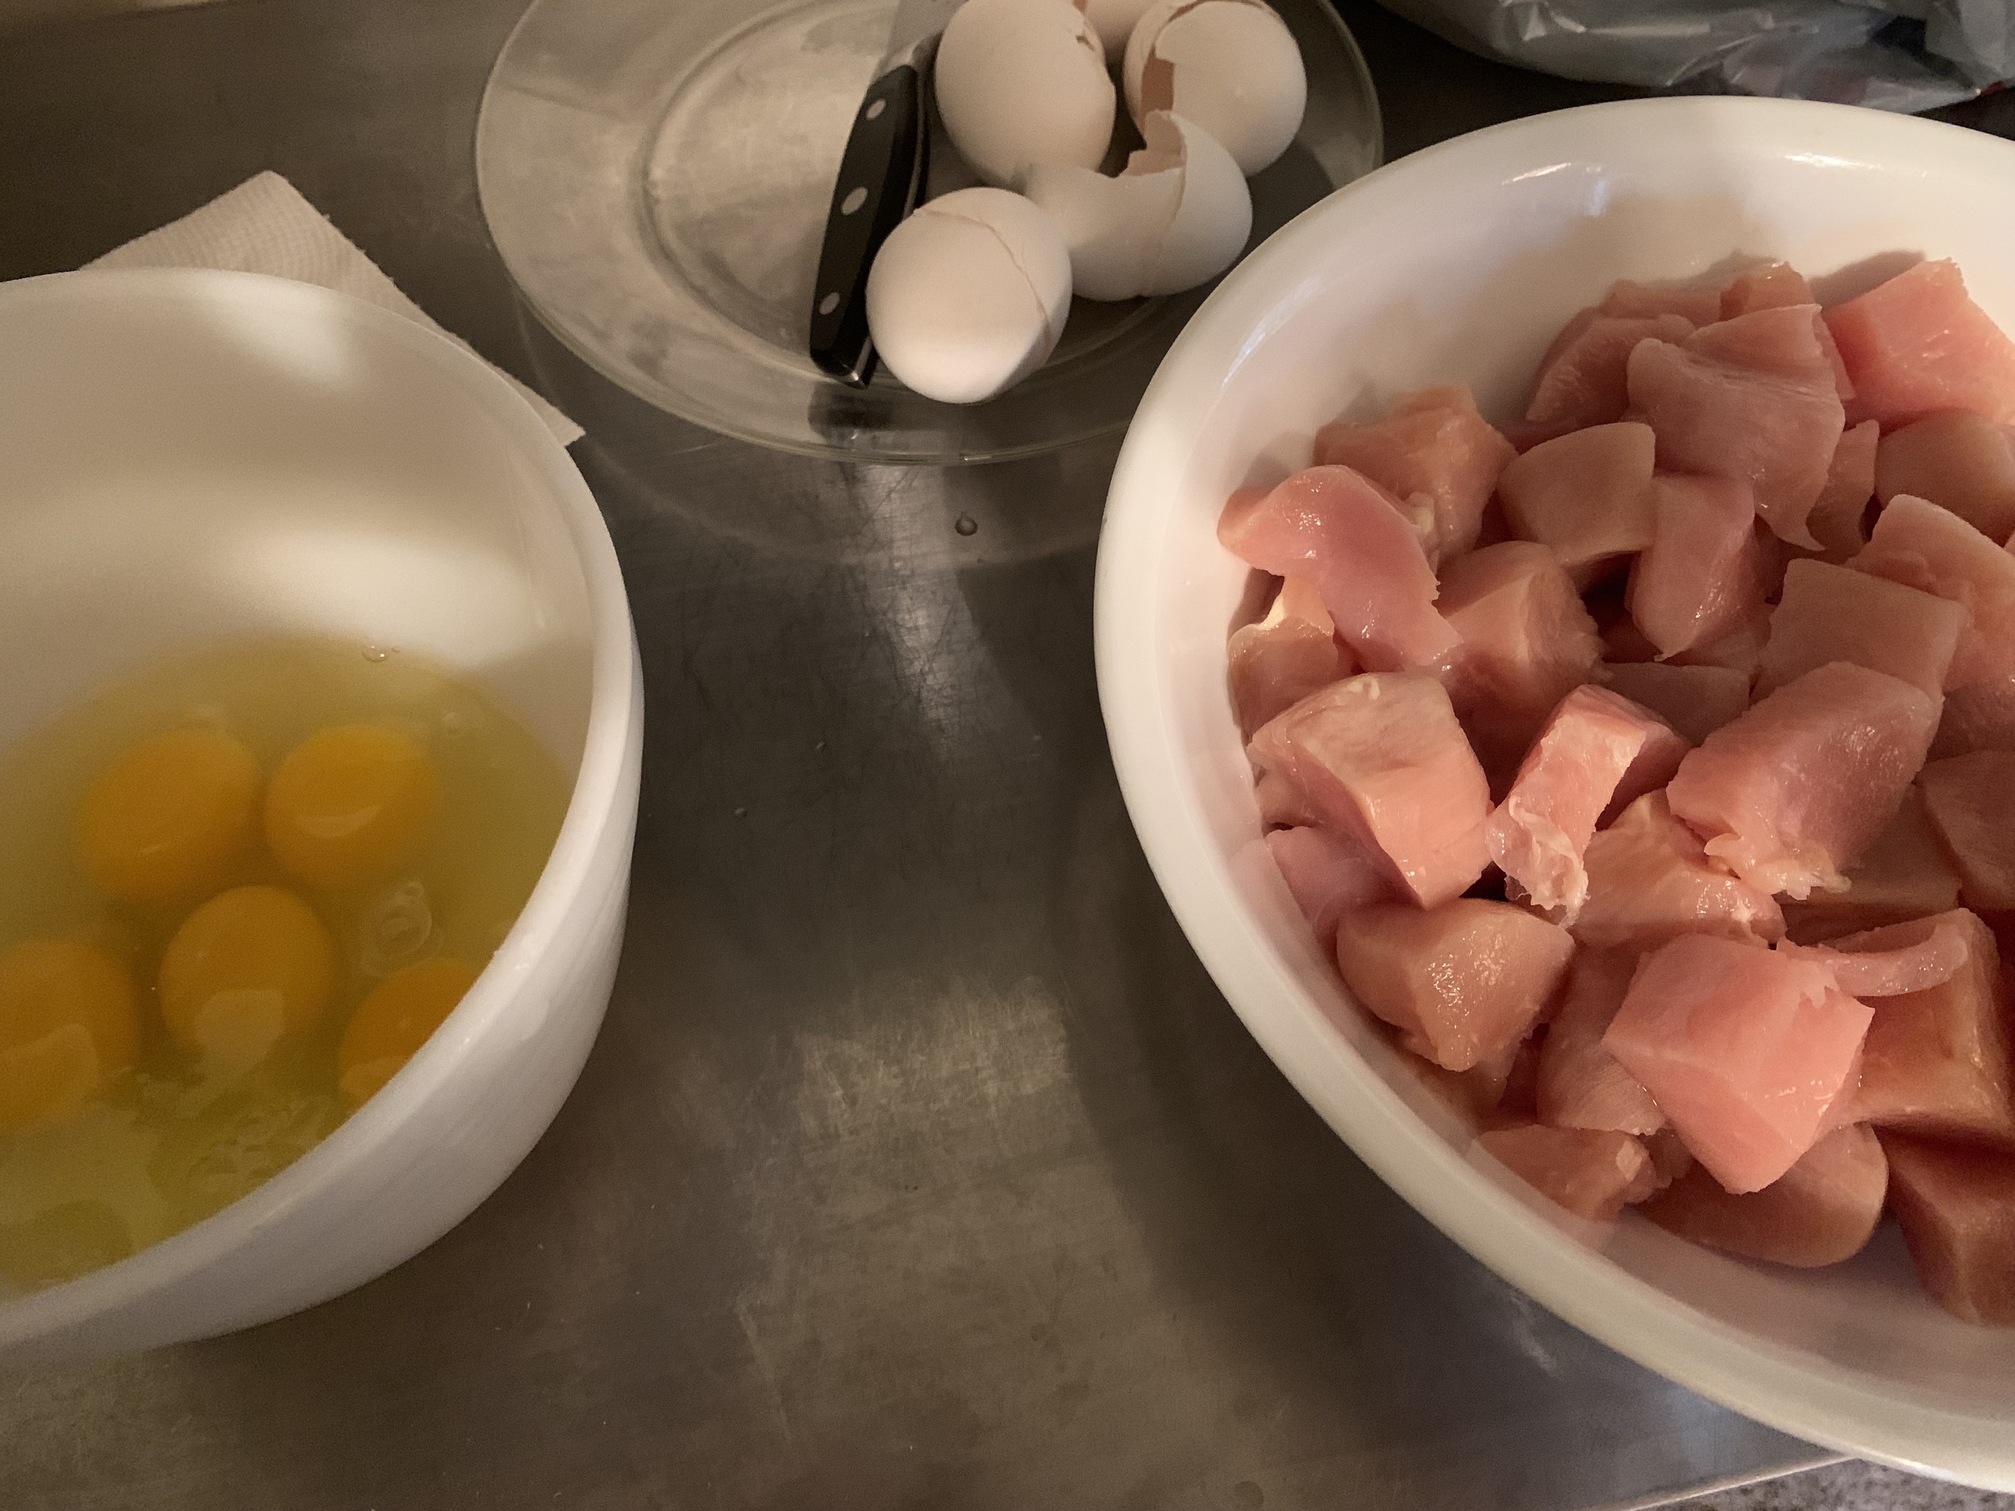
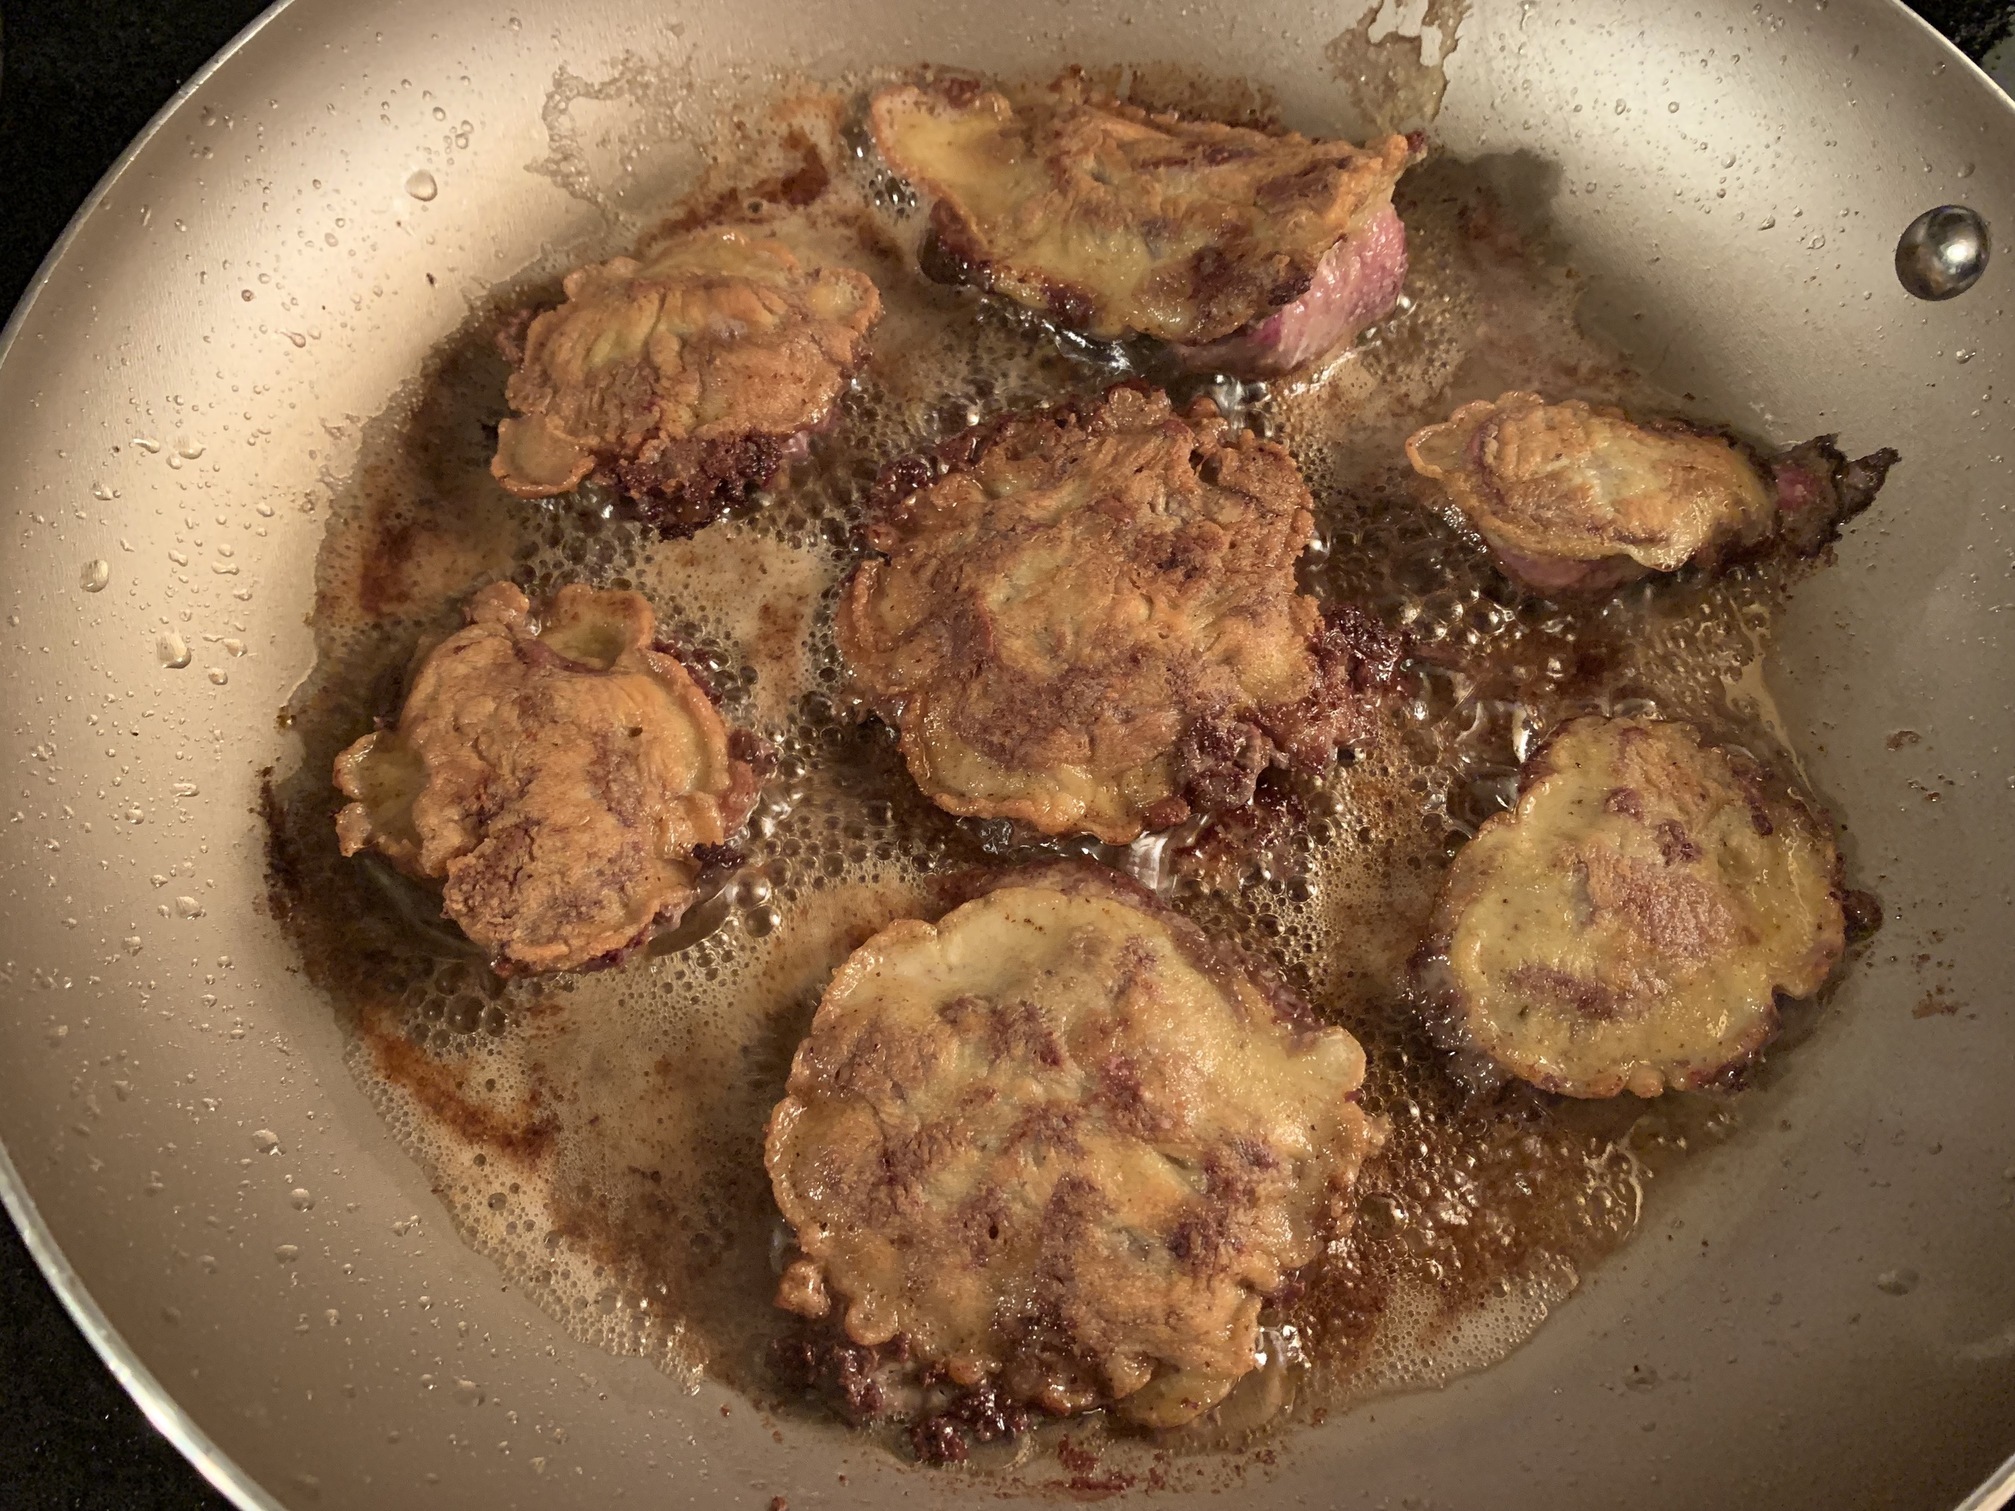
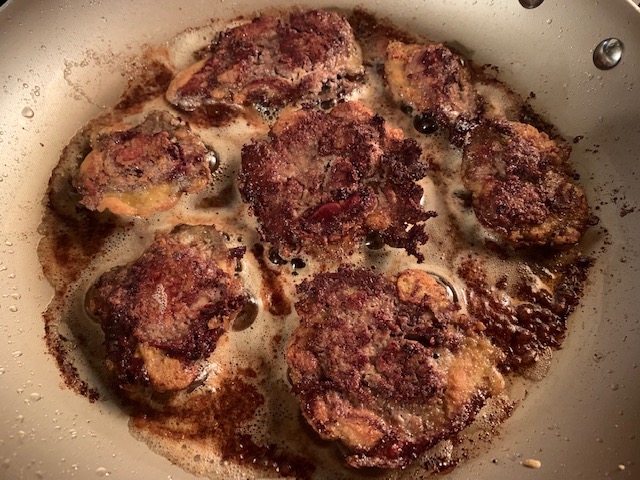
But last week, I actually felt a bit creative and decided to try some stuff with Chicken Breast. Honestly, I tried it with Chicken Liver first, and couldn’t wait to try it on cut up Chicken Breast meat. Basically to get some sort of nuggets, with a light crust, but with some flavor. (For the Liver I didn’t even measure, but I just added the stuff as I went.) Similarly w/ the Chicken, but I did try to keep track to provide some info.
Chicken Nuggets (As mentioned, I did Chicken Liver too, (First) and will add those images below.)
I started with just 4 Eggs, not knowing how far the ‘dip’ would go with a package of 5 large Chicken Breast. - I did end up adding two more Eggs, along with the other ingredients to make the last pan.
Ingredients:
- 1 Package Chicken Breast - Large is what we had, cut up to nugget sized.
- 5 Large Eggs
- 2 Tbsp. Old Bay Seasoning
- Sea Salt - I like large granular, and just added some, but maybe 1/2 tbsp. or more.
- 1-1/2 Cups Almond Flour
- Coconut Oil. I add enough, so the piece is about halfway submerged, so the sides cook up well.
Kept it simple as always, but also because some here are a bit picky and don’t like too much added.
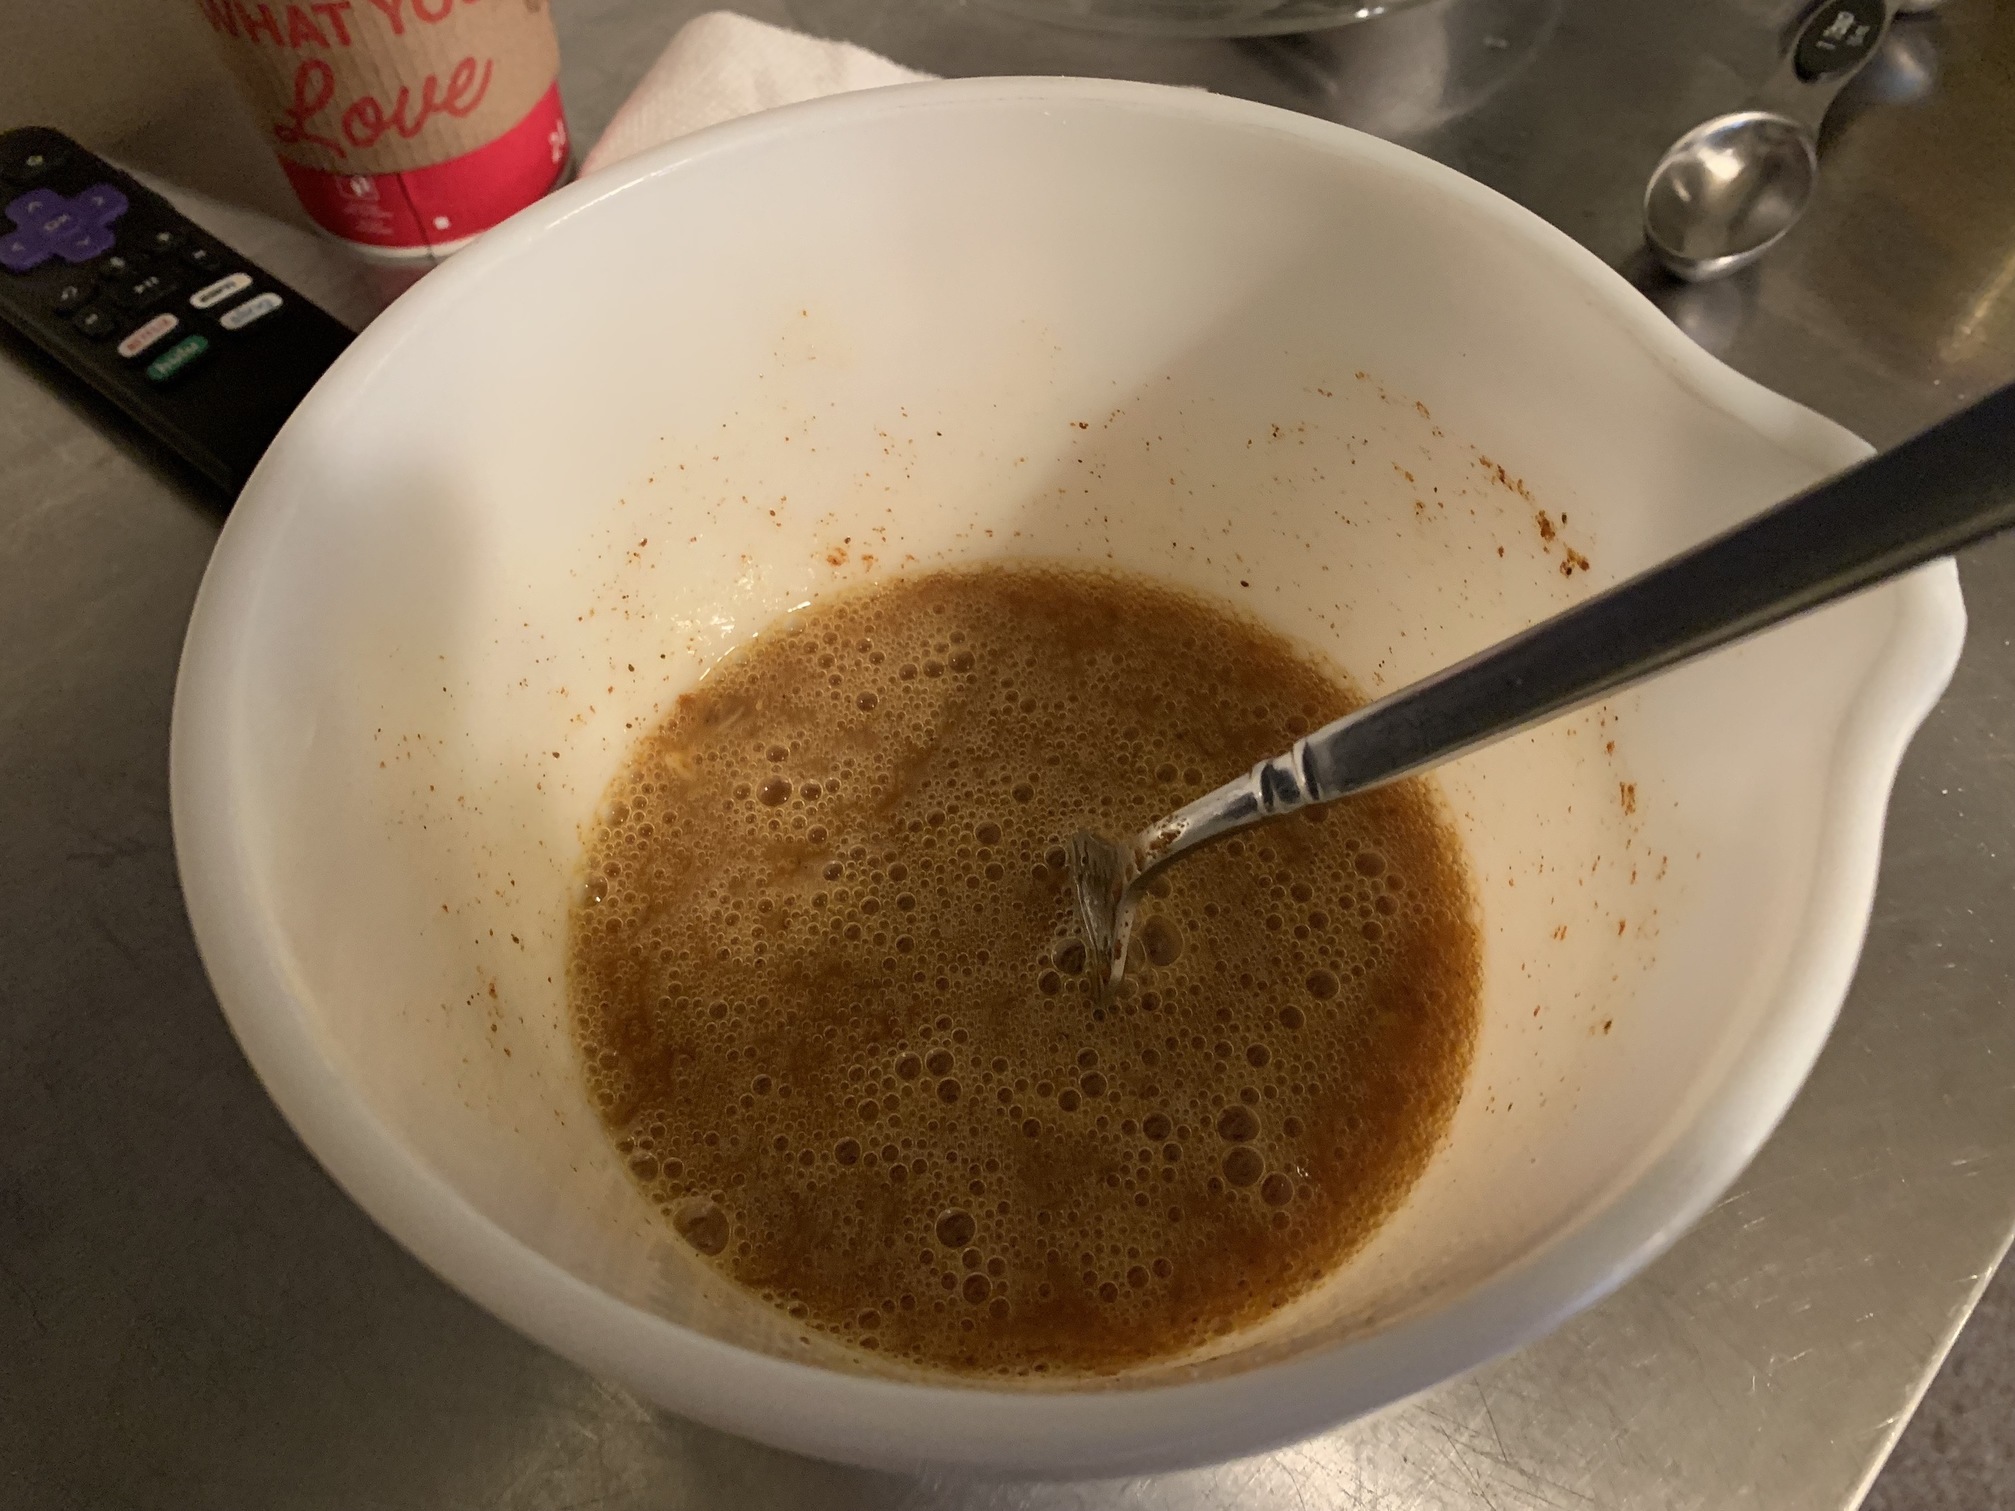
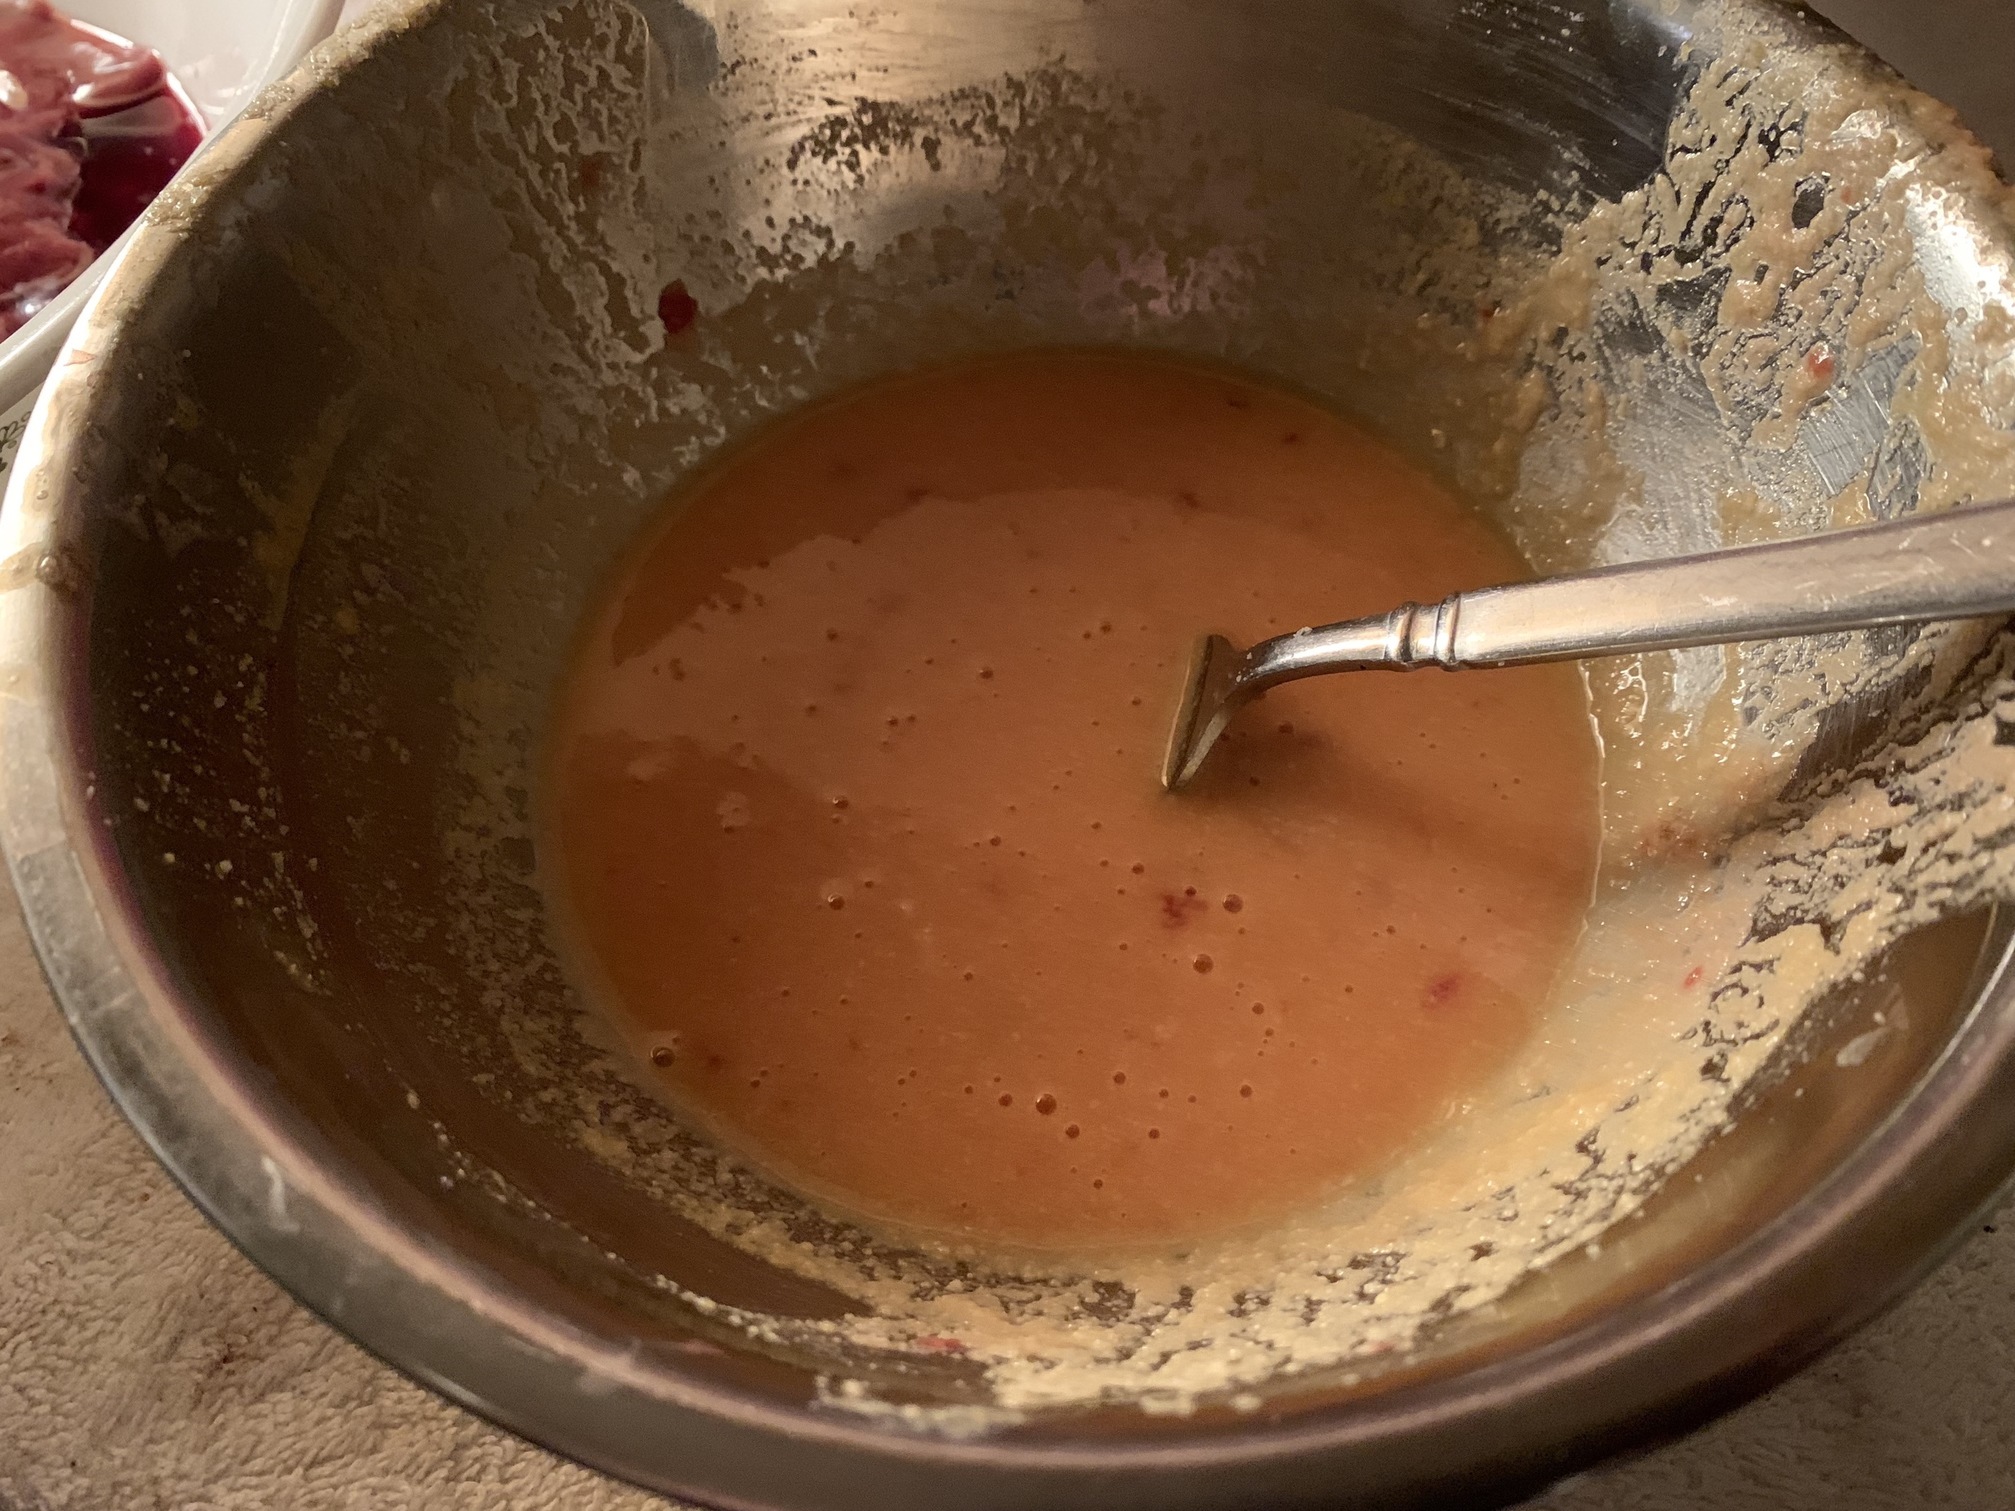
Put the Eggs in a bowl and mixed it well. Then added the Old Bay, Sea Salt and Almond Flour. I was shooting for thickening it up some, so was adding a little at a time. You could probably go 2 Cups, but I also wanted to use enough for a nice crust without having to make more. Worked just fine as is for me.

First image was with just 1 Cup Almond Flower, so I added more and it got a nice consistent thickness

I used my long thin tongs to grab each piece, dip it in the sauce and placed it in the Hot pan of Coconut Oil. I let it cook up enough to see the bottom/sides start turning a nice brown, which also helps with the flipping. I also flipped them a few times after this just to make sure they cooked up well. But you can do this until you get the crispiness you want. Too long will dry the little Chicken bites out, and not as moist.
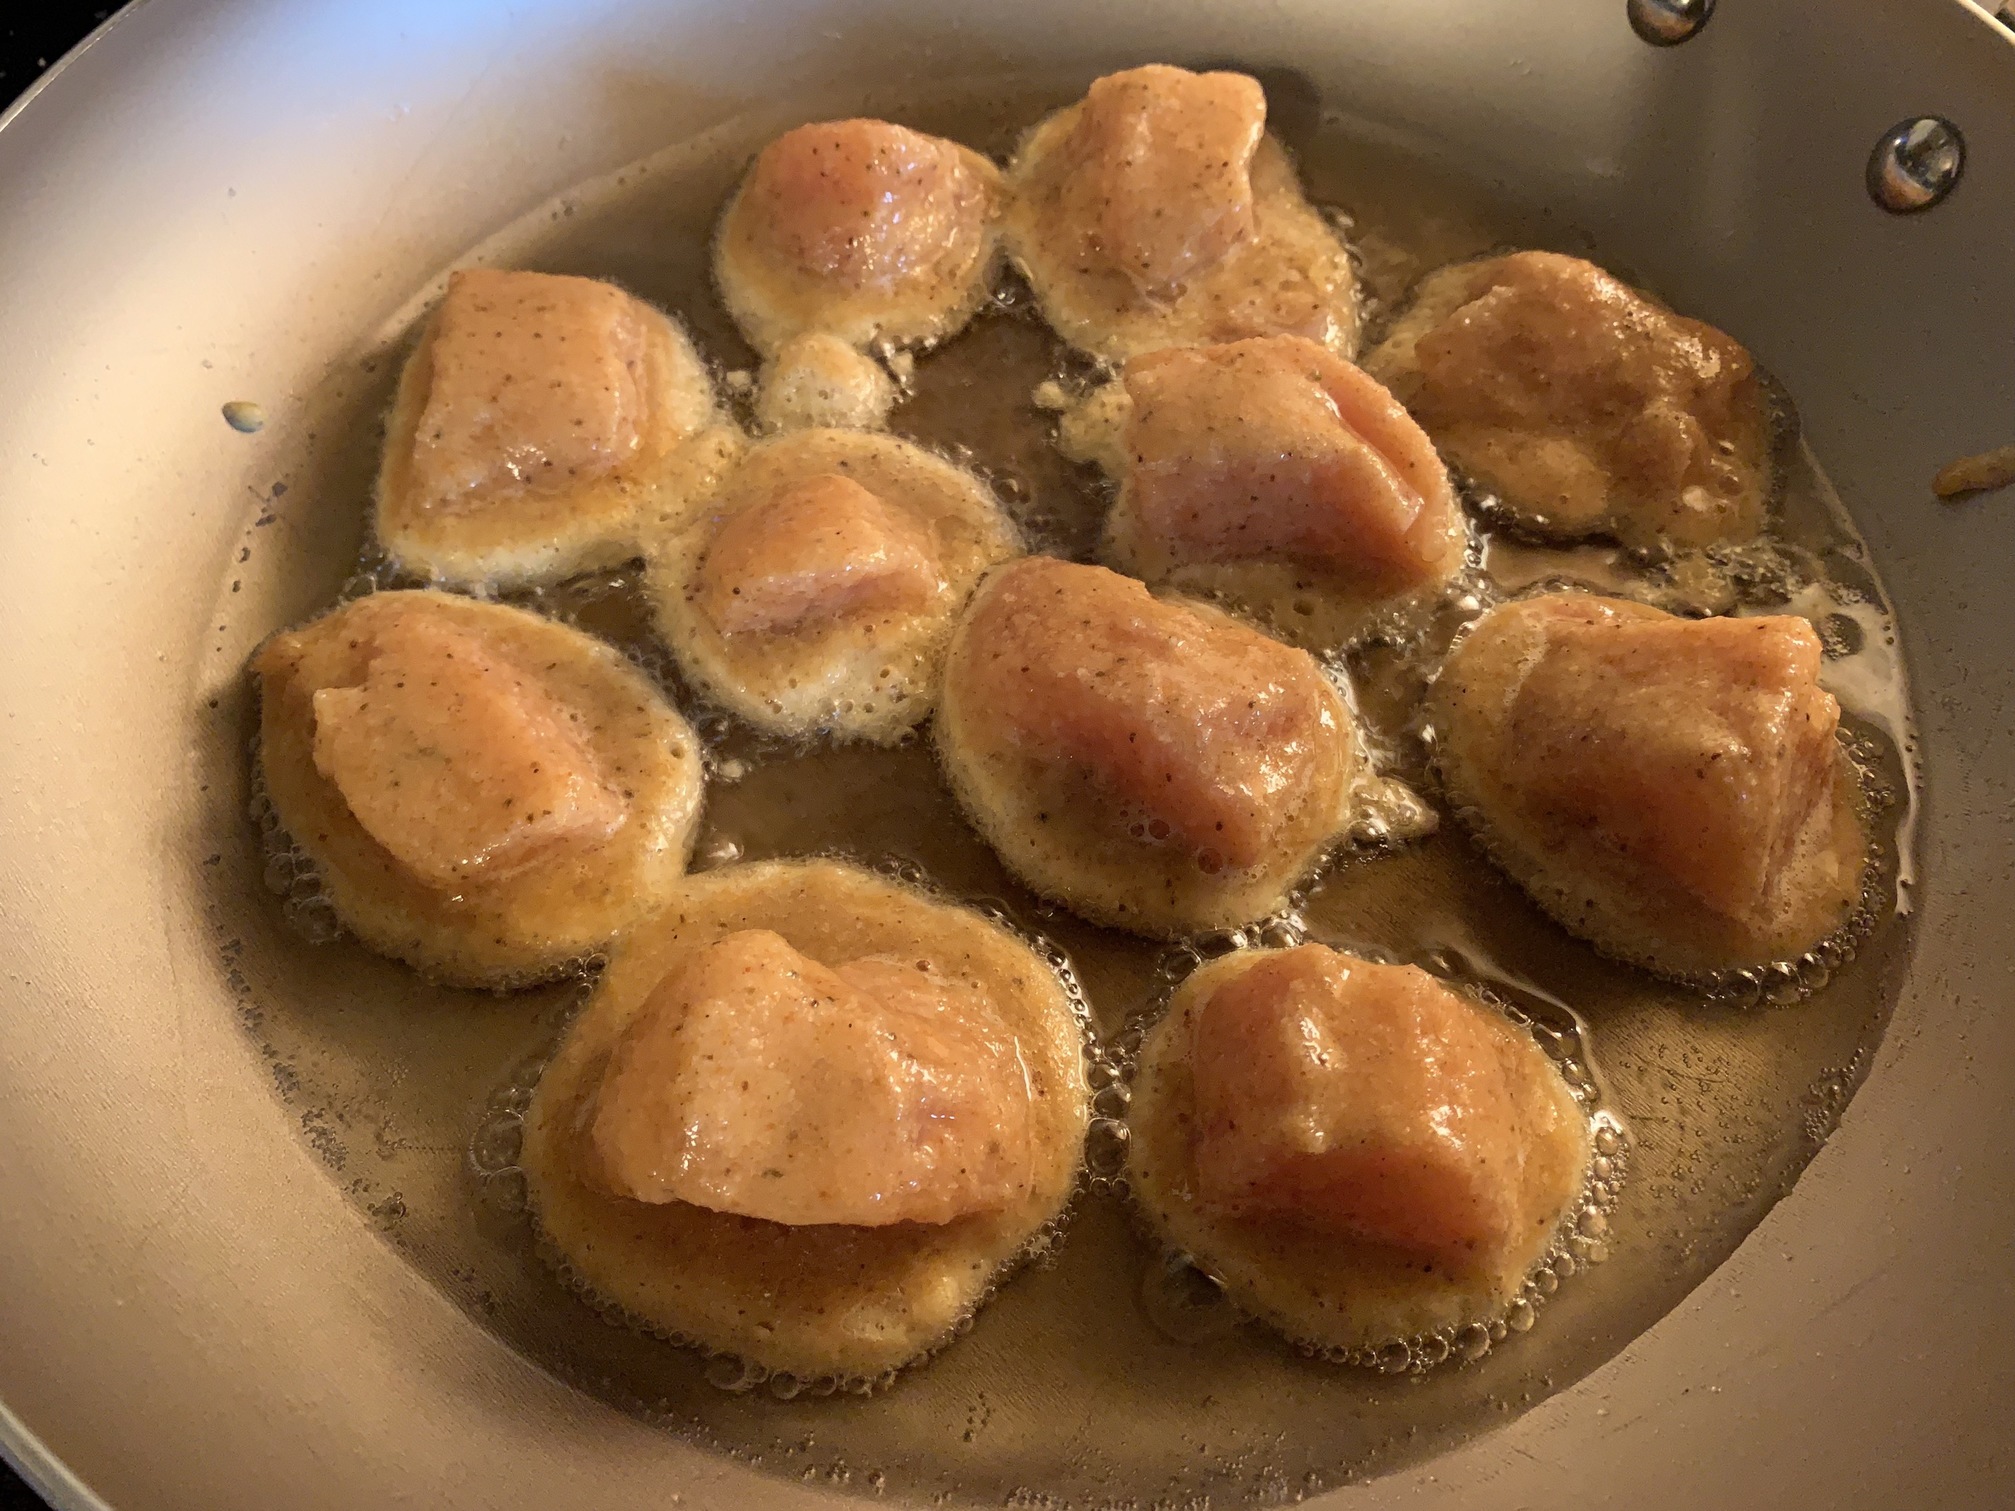
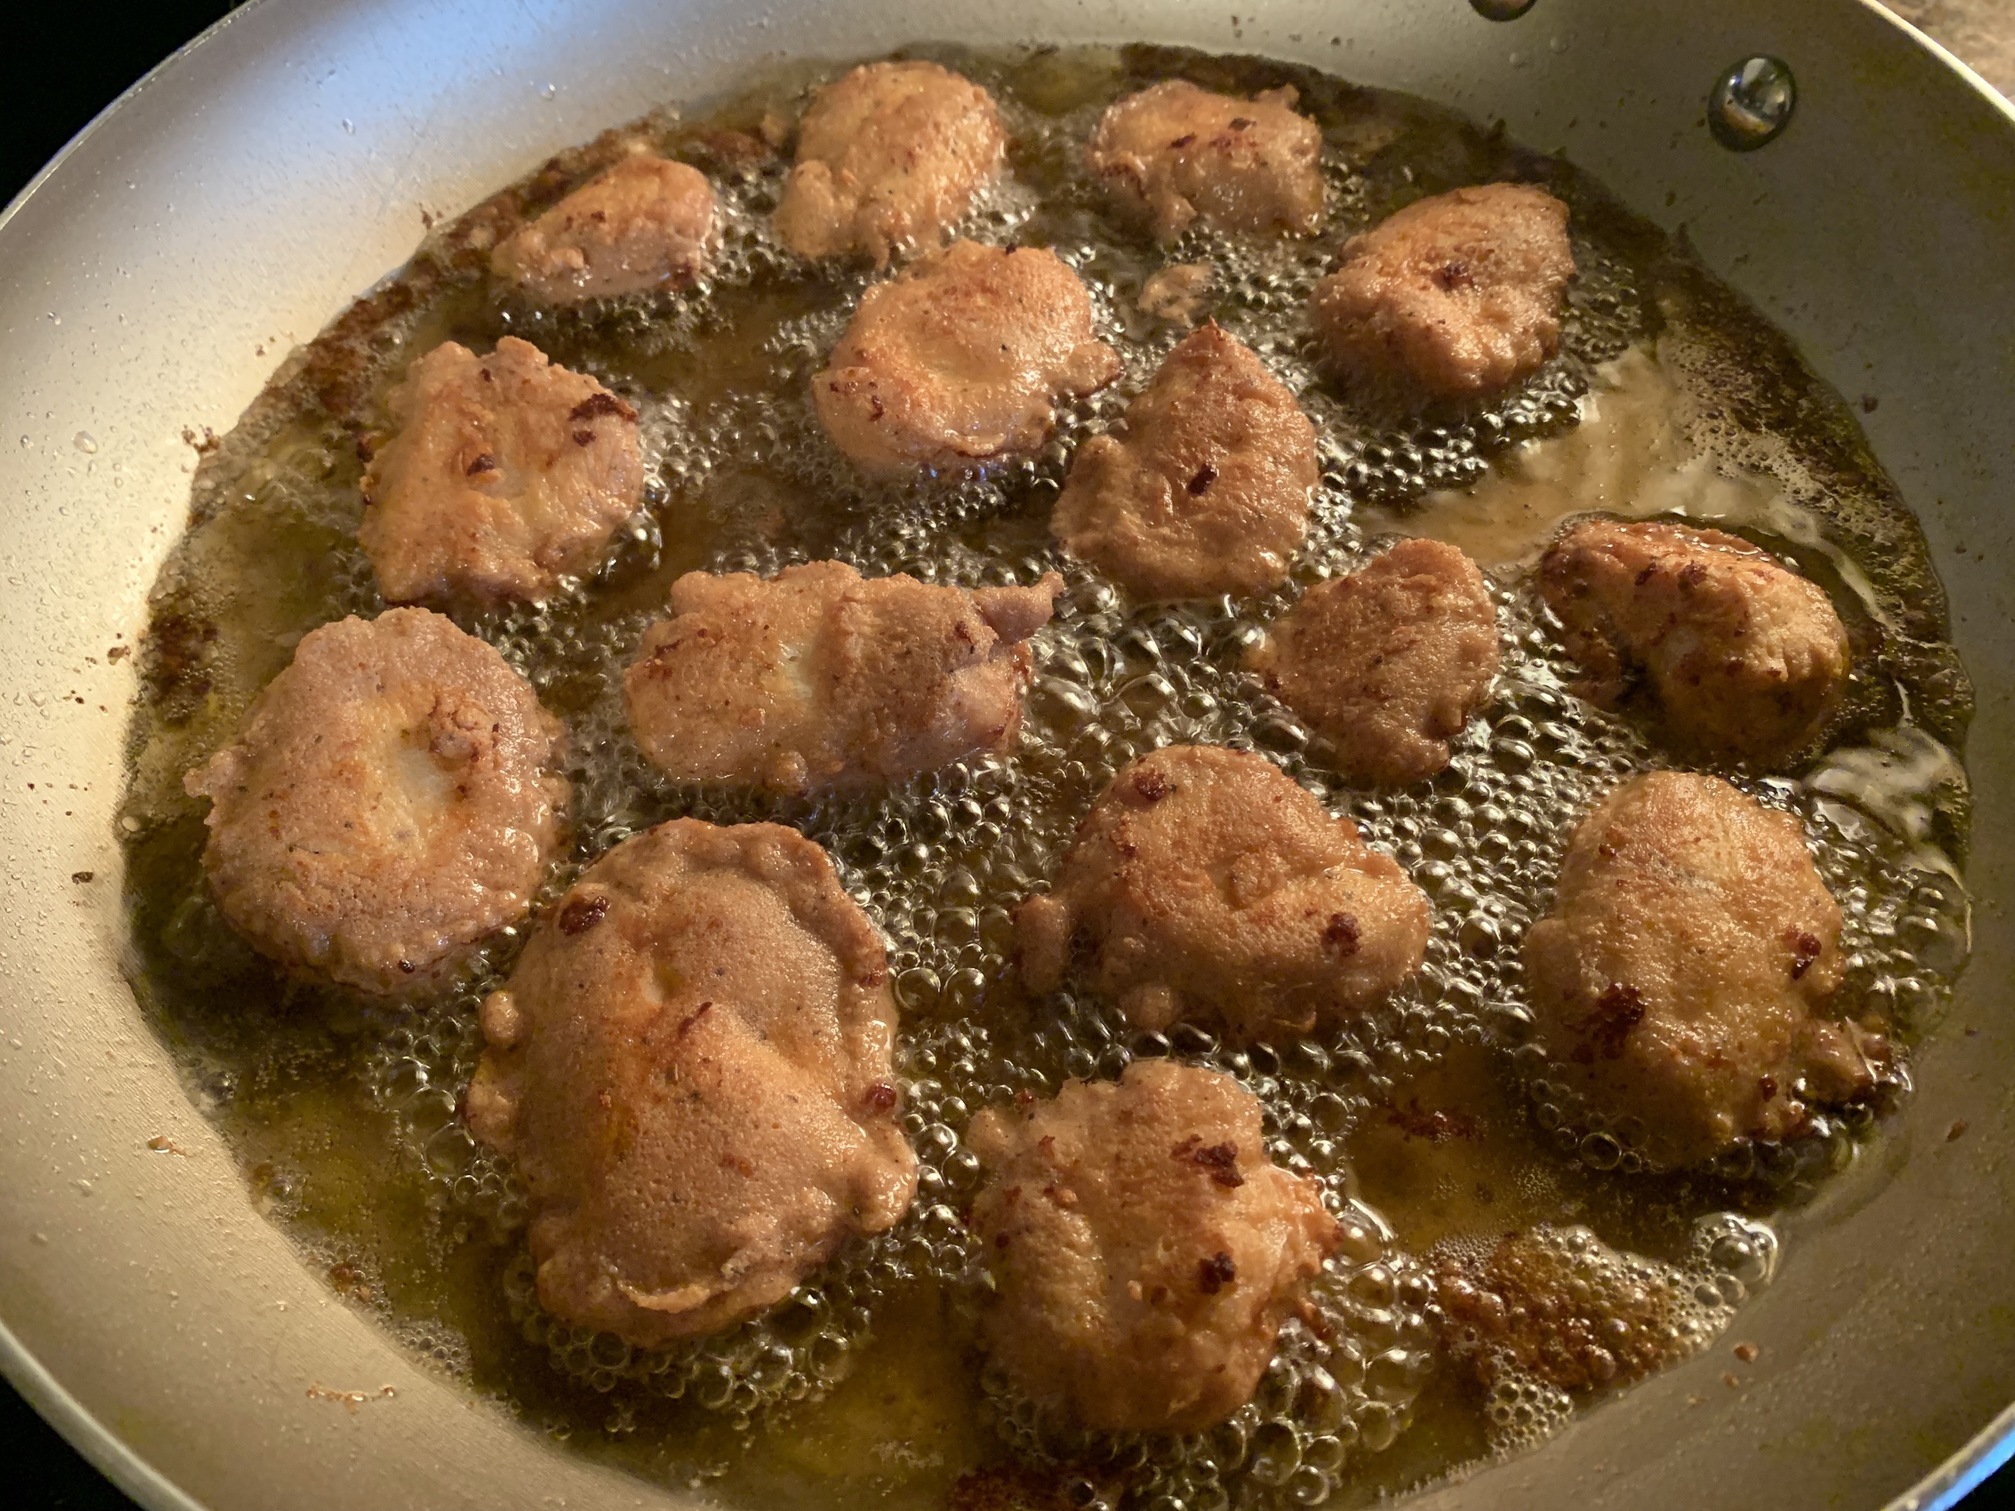
Again, after the first flip, I was just grabbing them and turning them over a few times, and not worrying as much about knocking off any crusting. But the first flip, just reached underneath and had no problems.
They came out extremely well indeed. And I only got to take a pic of the first plate, before the Wife and Son laid eyes on them. After that, they were being eaten up by the plate, while the next pan full was being cooked up. They went quick! Beats any nuggets I’ve had, even before switching to this WOE.
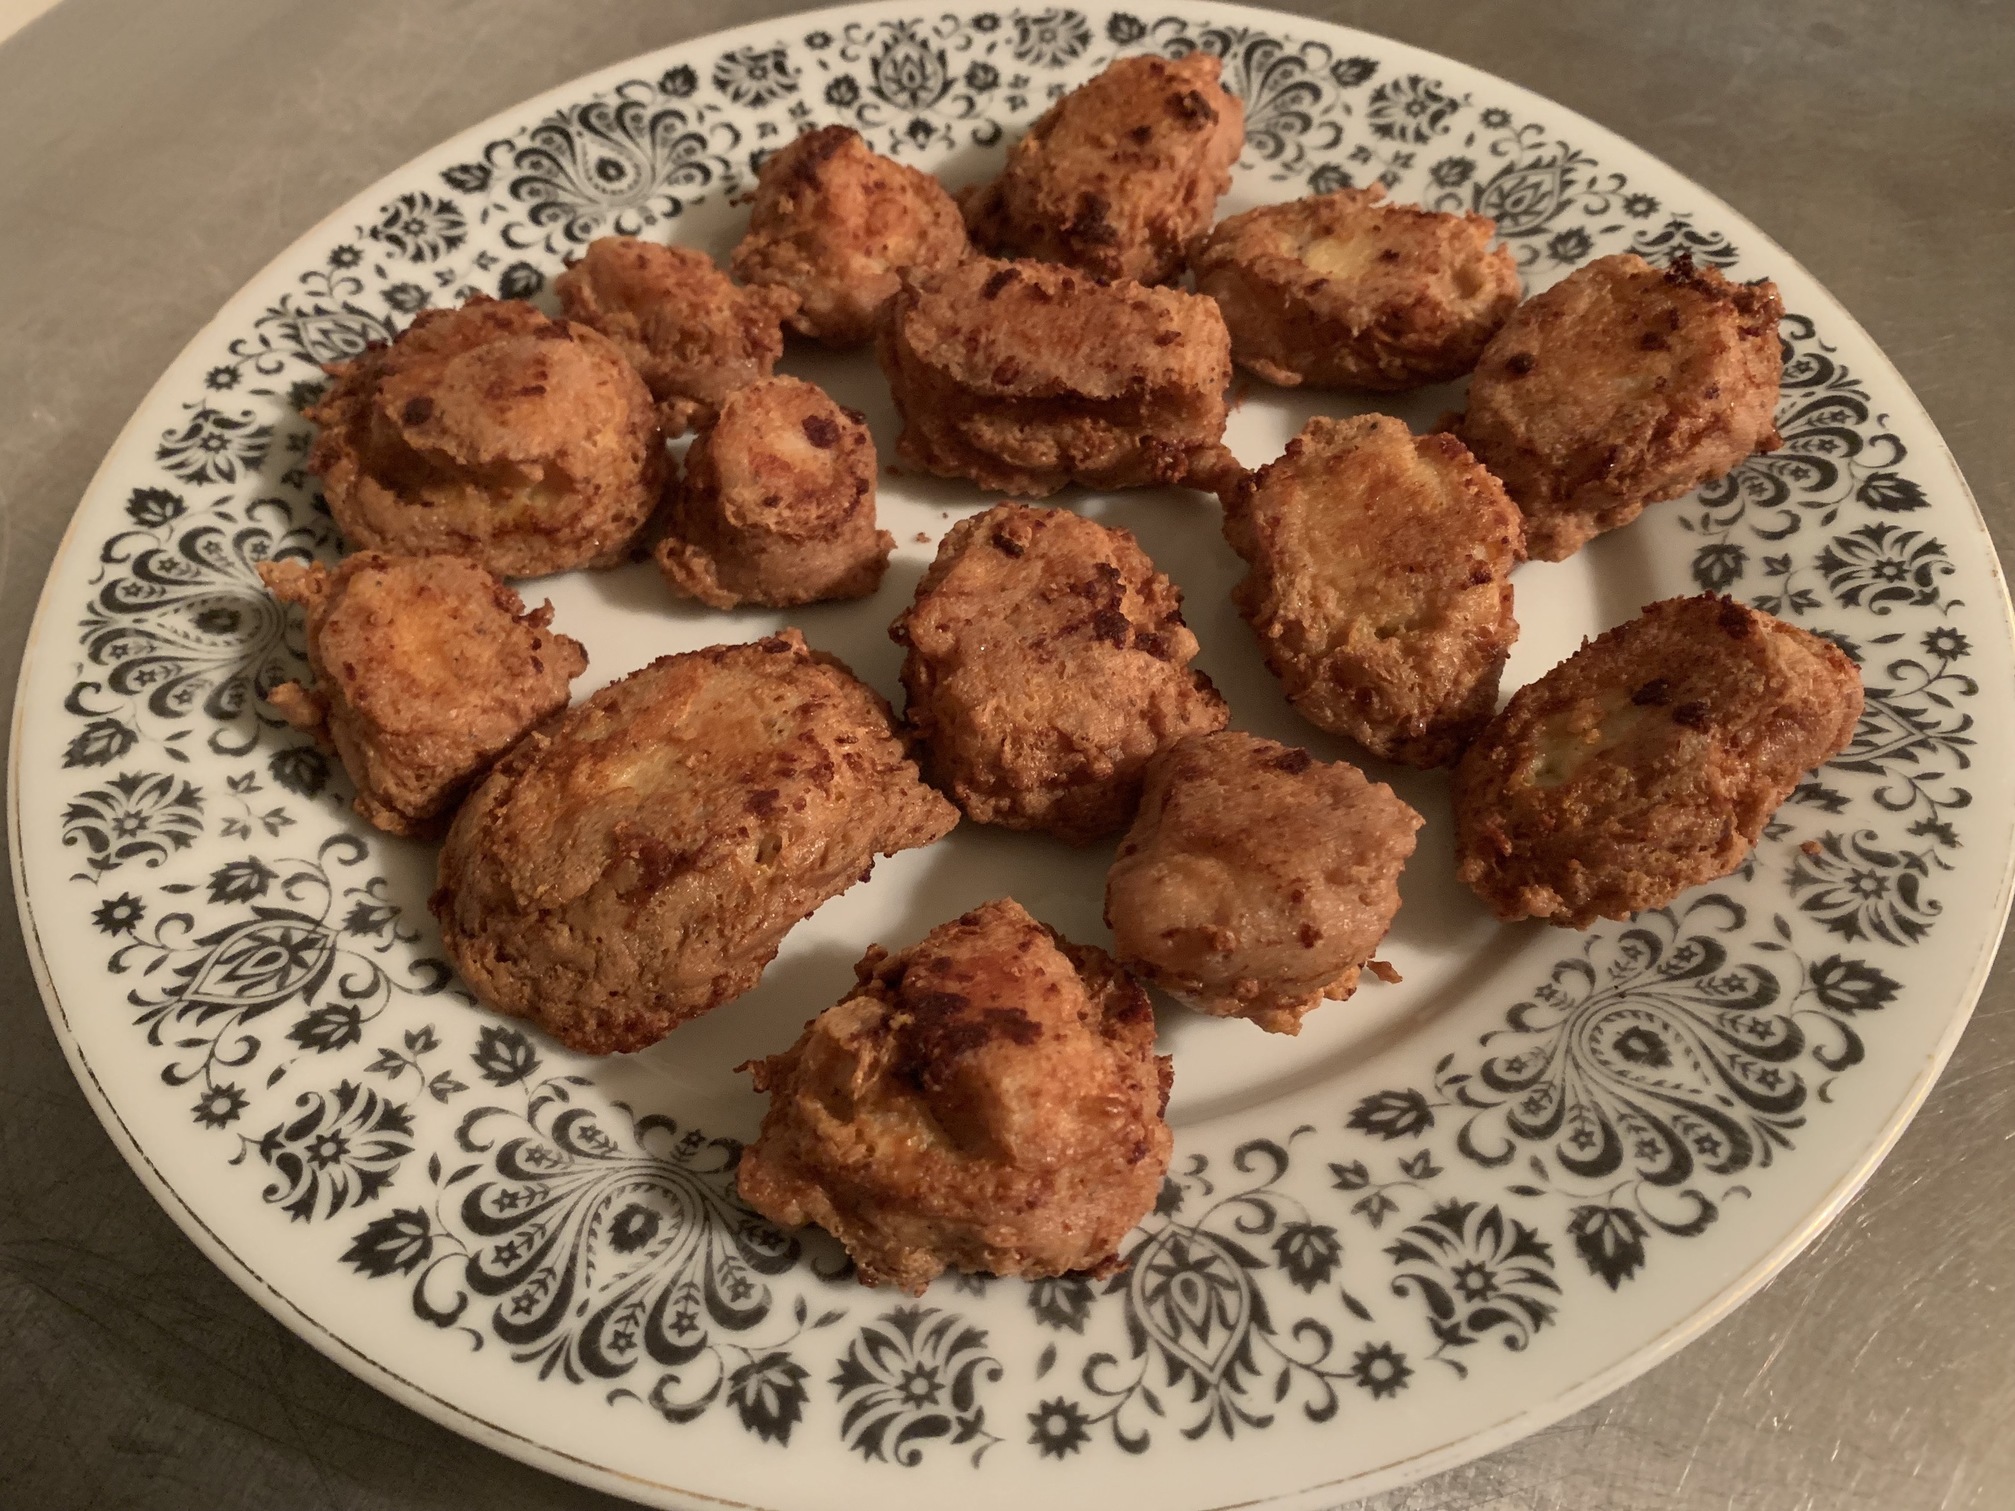
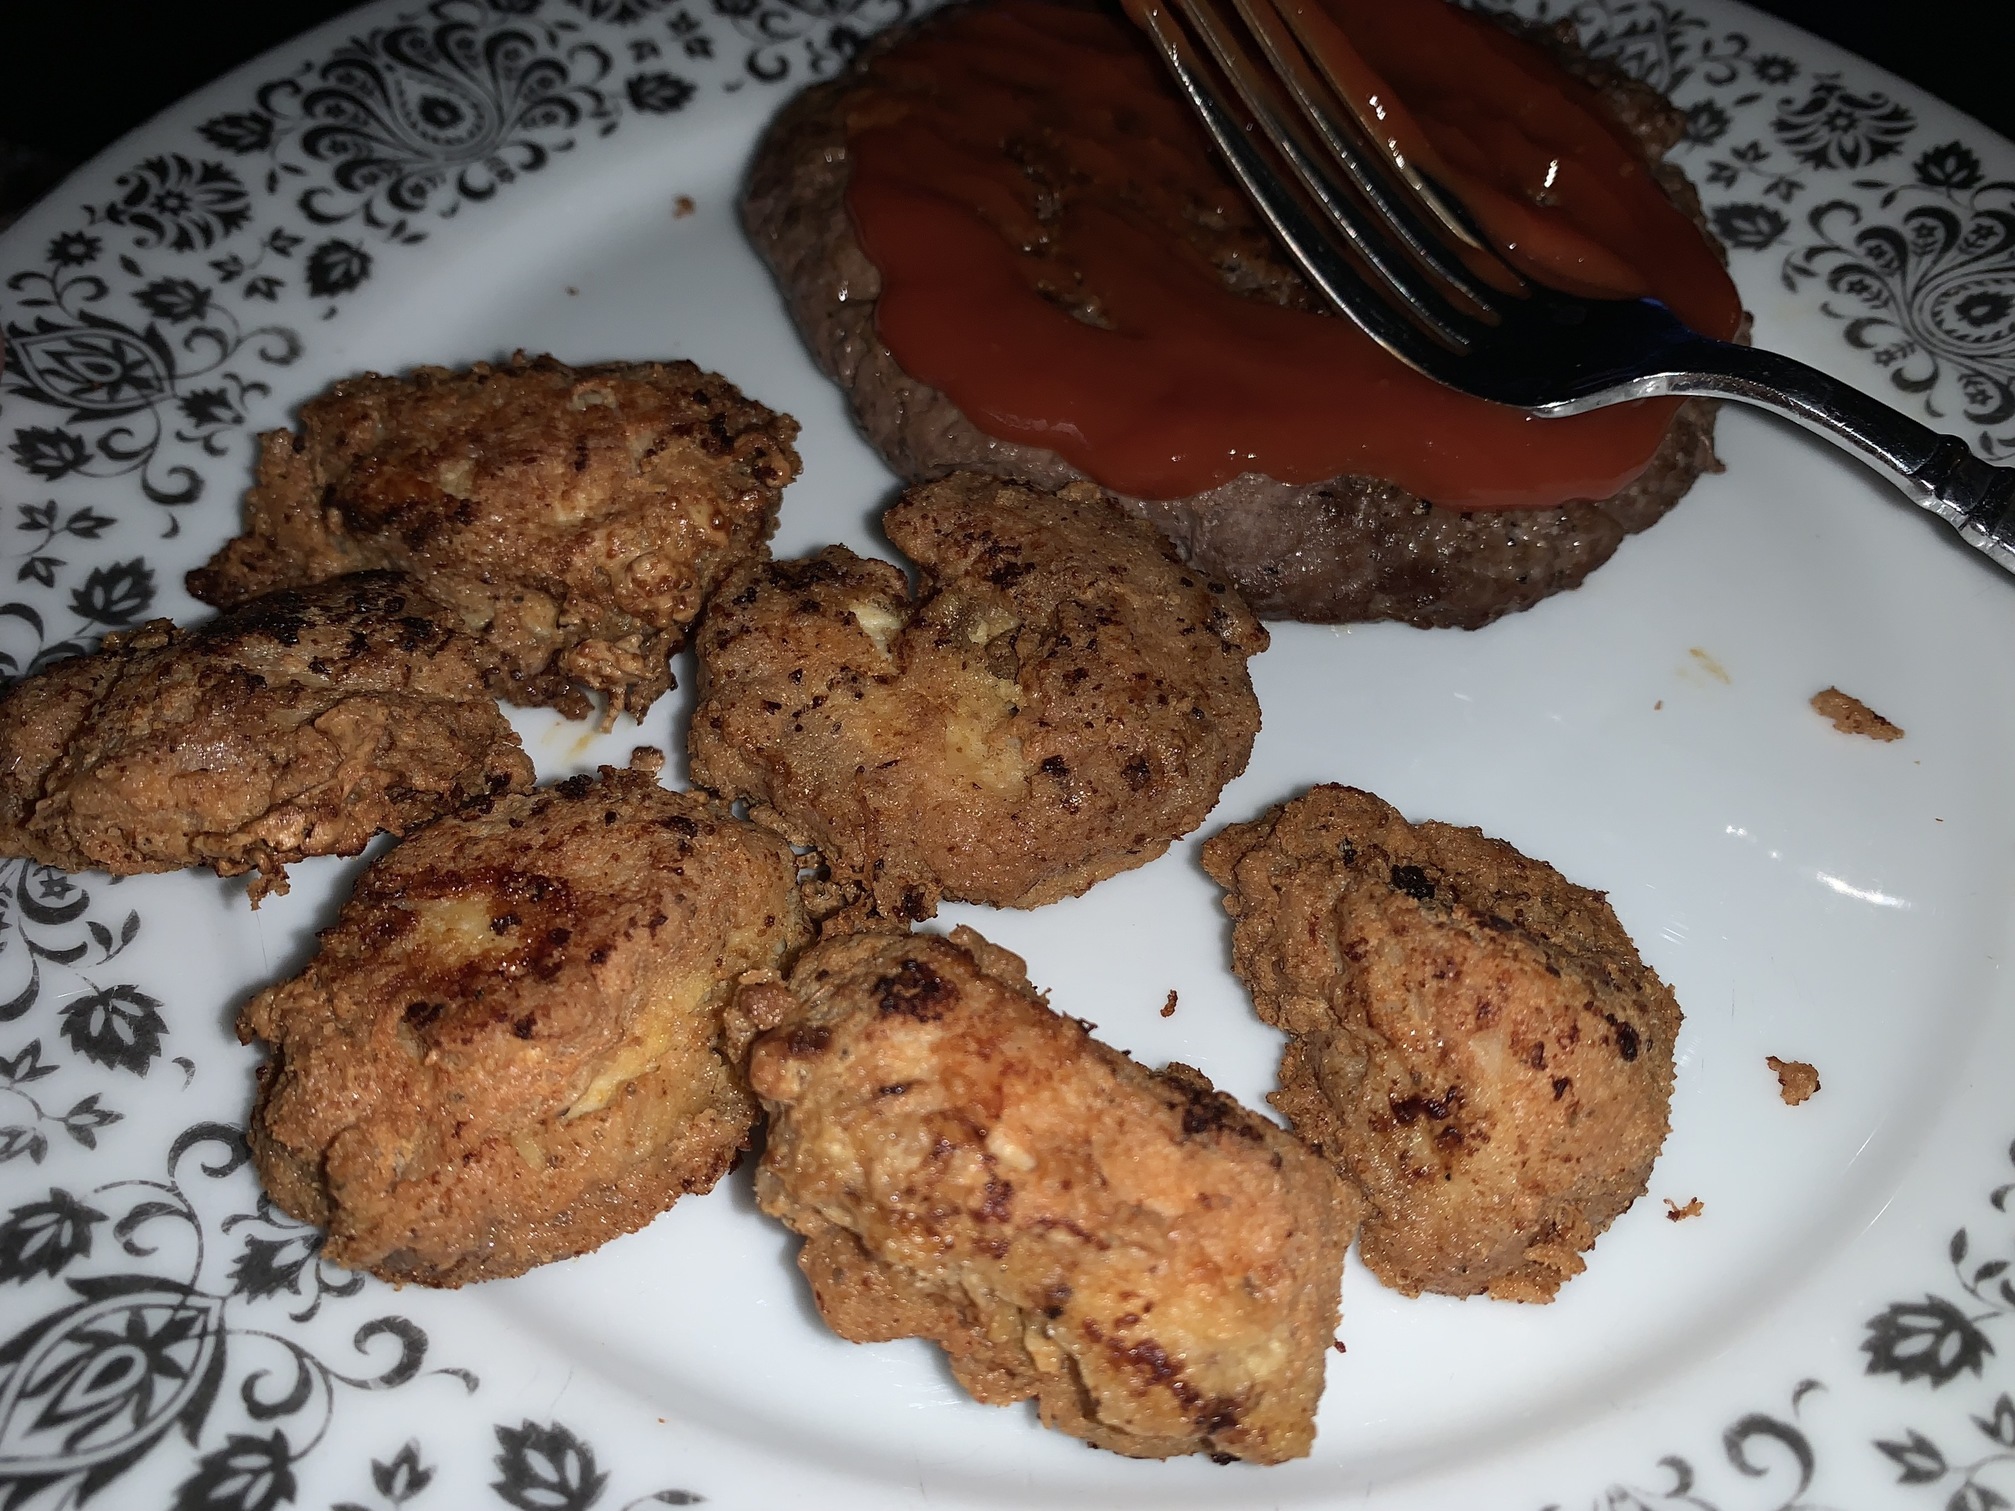
Added a Hamburger when I finally sat down to eat some when I was done. Think I did 6 or 7 pan fulls.
As mentioned, I tried this technique with Chicken Livers first, (few days before) and they too came out great. Family liked them and I think the added Old Bay gives some nice flavor without overtaking the meat itself. (You could also add some more seasonings, but I try to keep it simple, and as mentioned, there’s some stuff the Wife and Son don’t like so I don’t over-do-it. … I already plan to use this for other stuff… ESPECIALLY some fricken Oysters! When I was cooking up the Chicken Liver, it actually looked and reminded me of Oysters so much, it was all I wanted at the moment. But the Liver was good too.
Here’s some picks of the Chicken Liver, and it came out even crispier with them. Not sure why, but I did end up doing 3 containers of them, since I was planning to give some to the Girls as well.
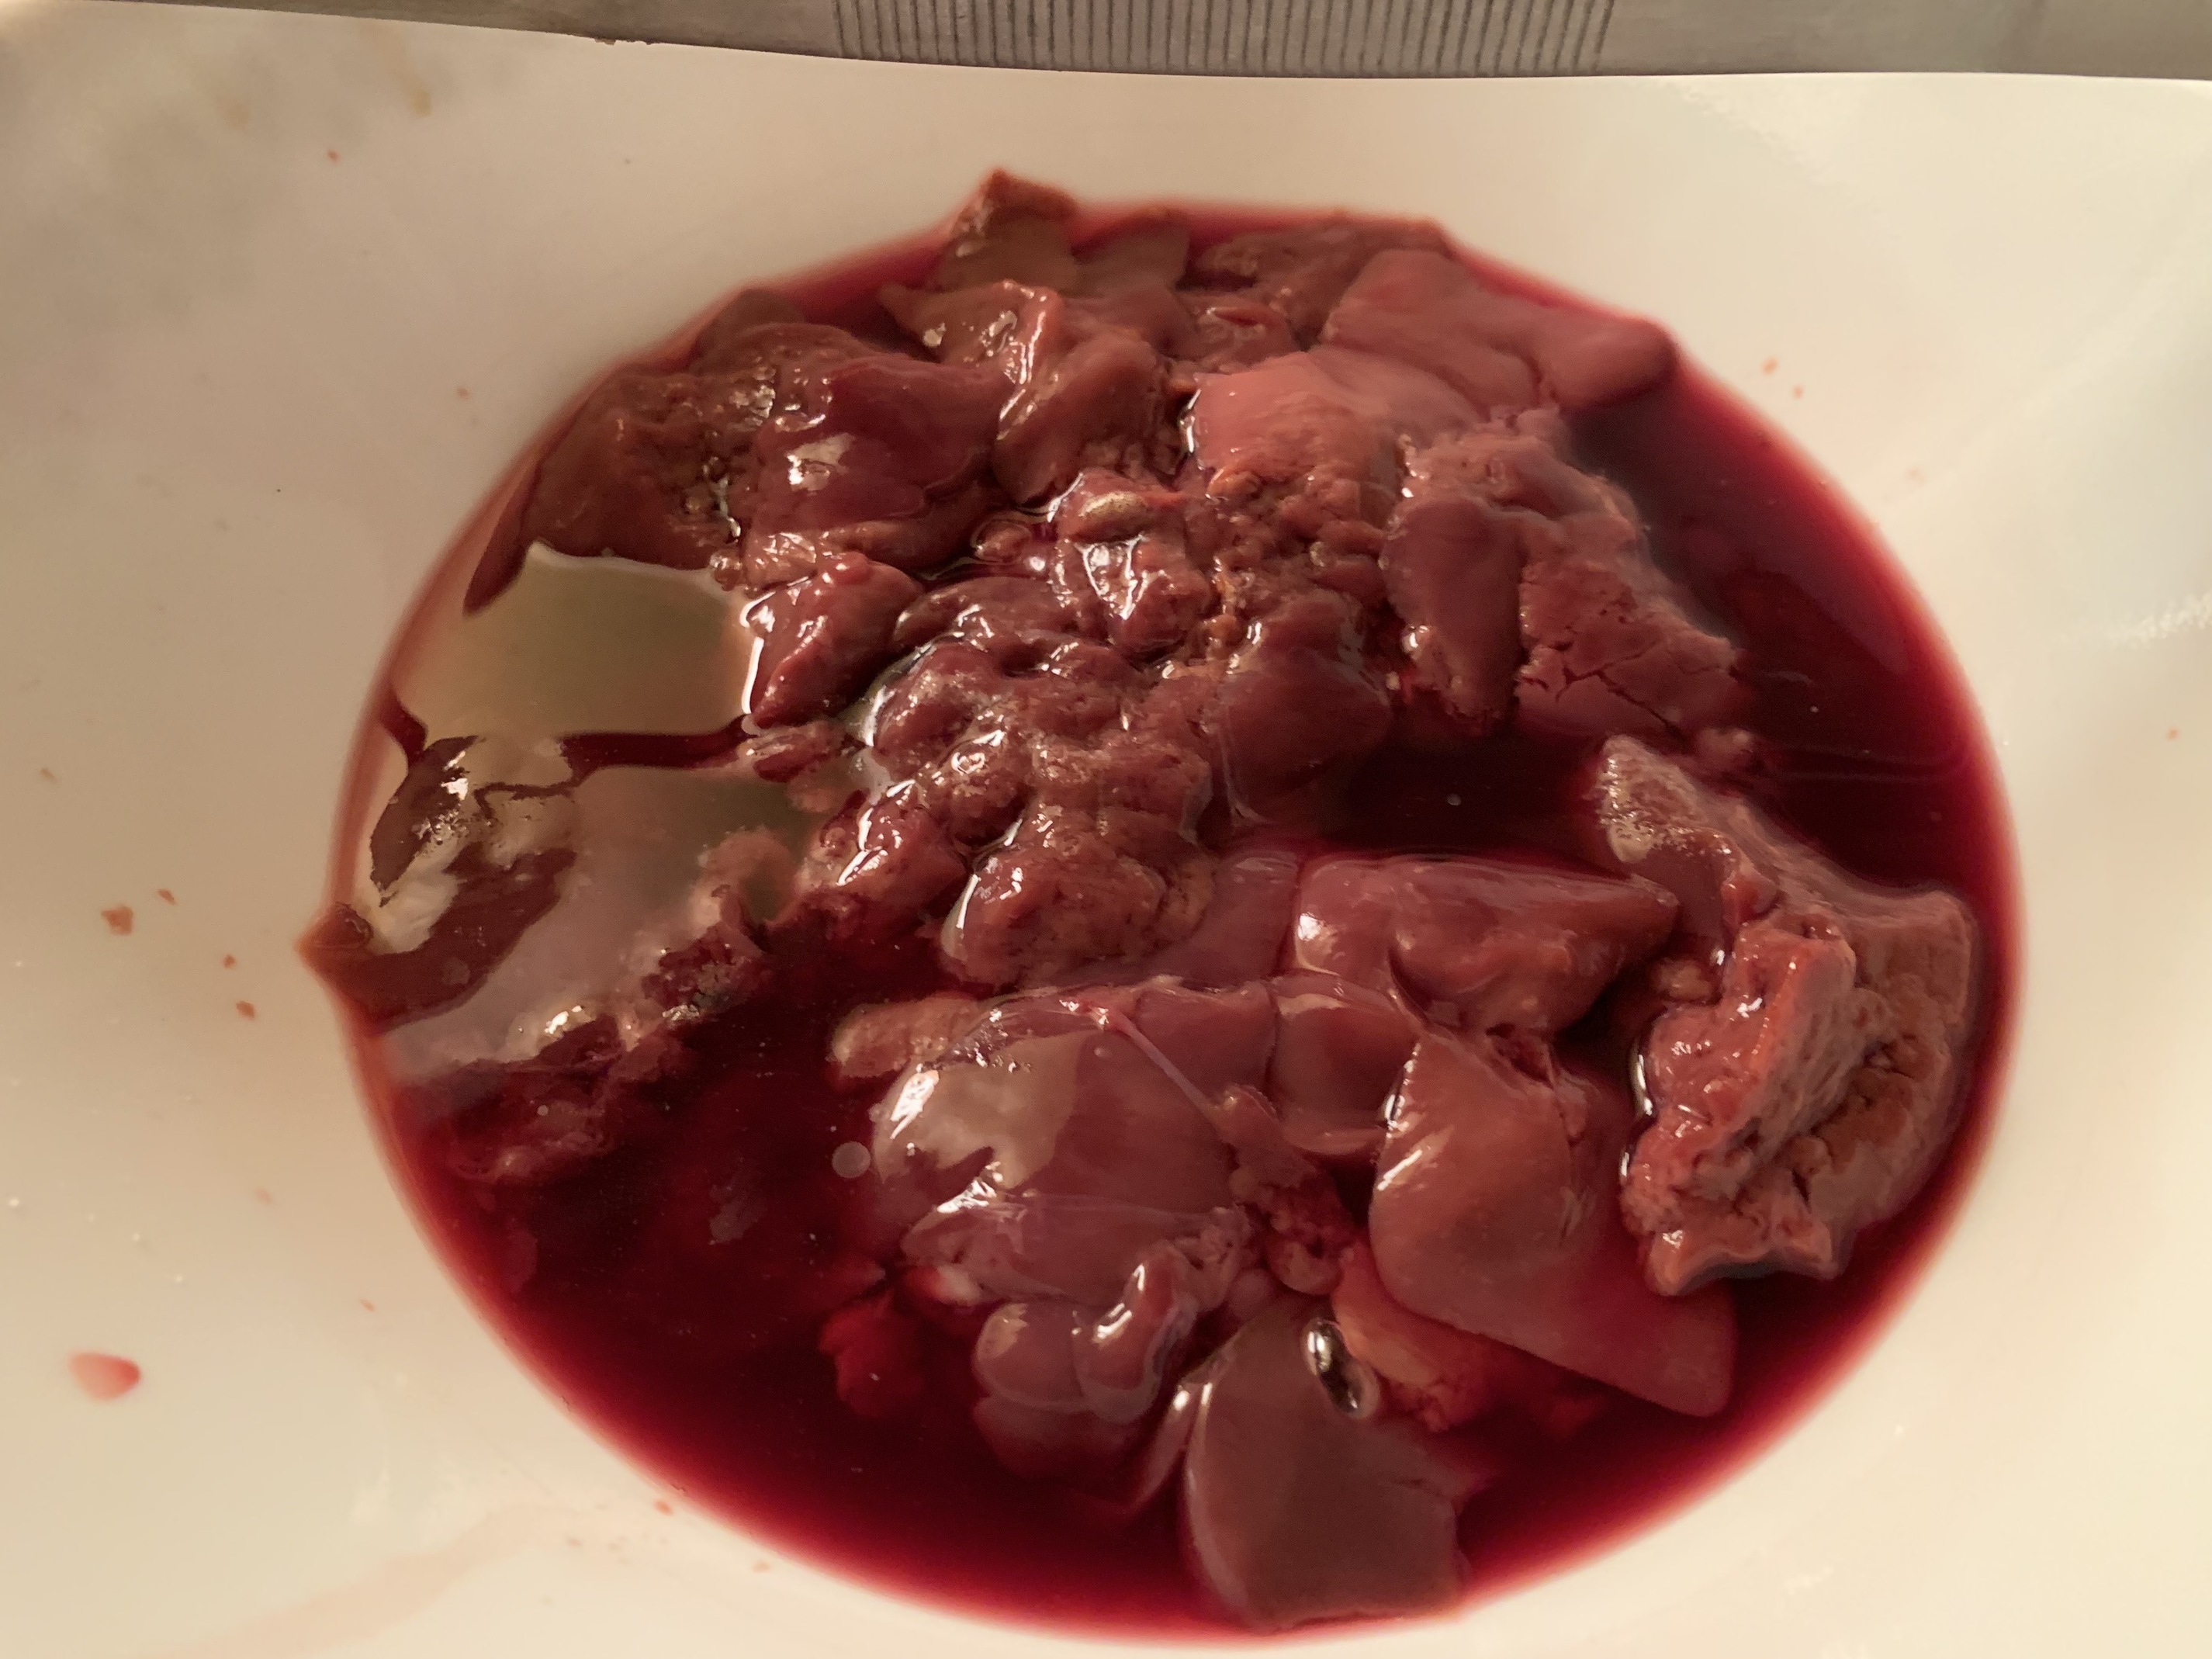
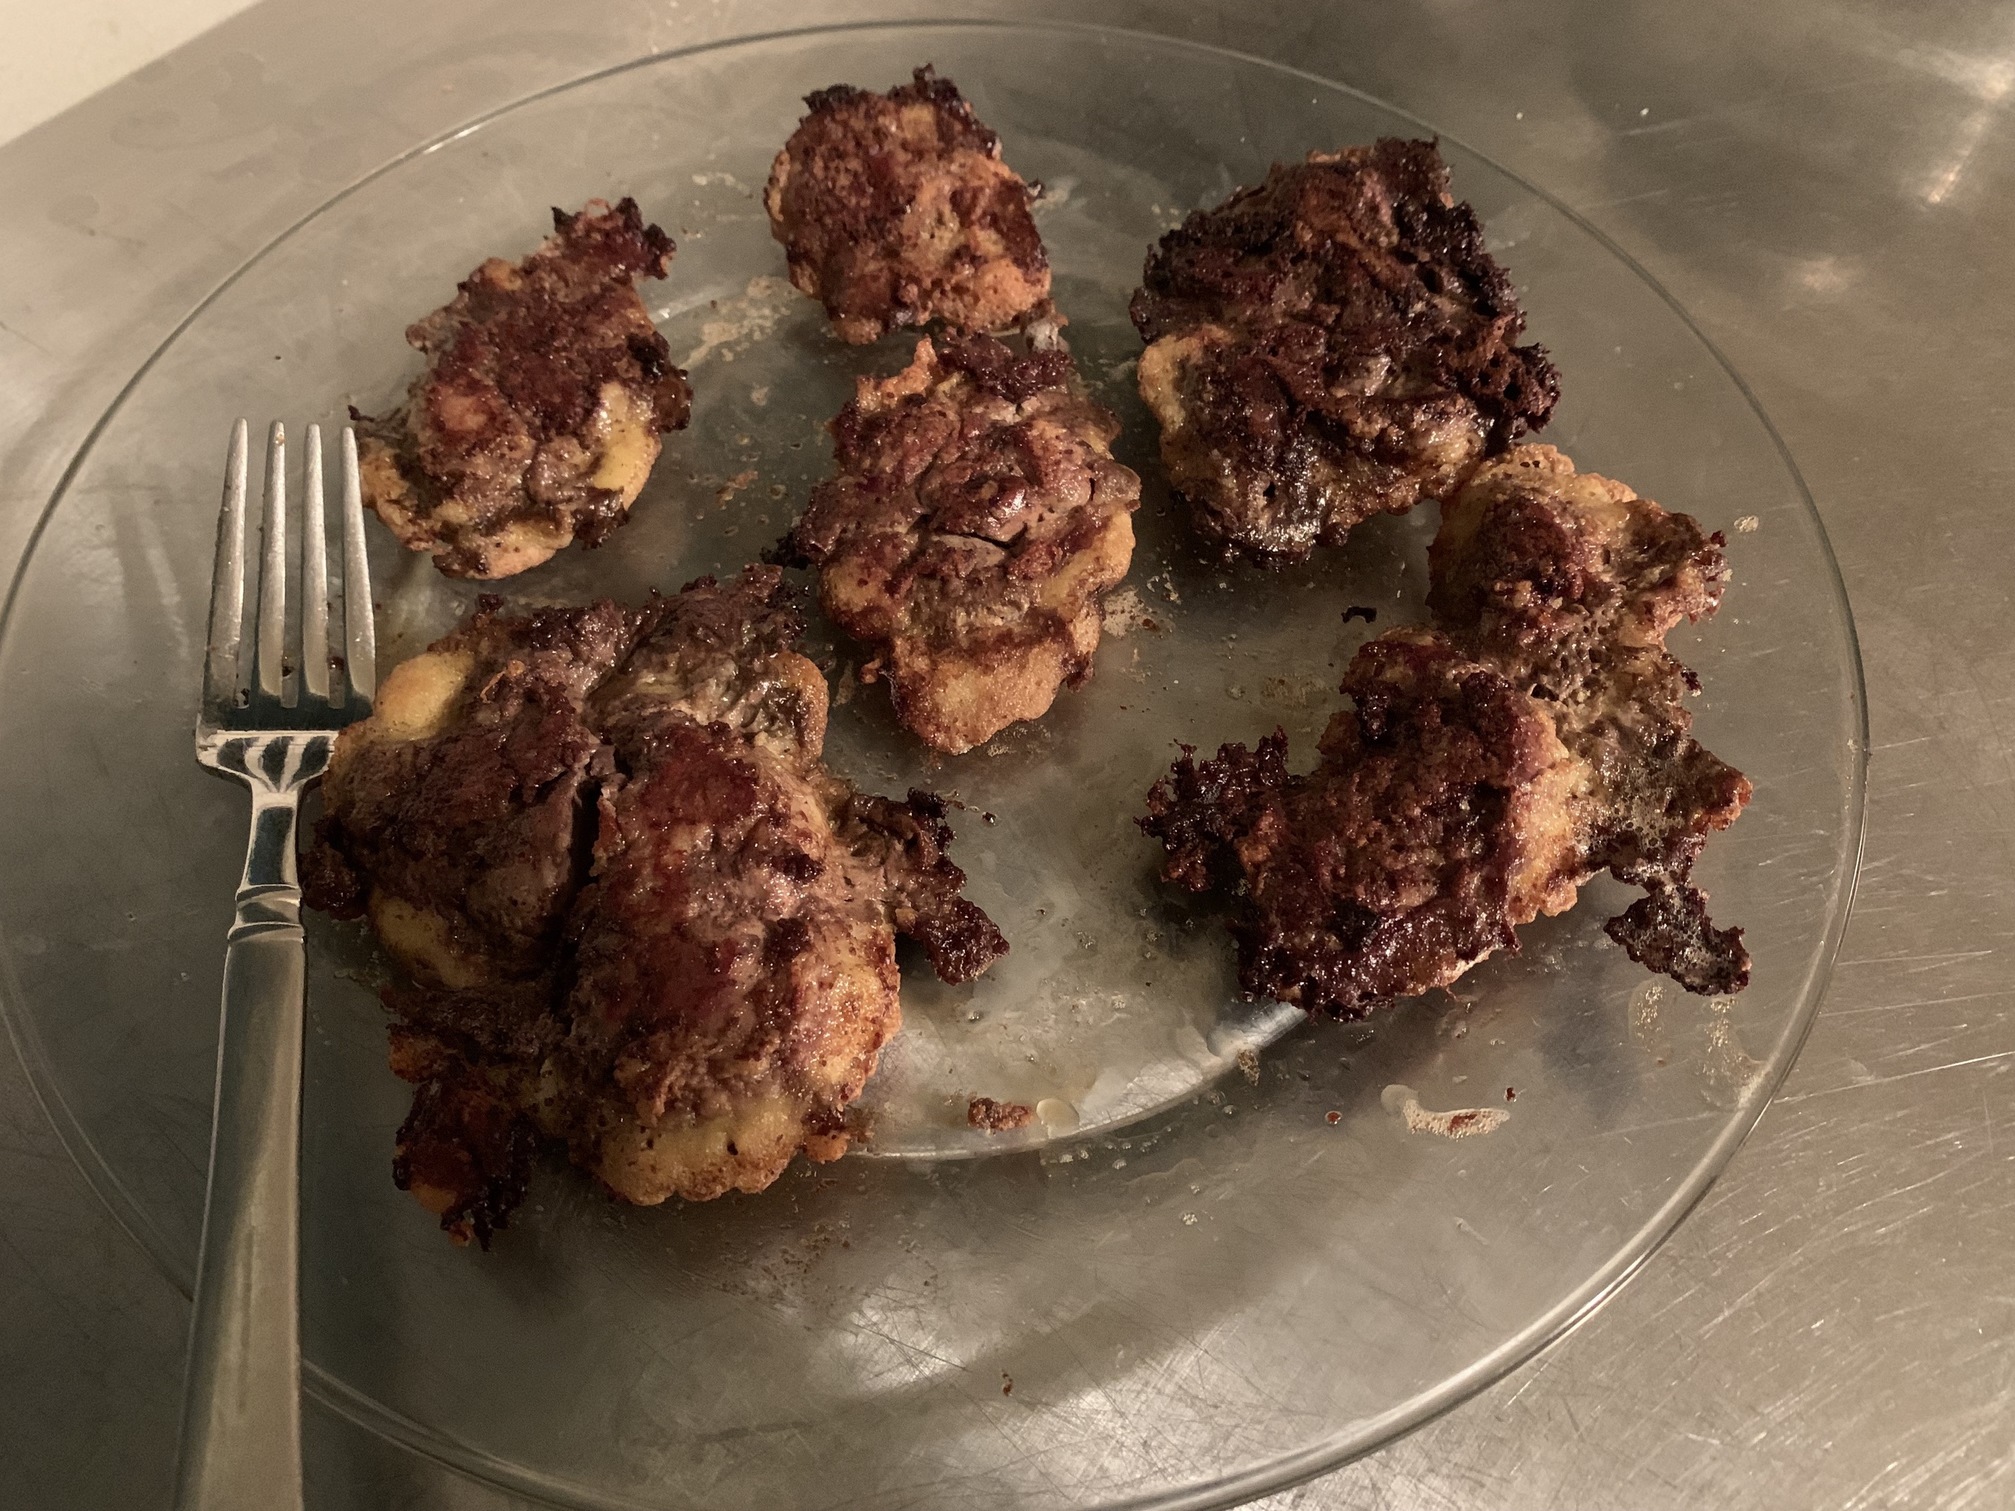
I almost forgot to take an image of the finished Livers, but remembered when there was a few left…
Digital_Dave
#200
Thanks, Robin. … I always try to show all the steps I take, since it seems to help. It also eliminates any followup questions asking how I did this or that. - Anytime I create something I think others might like, I try to add it in here. Plus, I use it myself when I haven’t done that recipe for a while. Just think that its easier than writing it all down somewhere. But most of the ones I do regularly, I know the recipe quite well from making it so often, so don’t need the occasional reminder of what all I put in, or did.
Actually the only time I get to do the Zucchini Boats is during my gardening season, since none of the stores sell Zucchini’s that darn big. But they have always grown quite well here, and fast. So I can get quite a bit too fast at times. But I also share with all my neighbors, as well as taking loads of stuff into work for staff. … I just about getting ready to start the garden up presently. Probably try to plant within the next week or two. Depending on weather.
robintemplin
(Robin)
#201
As Mr Rogers said, lease won’t you be my neighbor?
I miss having a veggie garden. Such a satisfaction throughout the entire process.