Cold "therapy" shirt

thermogenic

#1

This post is by request, if it belongs elsewhere, by all means mods, move it where it ought to be.

I mentioned this cold shirt in a post today about my current fast. Some curiosity was expressed, so I thought I’d try to write up a short post about the first generation of this diy project. I have two versions of this, but the “COLD” shirt lives at my office. This one is more like, a “cool” shirt.

The first gen I’ll discuss here was made to keep me cool while I pursue my hobby welding during the summer. Later I realized that I could make a more powerful one, with a bigger pump, with bigger tubing, and use more ice to go for a shirt that would genuinely make my body work to stay warm. I built this on the hypothesis that surrounding my core with cold would create a caloric load, and work toward increasing the activation of my brown adipose tissue, as well as putting additional caloric load on my body as a whole. The term I’ve seen used is “cold thermogenesis”.

I’m hoping my adding of images works here. If it does, I’ll explain what you’re seeing in each image.

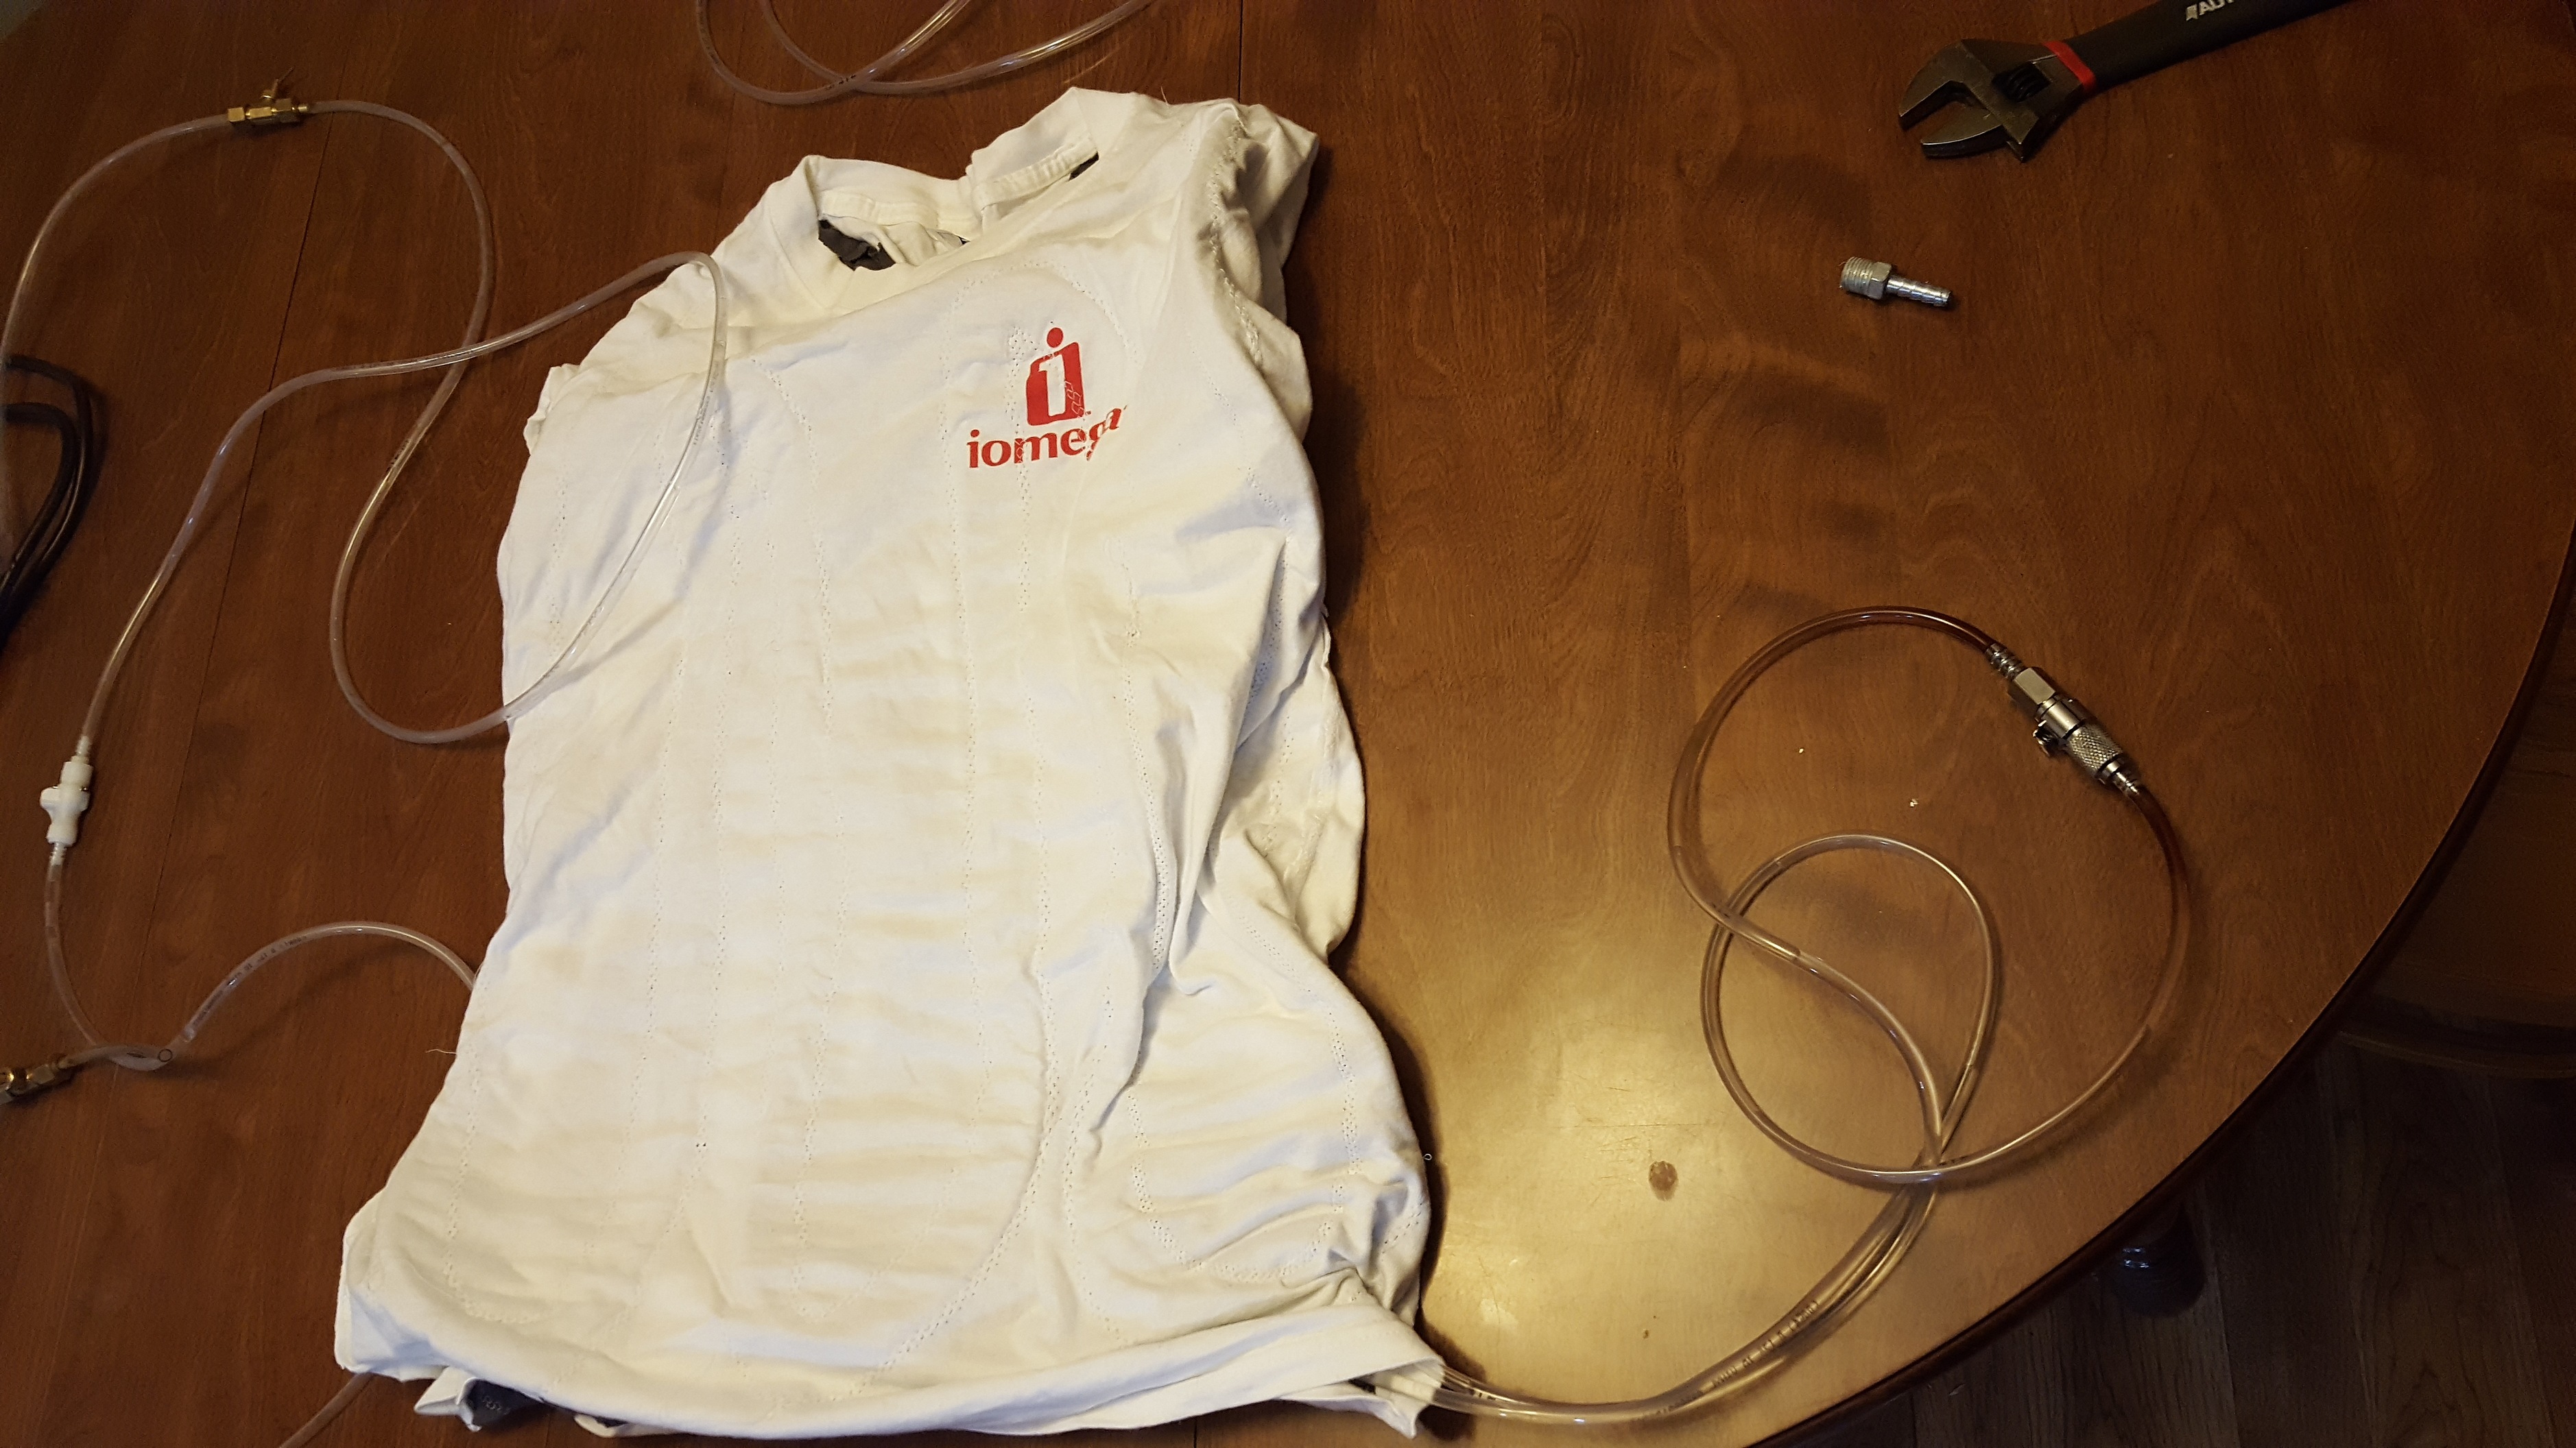
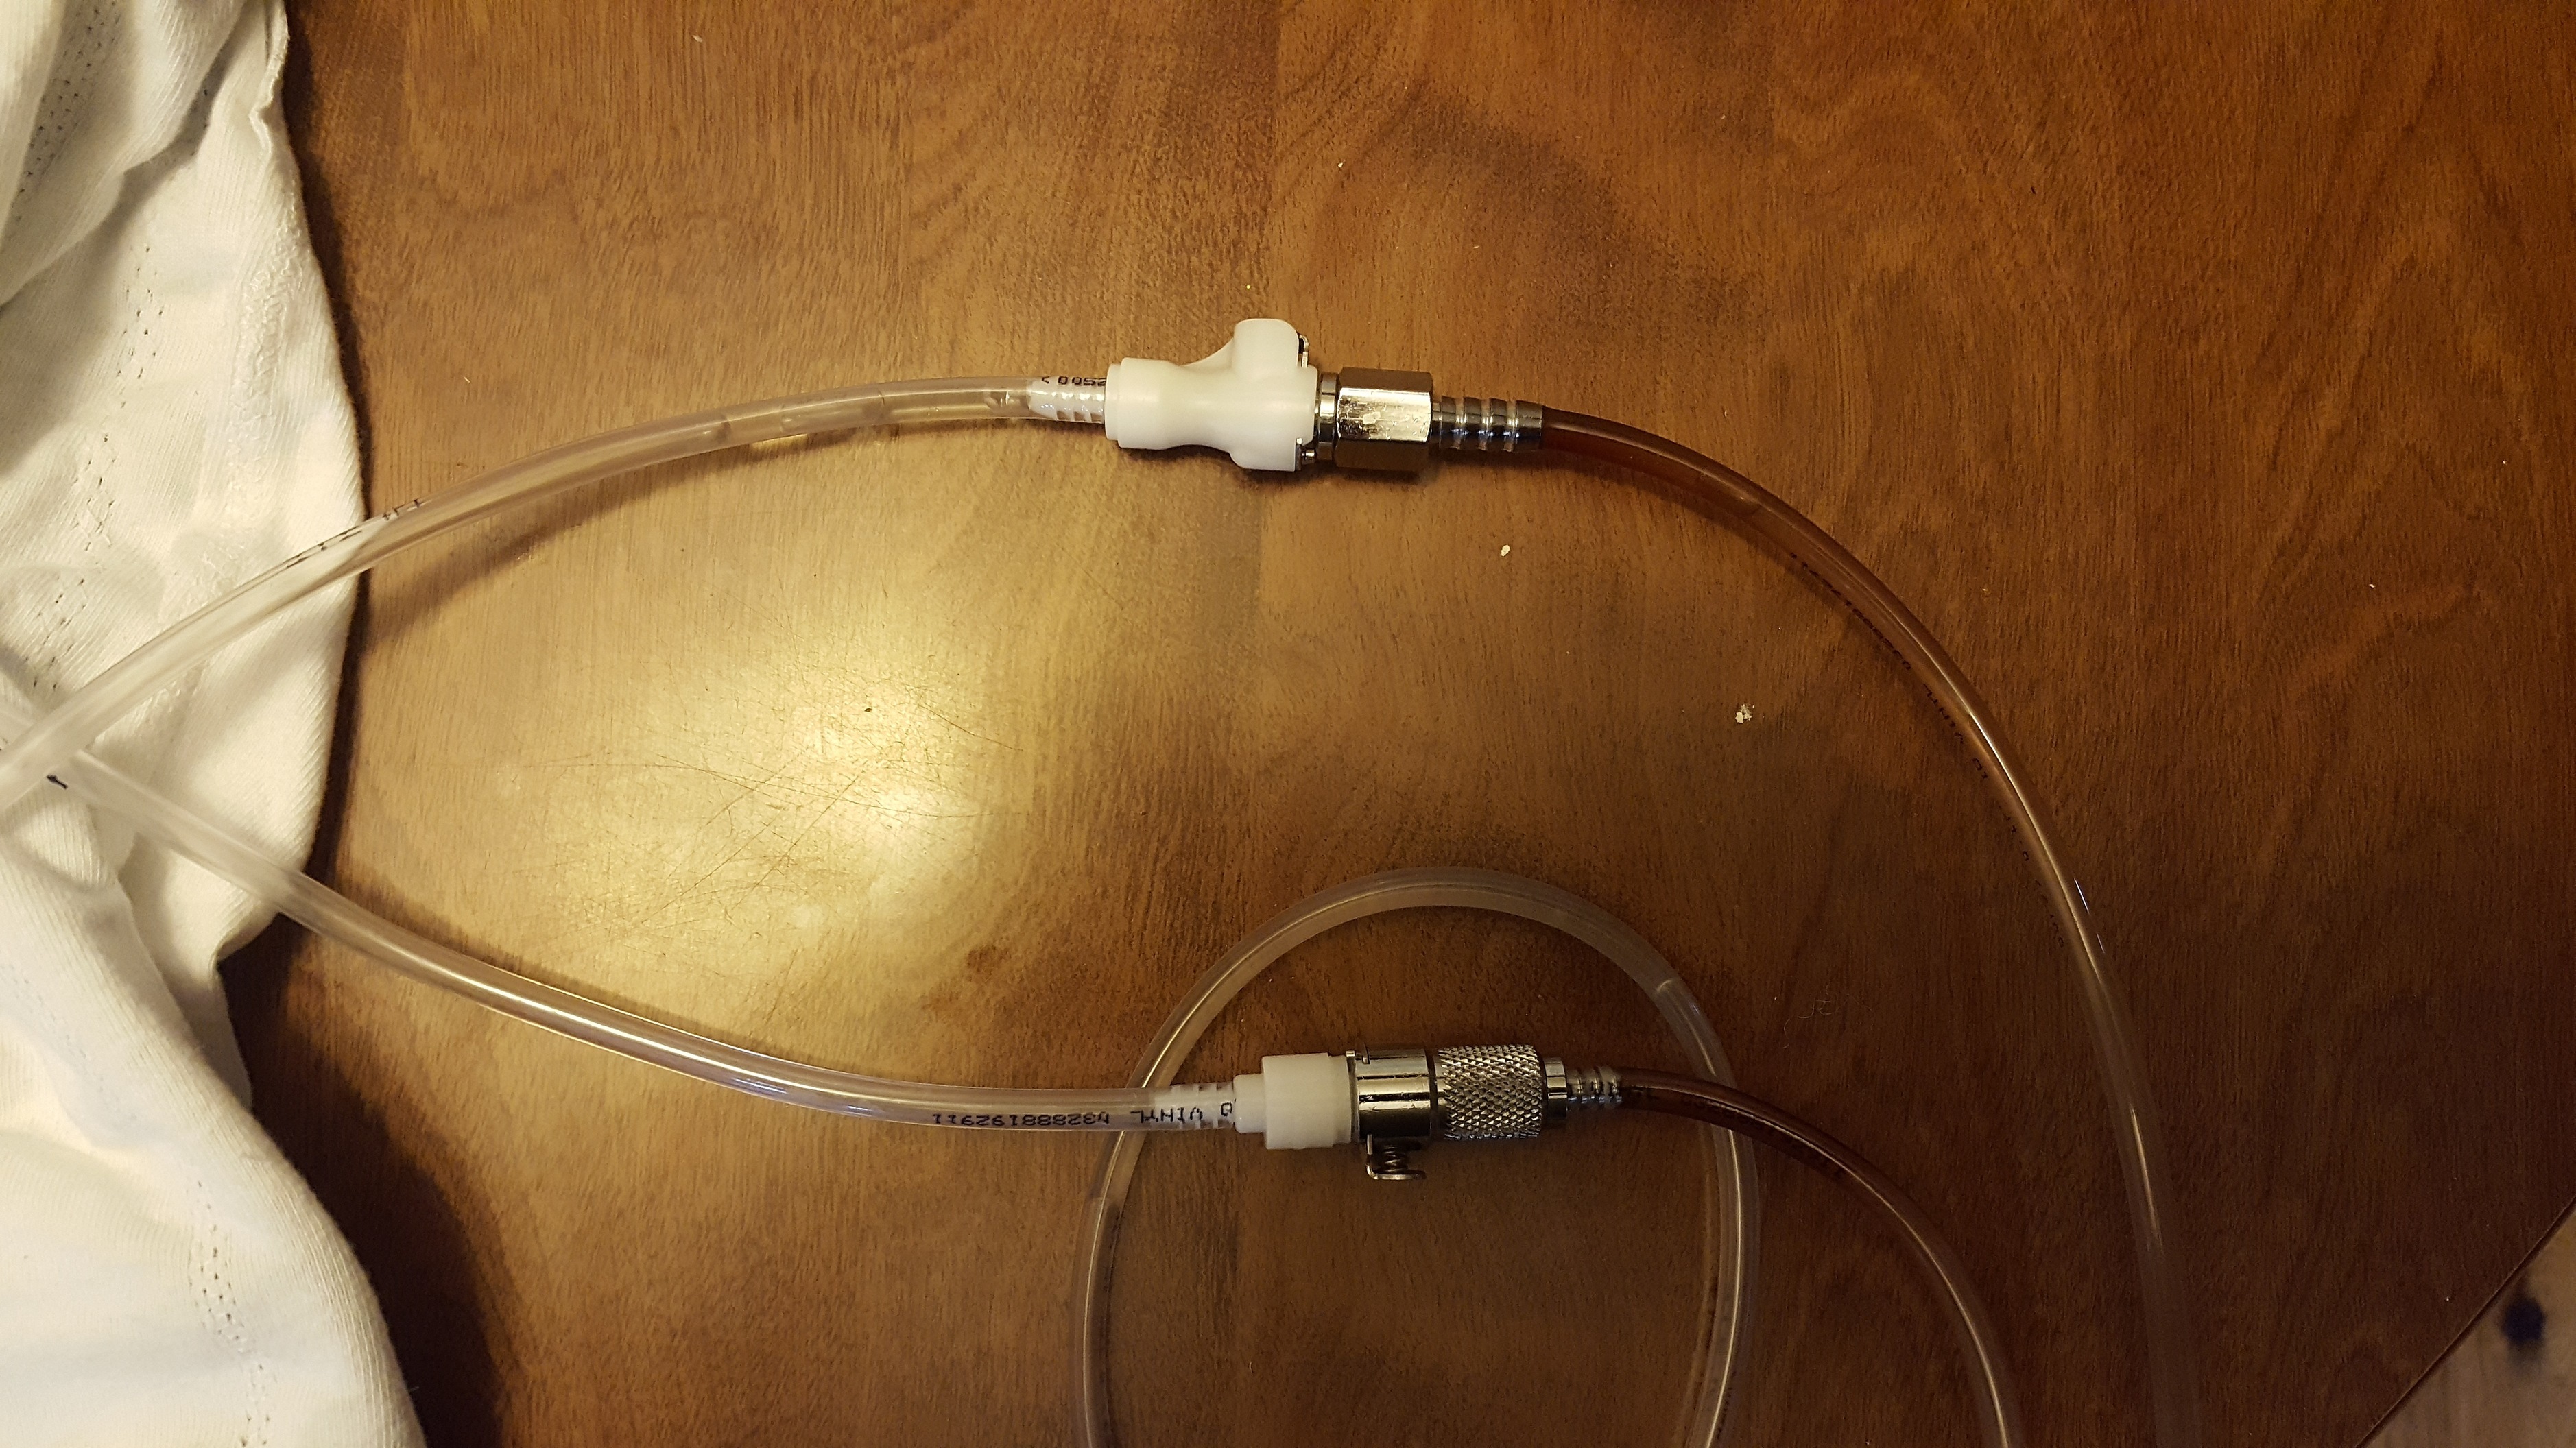
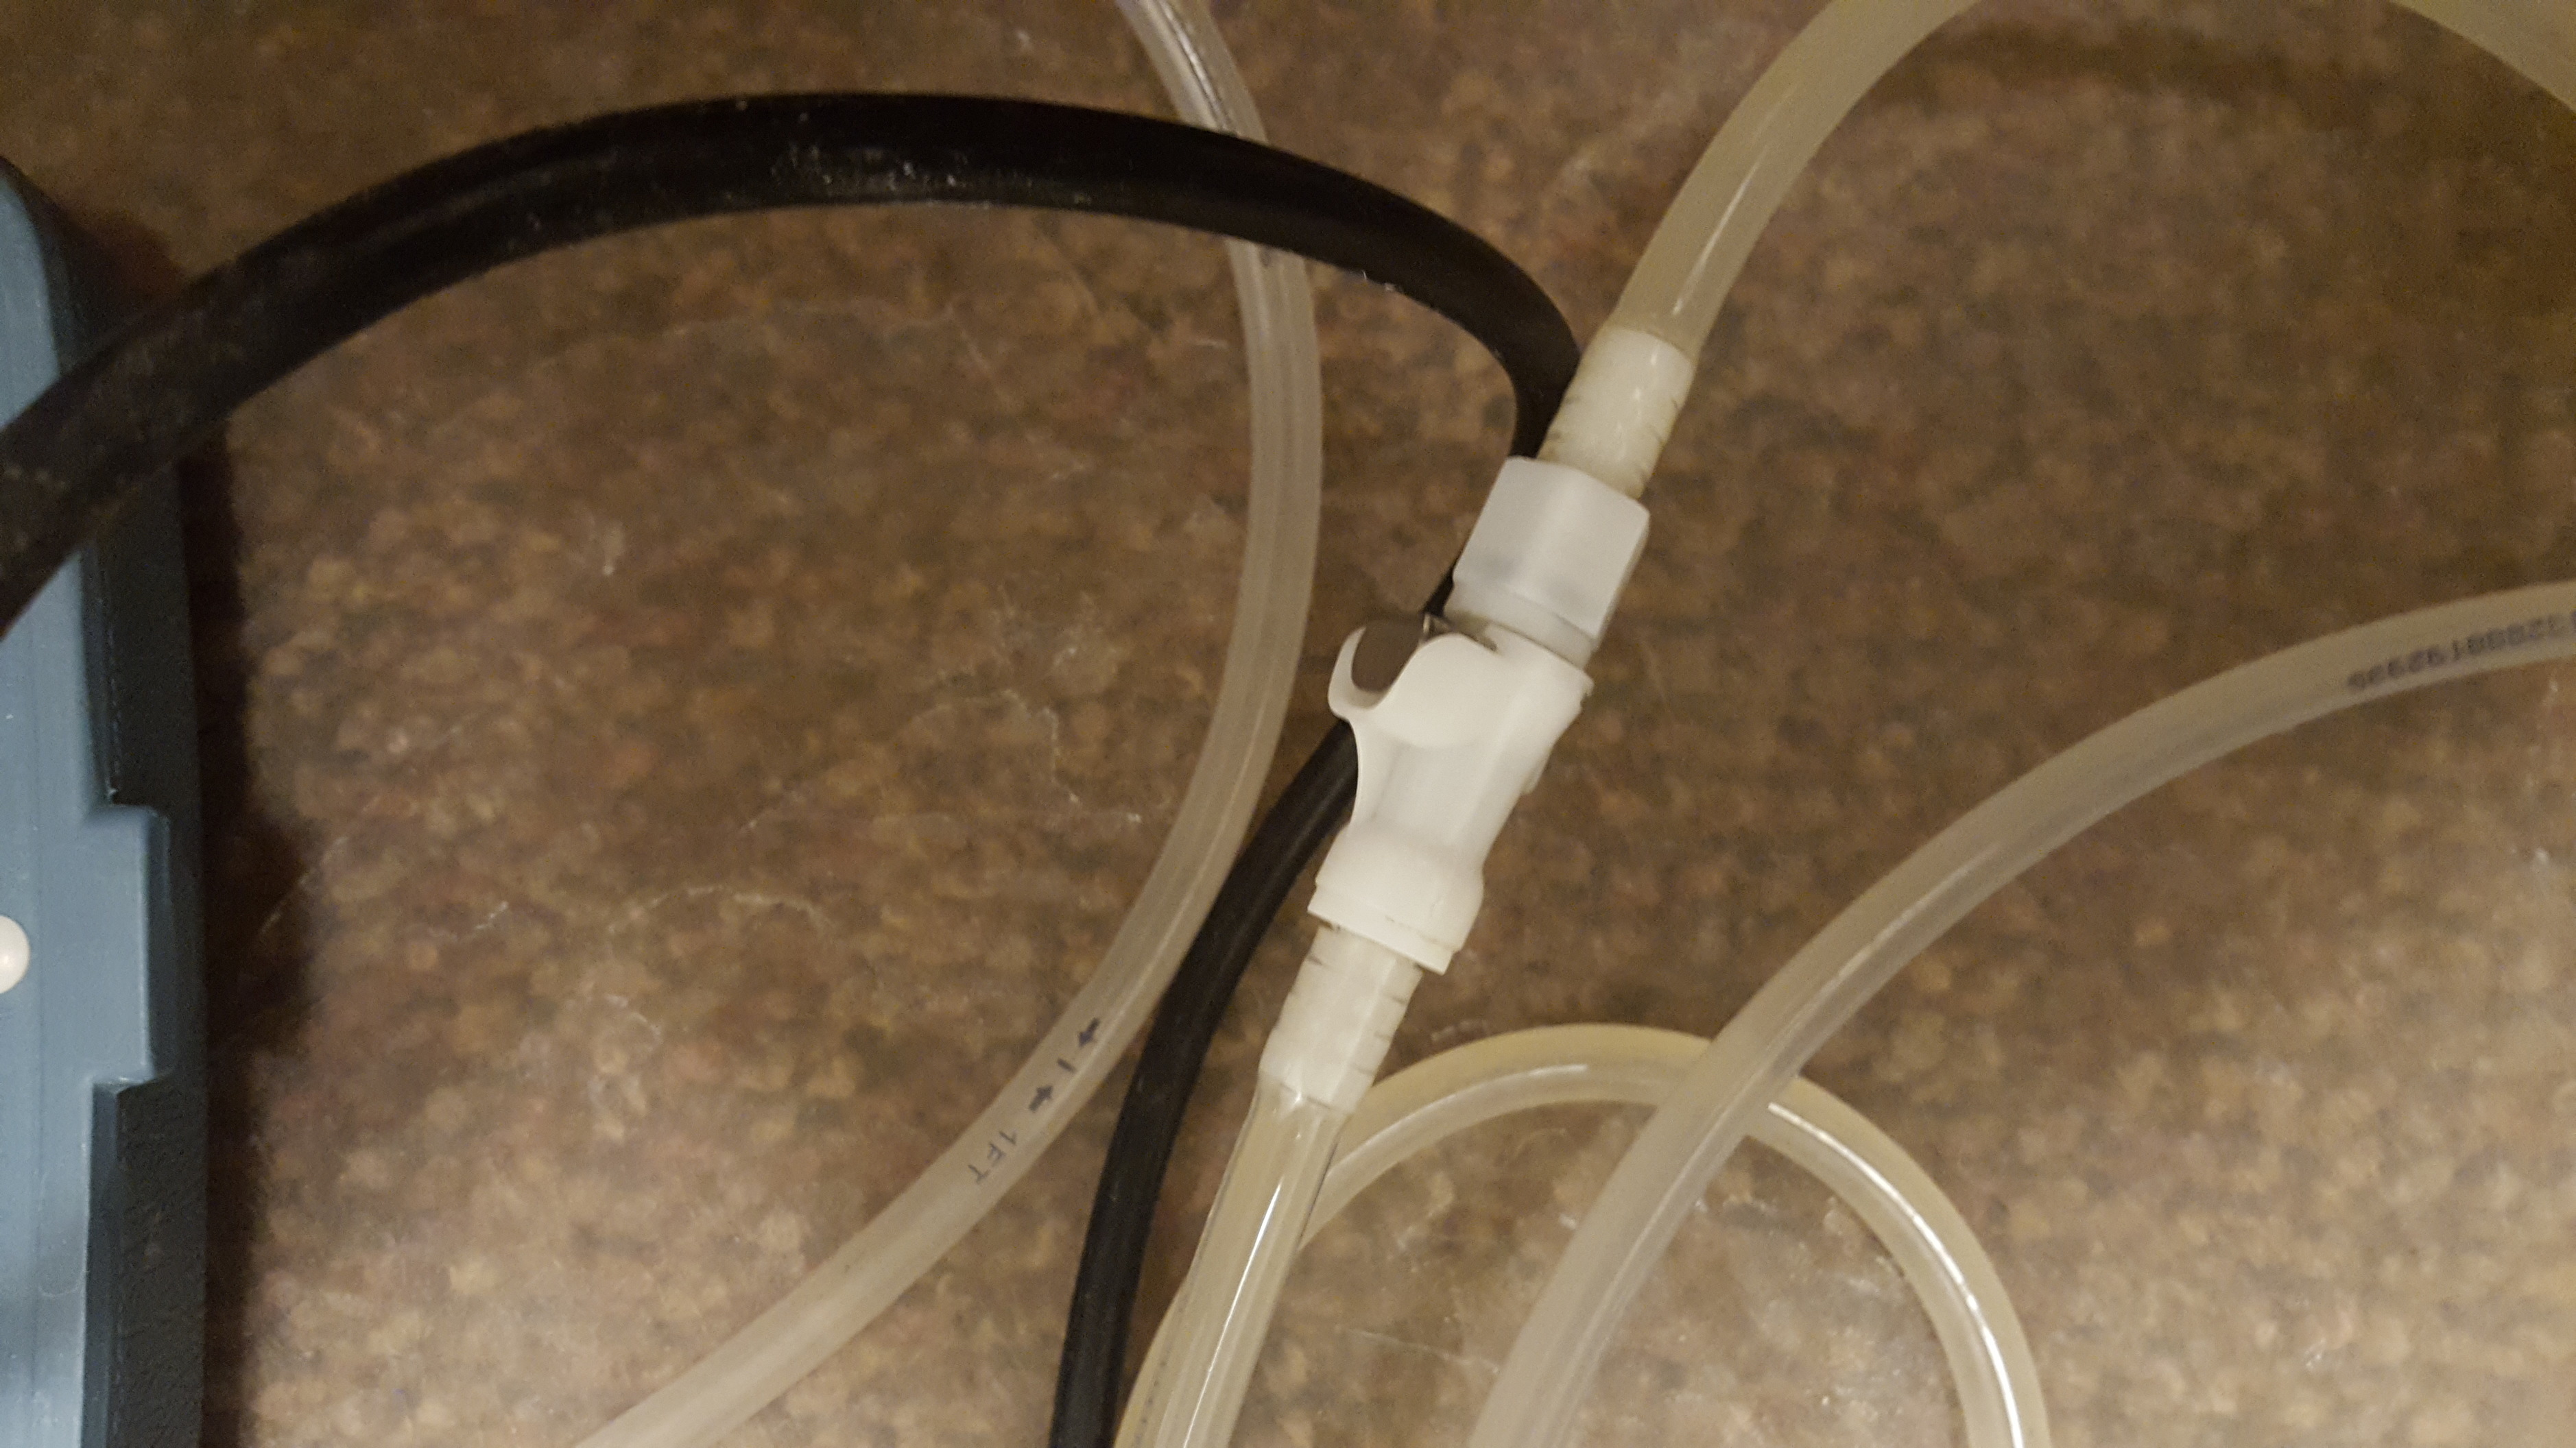
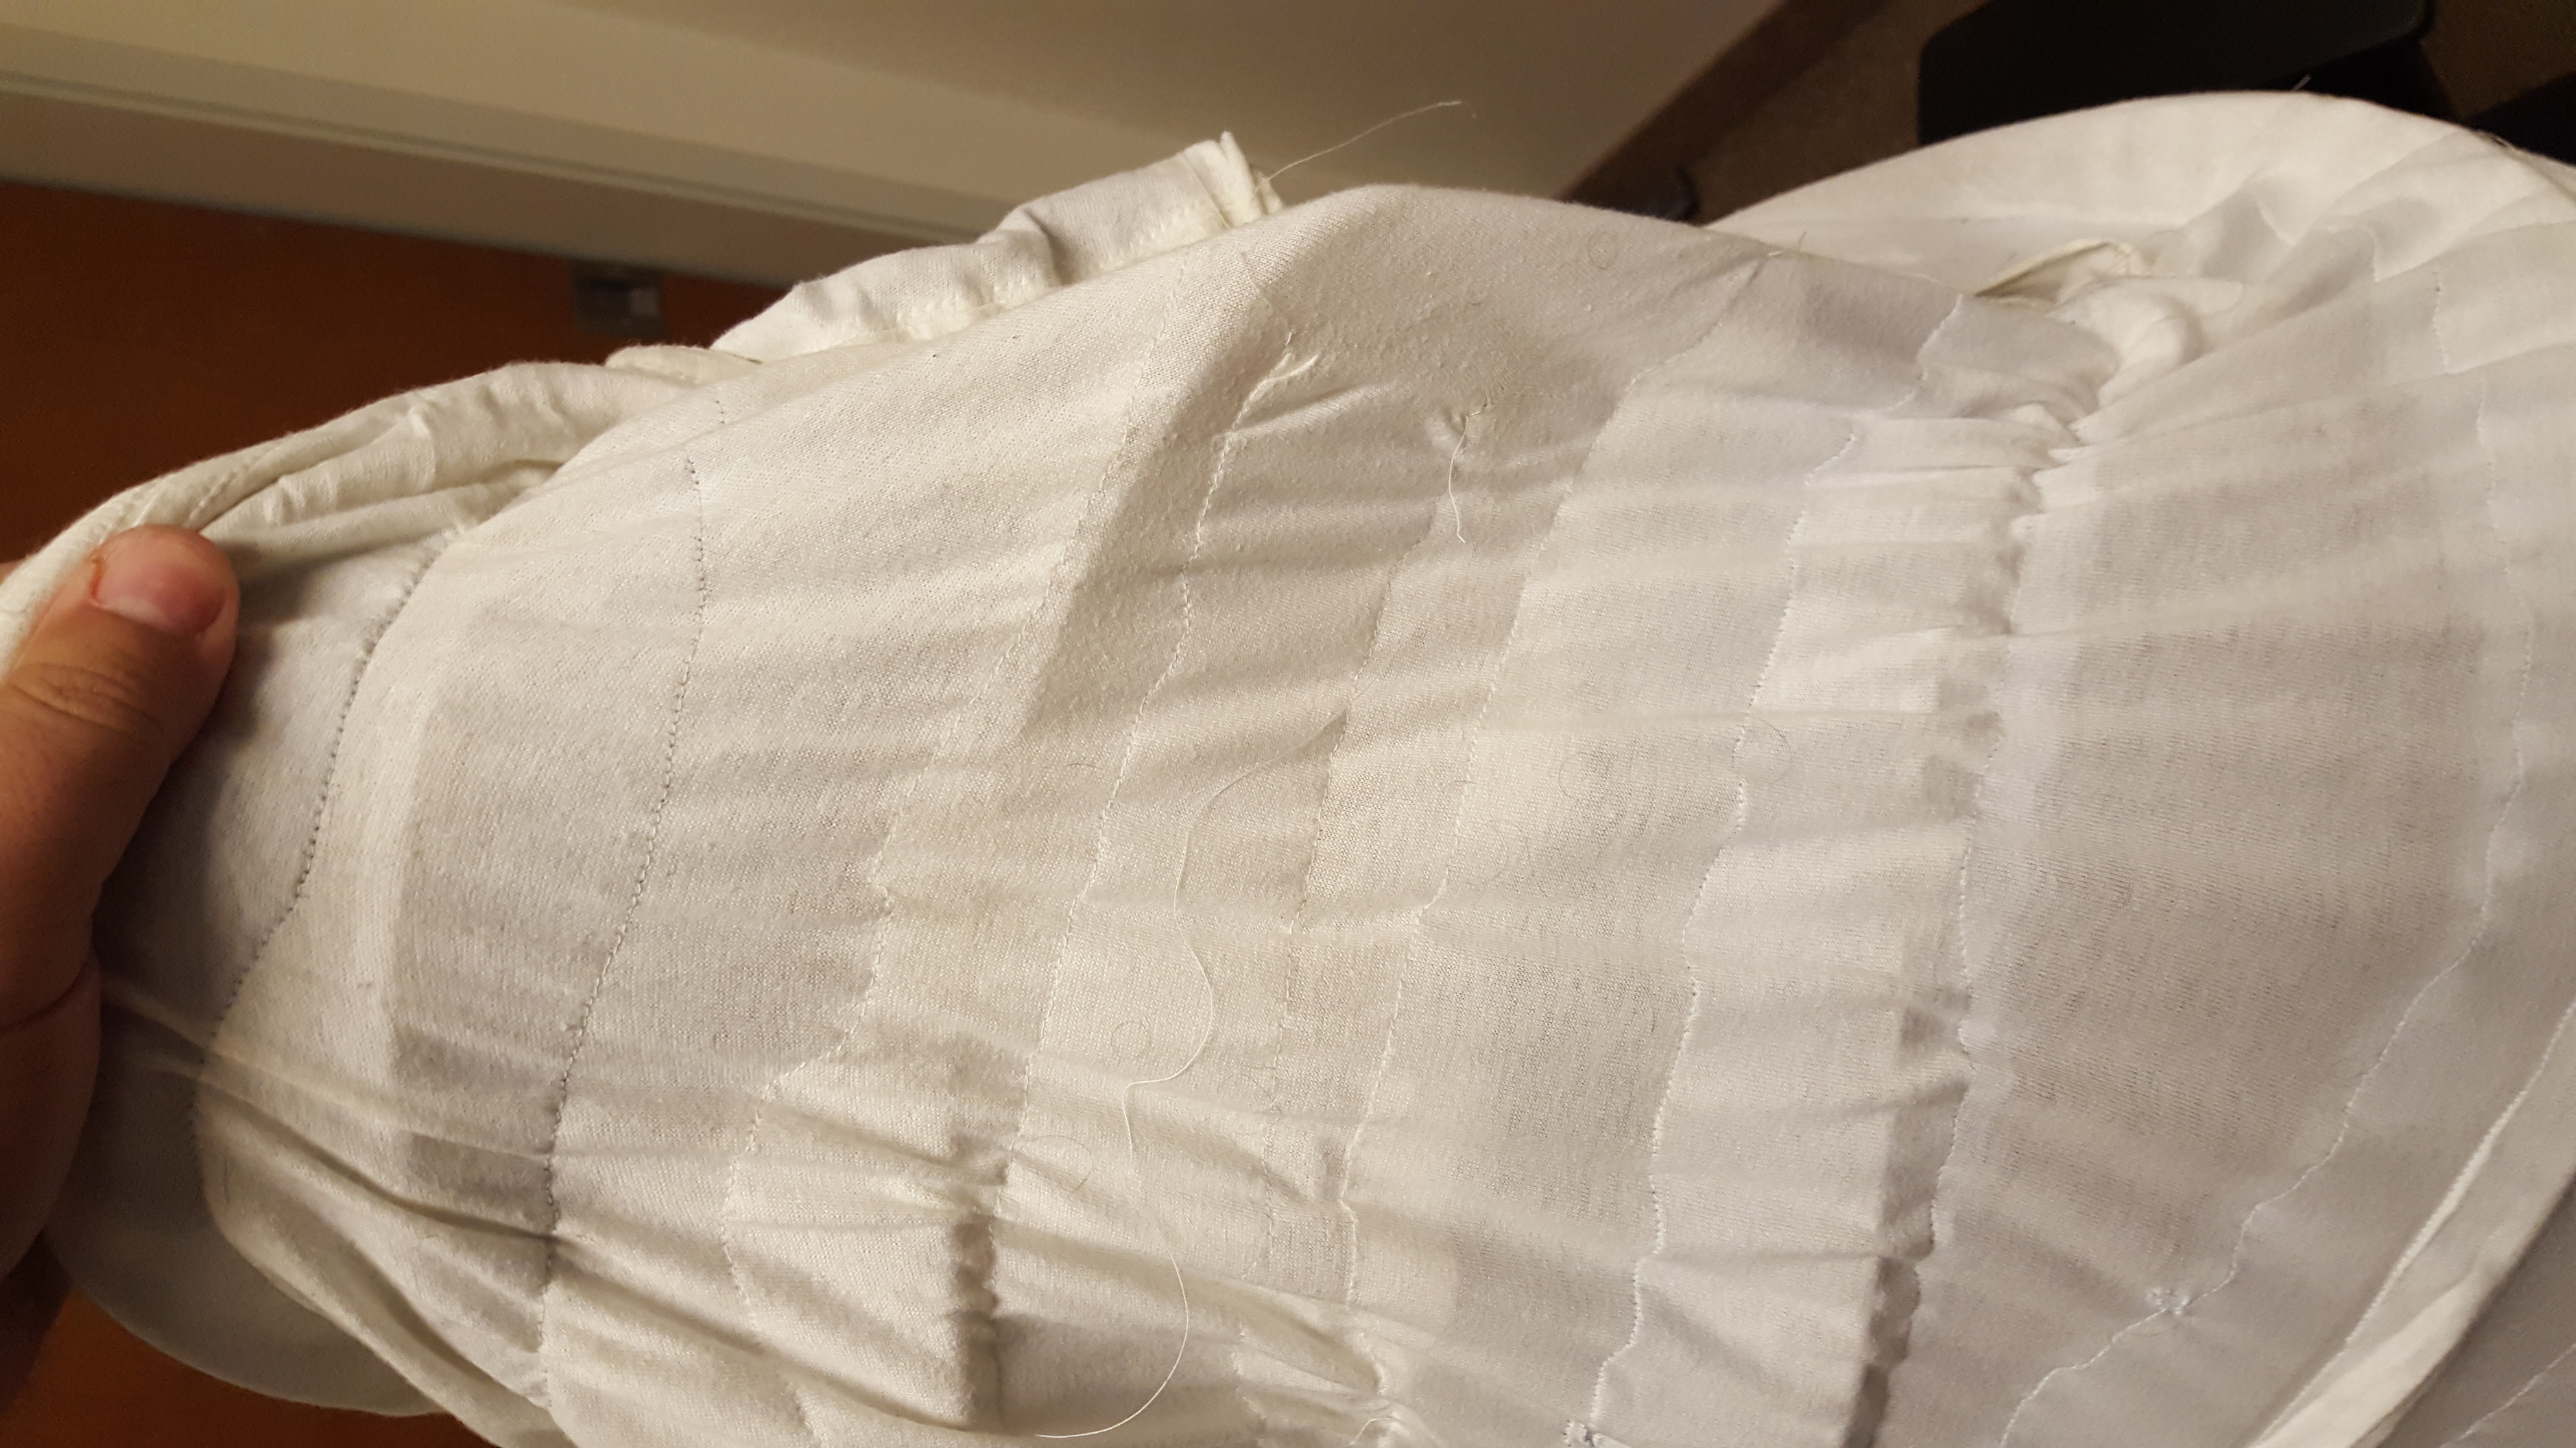
The shirt has metal connectors. This was a mistake, as my adding salt and vinegar to the water mix to lower the temp, and deal with my hard water here, did a number on the metal, and you can see there is a bit of rust staining on the tubing around the connector. This does not affect the function, and I suspect I will shrink out of the shirt long before it matters. The silver colored air hose connector is the right size to attach to the gen 2 tubing, I tested with the gen 1 pump, but found it too anemic for my purposes. Pics of the gen 2 pump tomorrow.

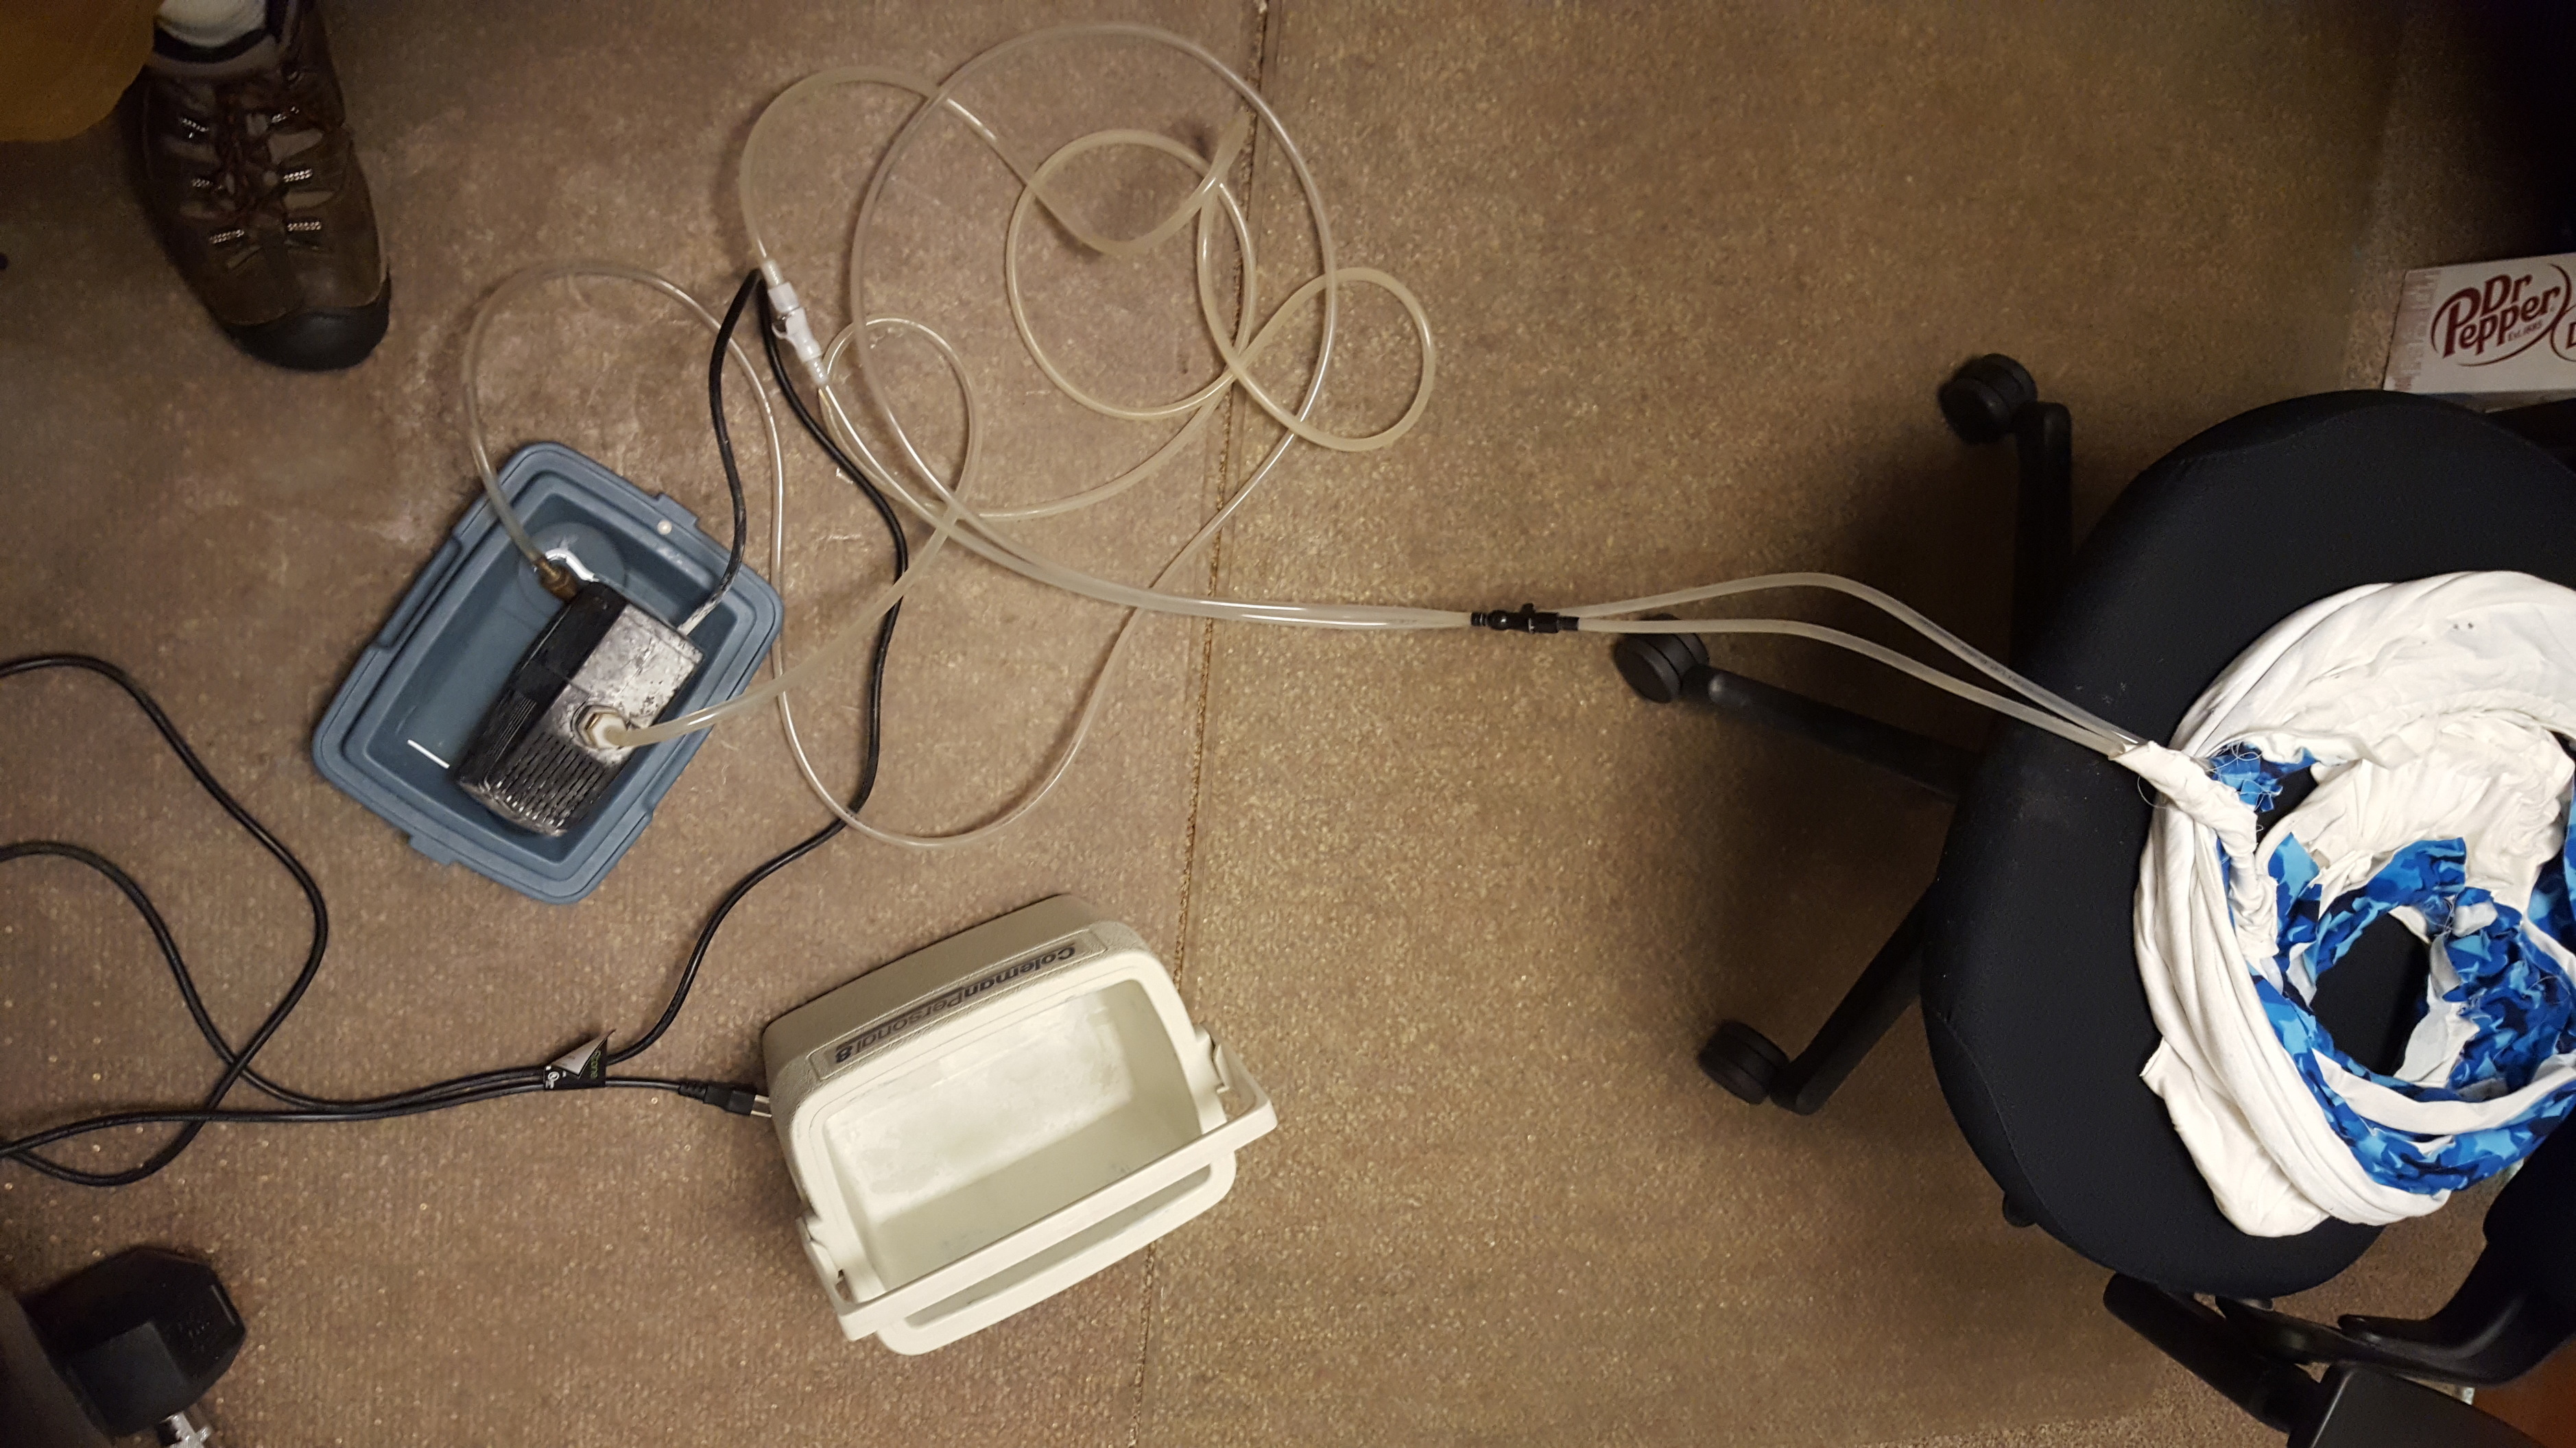
The whole setup minus the tank.

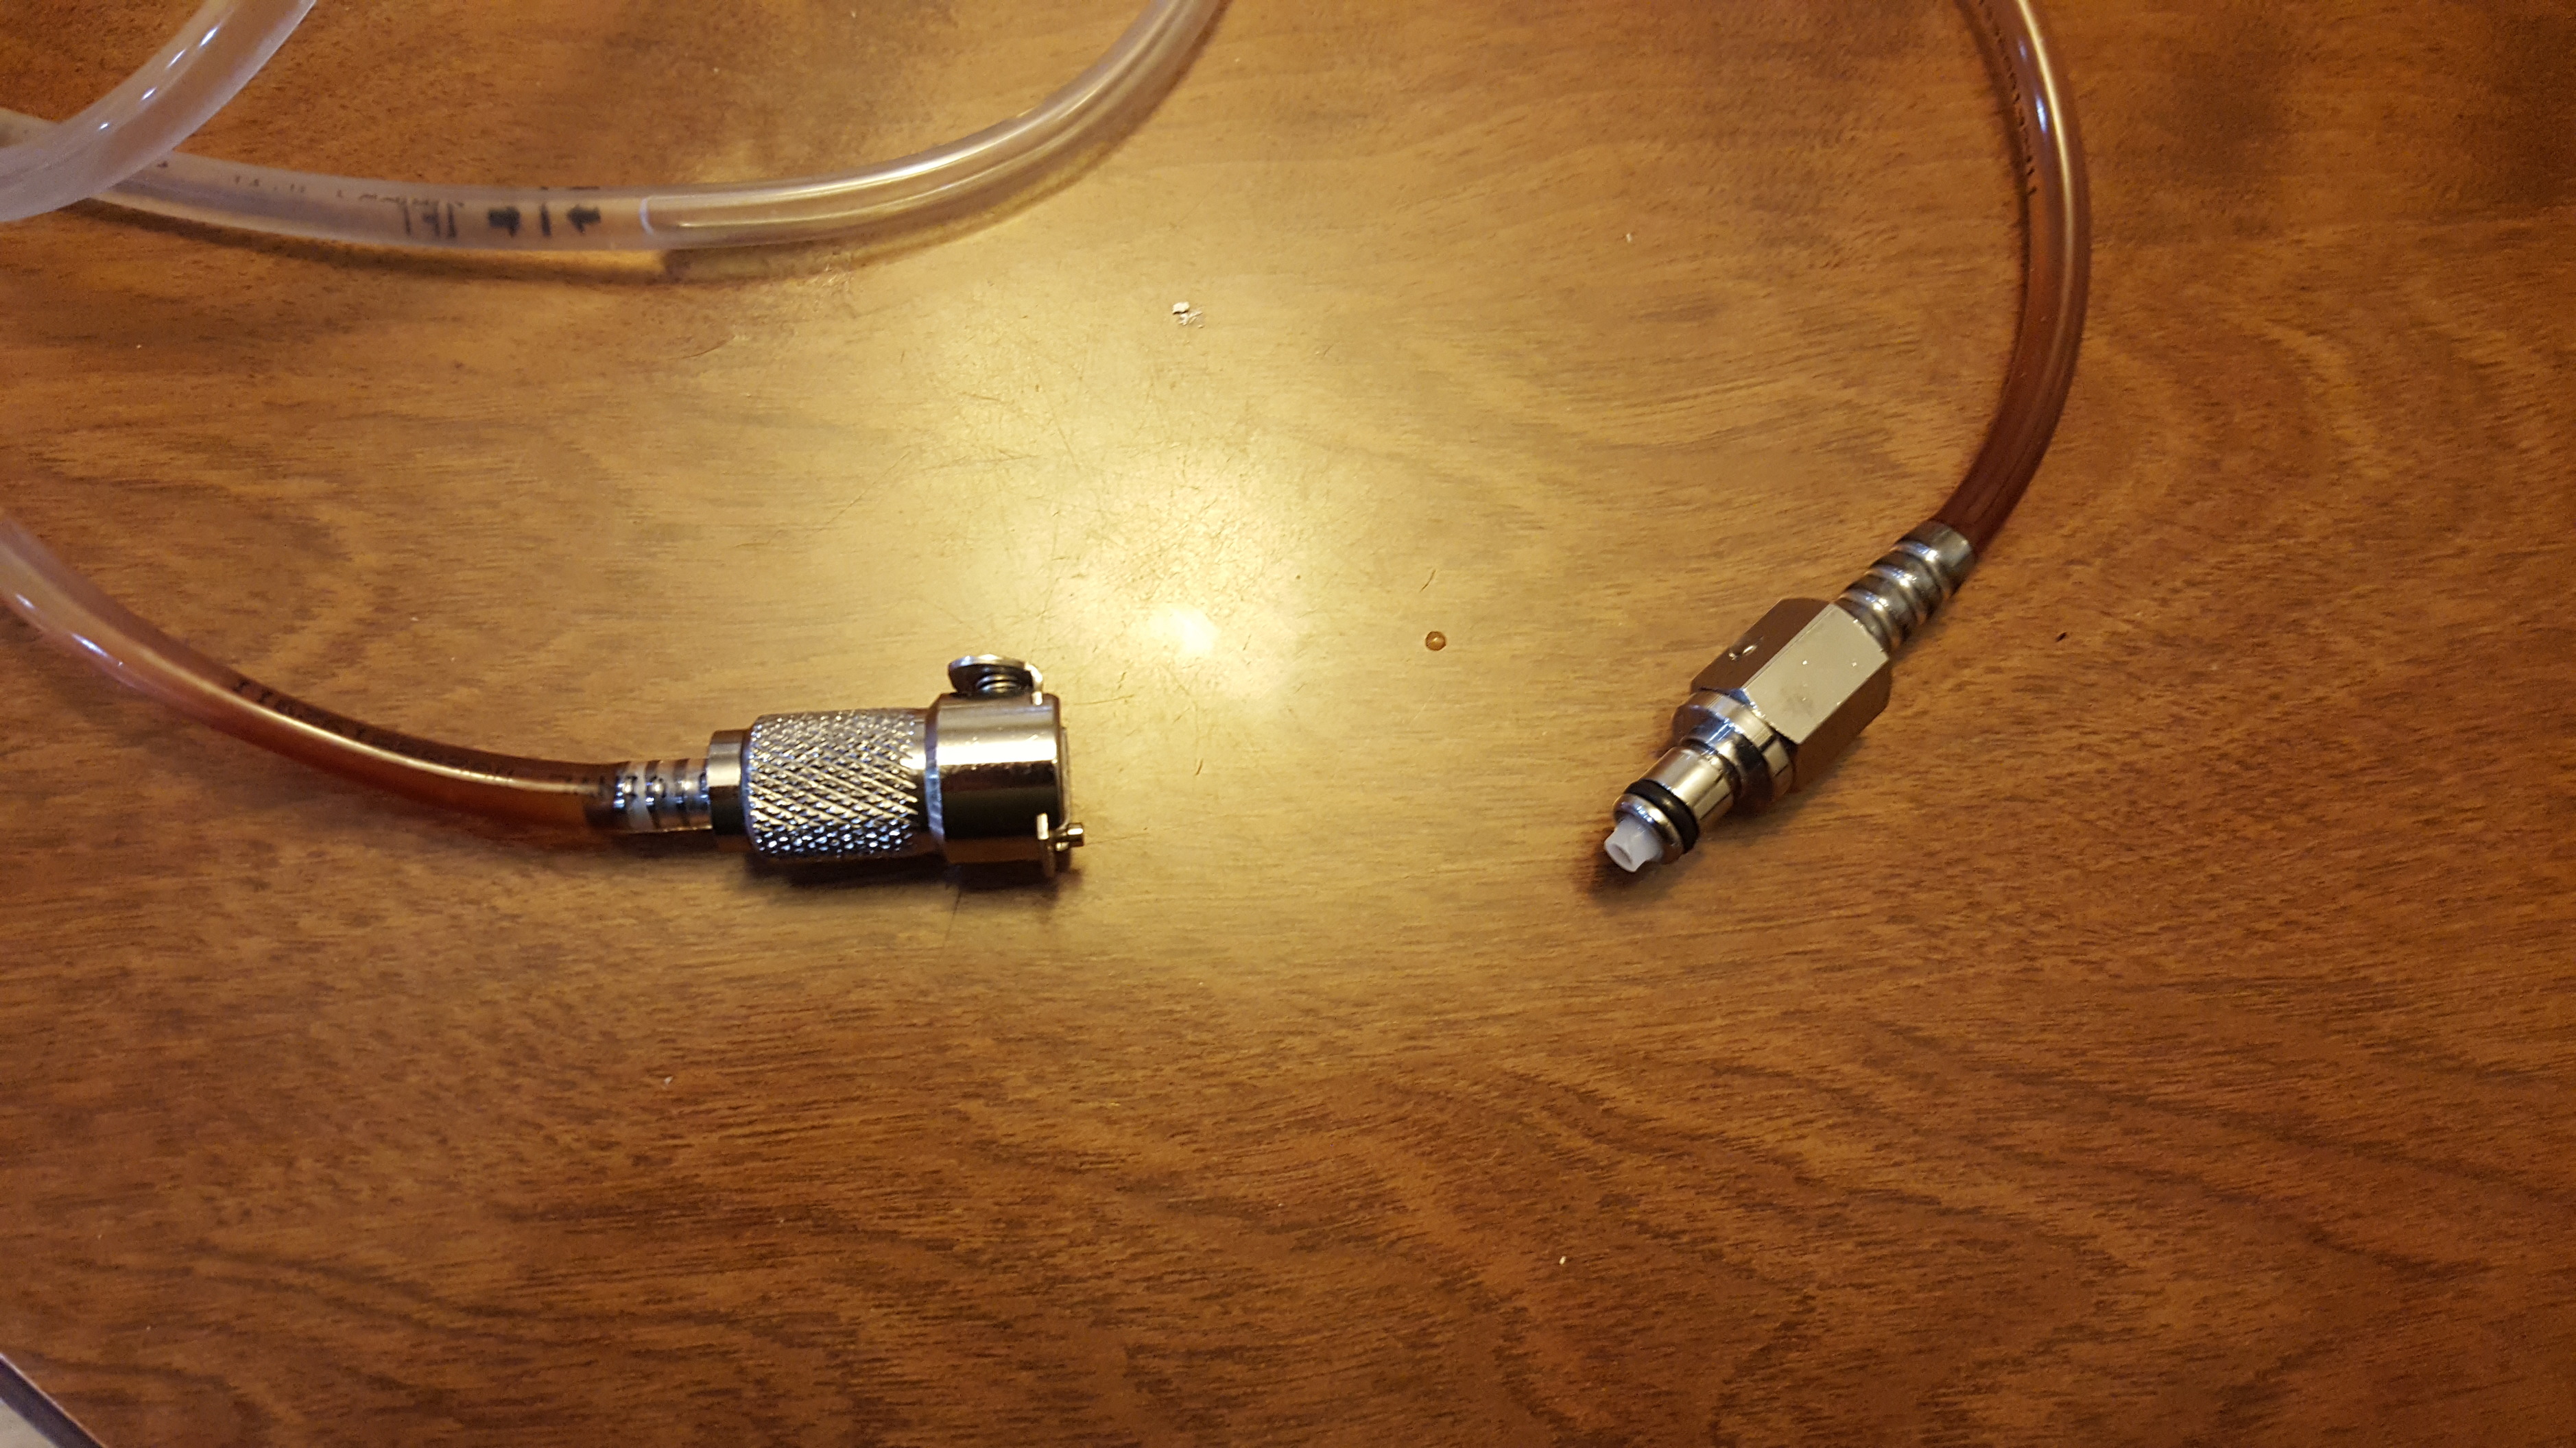
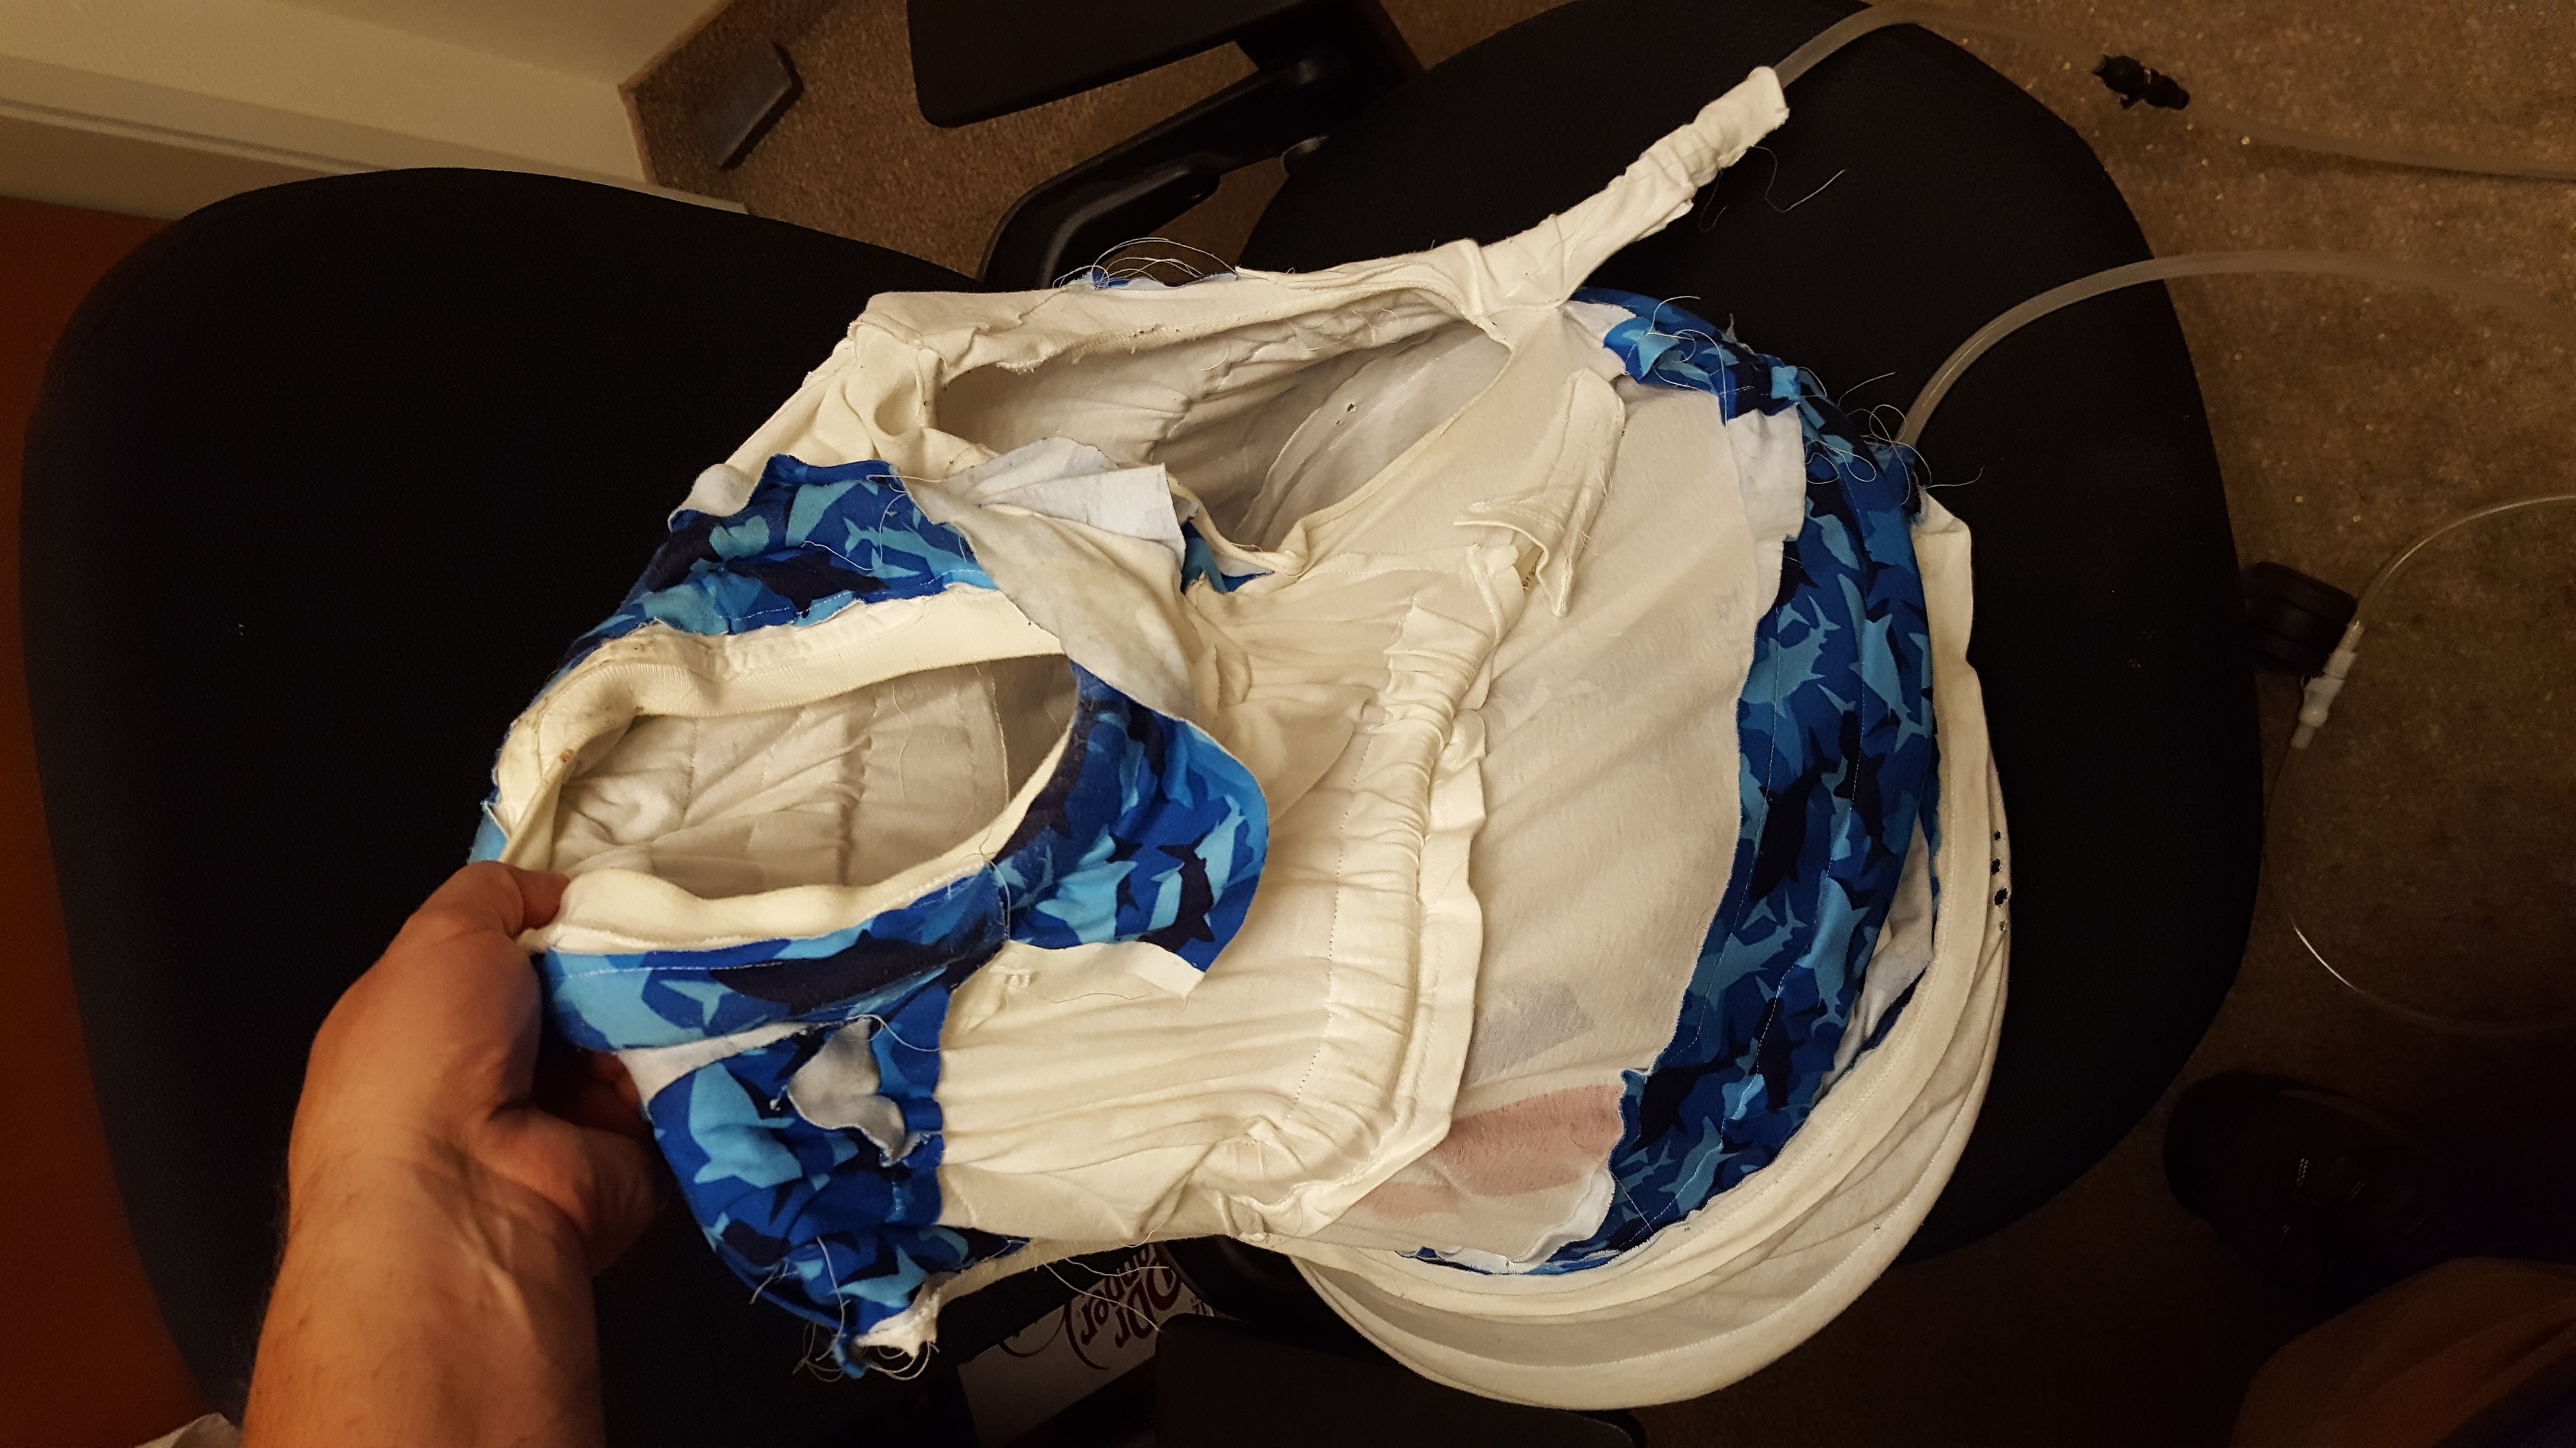
The shirt side connectors, disconnected. Rust stains visible.

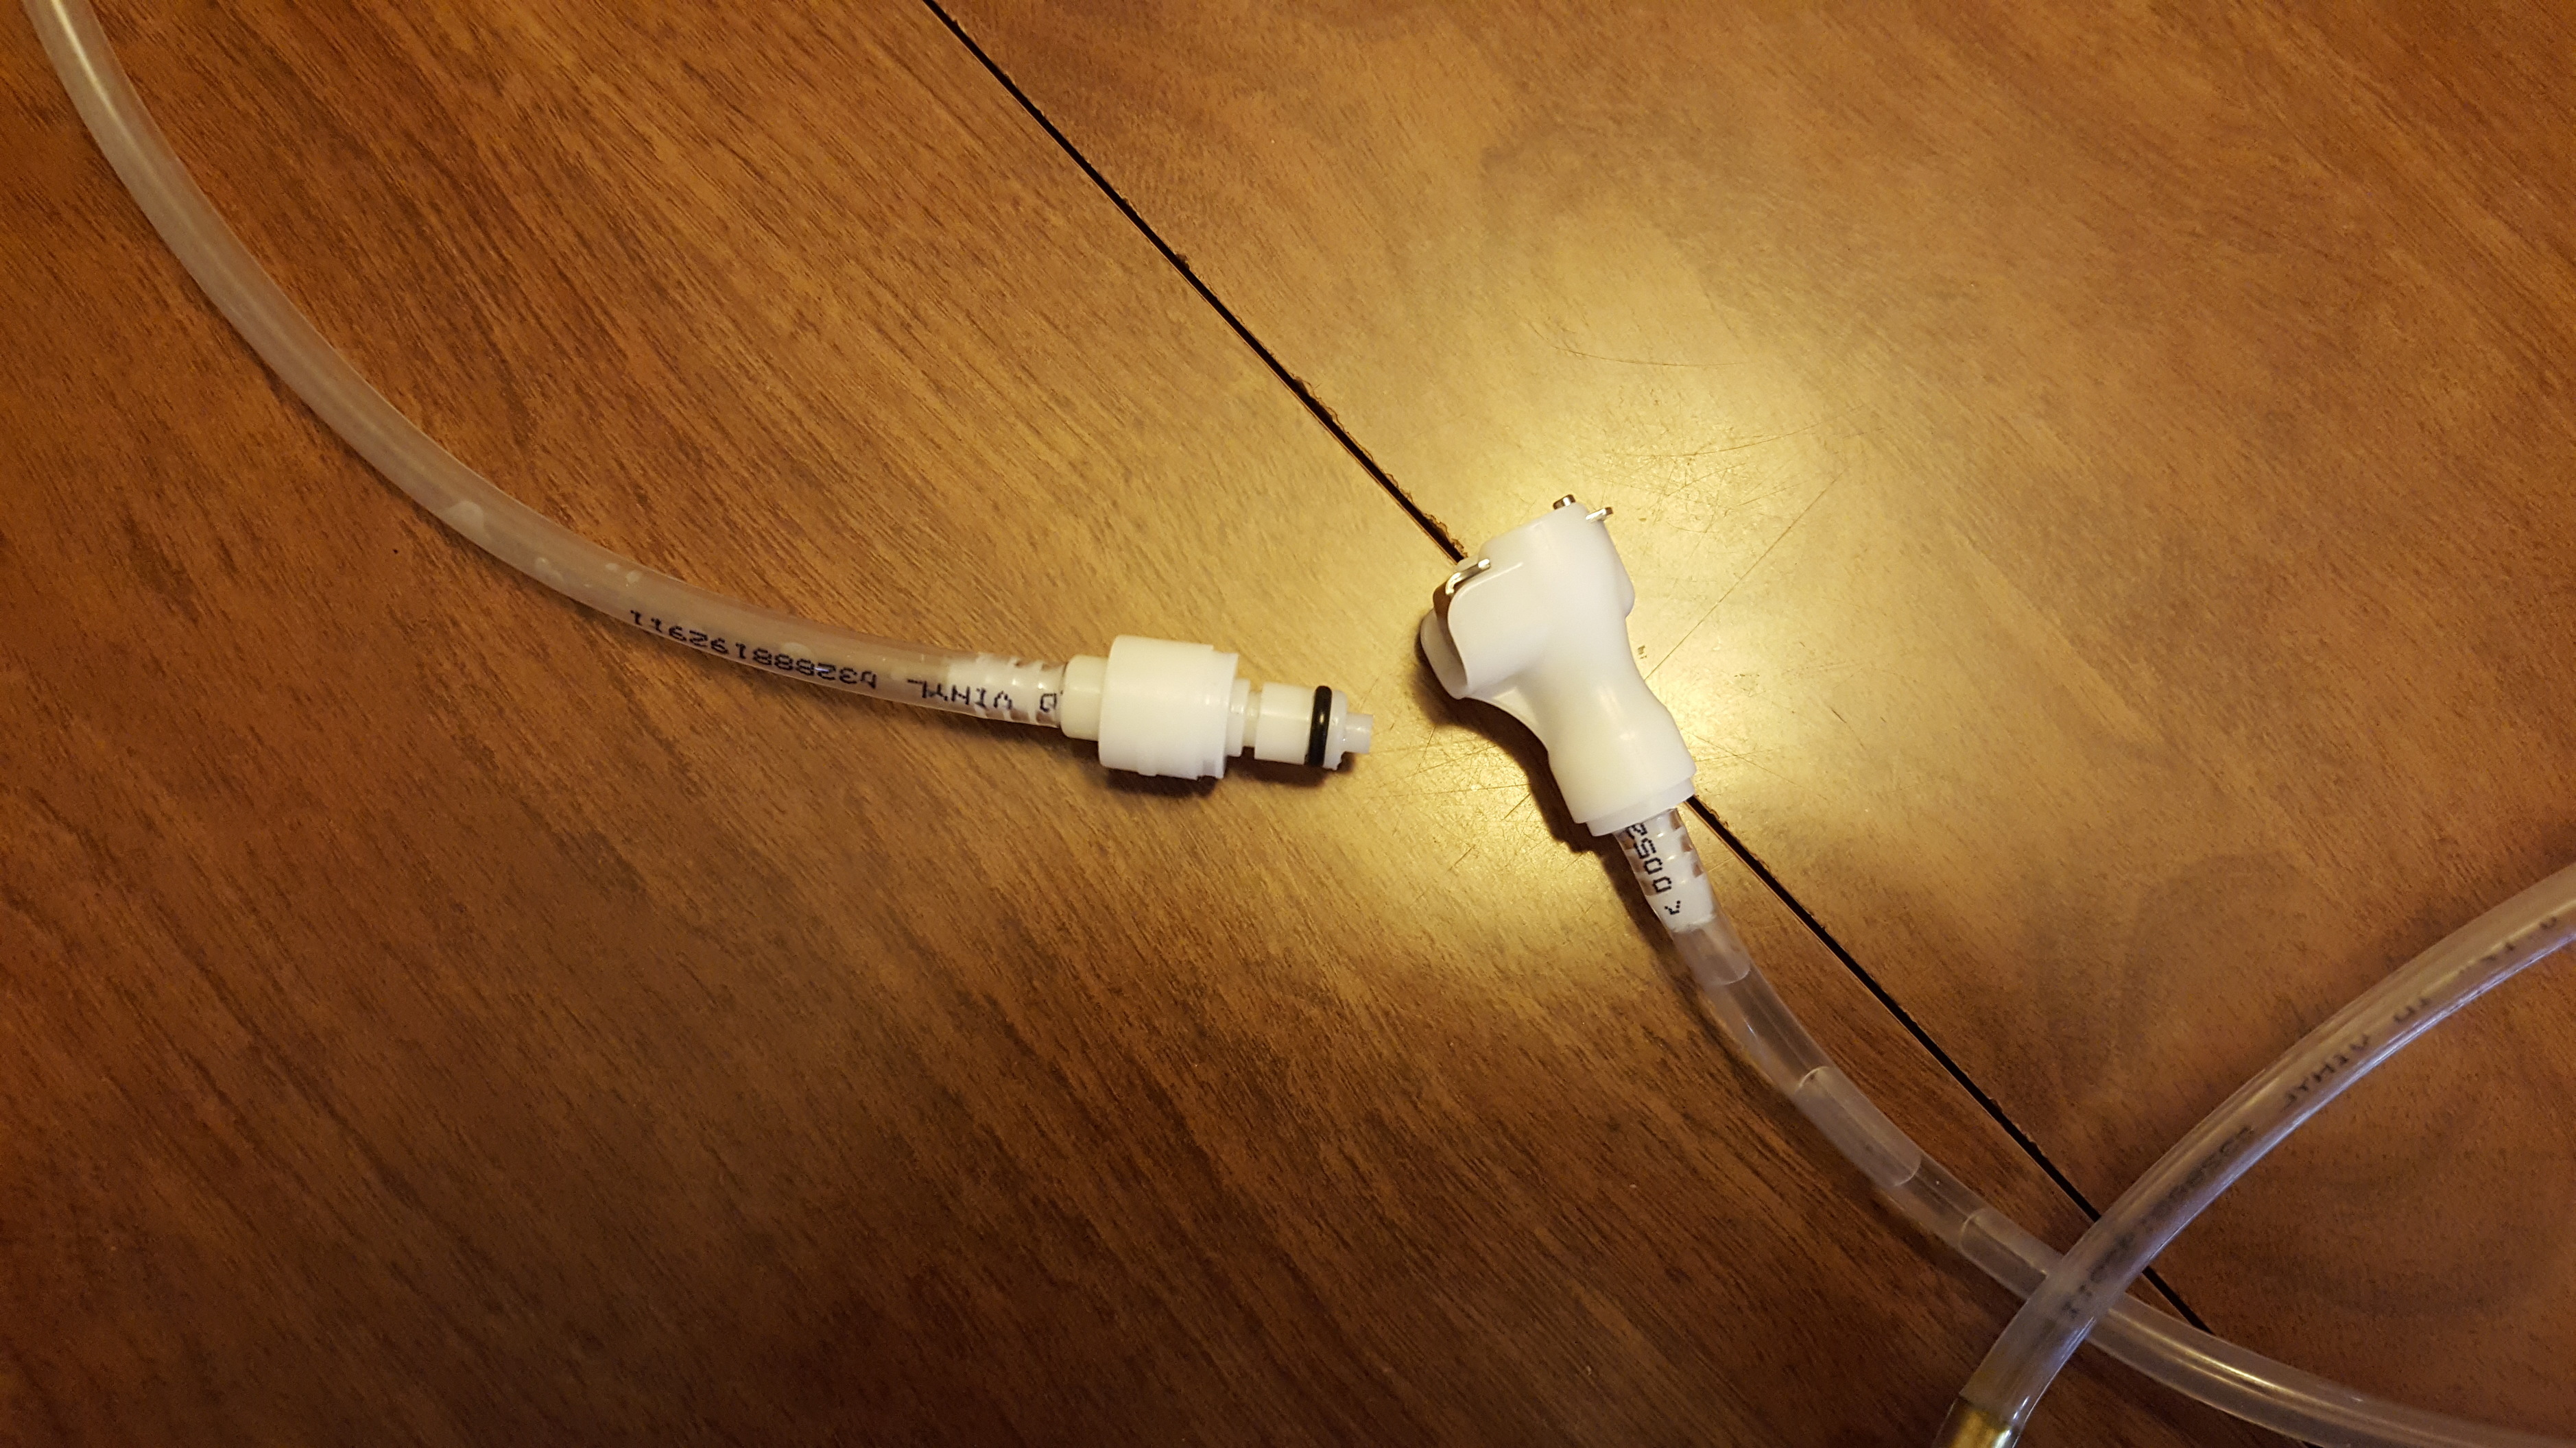
The plastic dry break connectors disconnected.

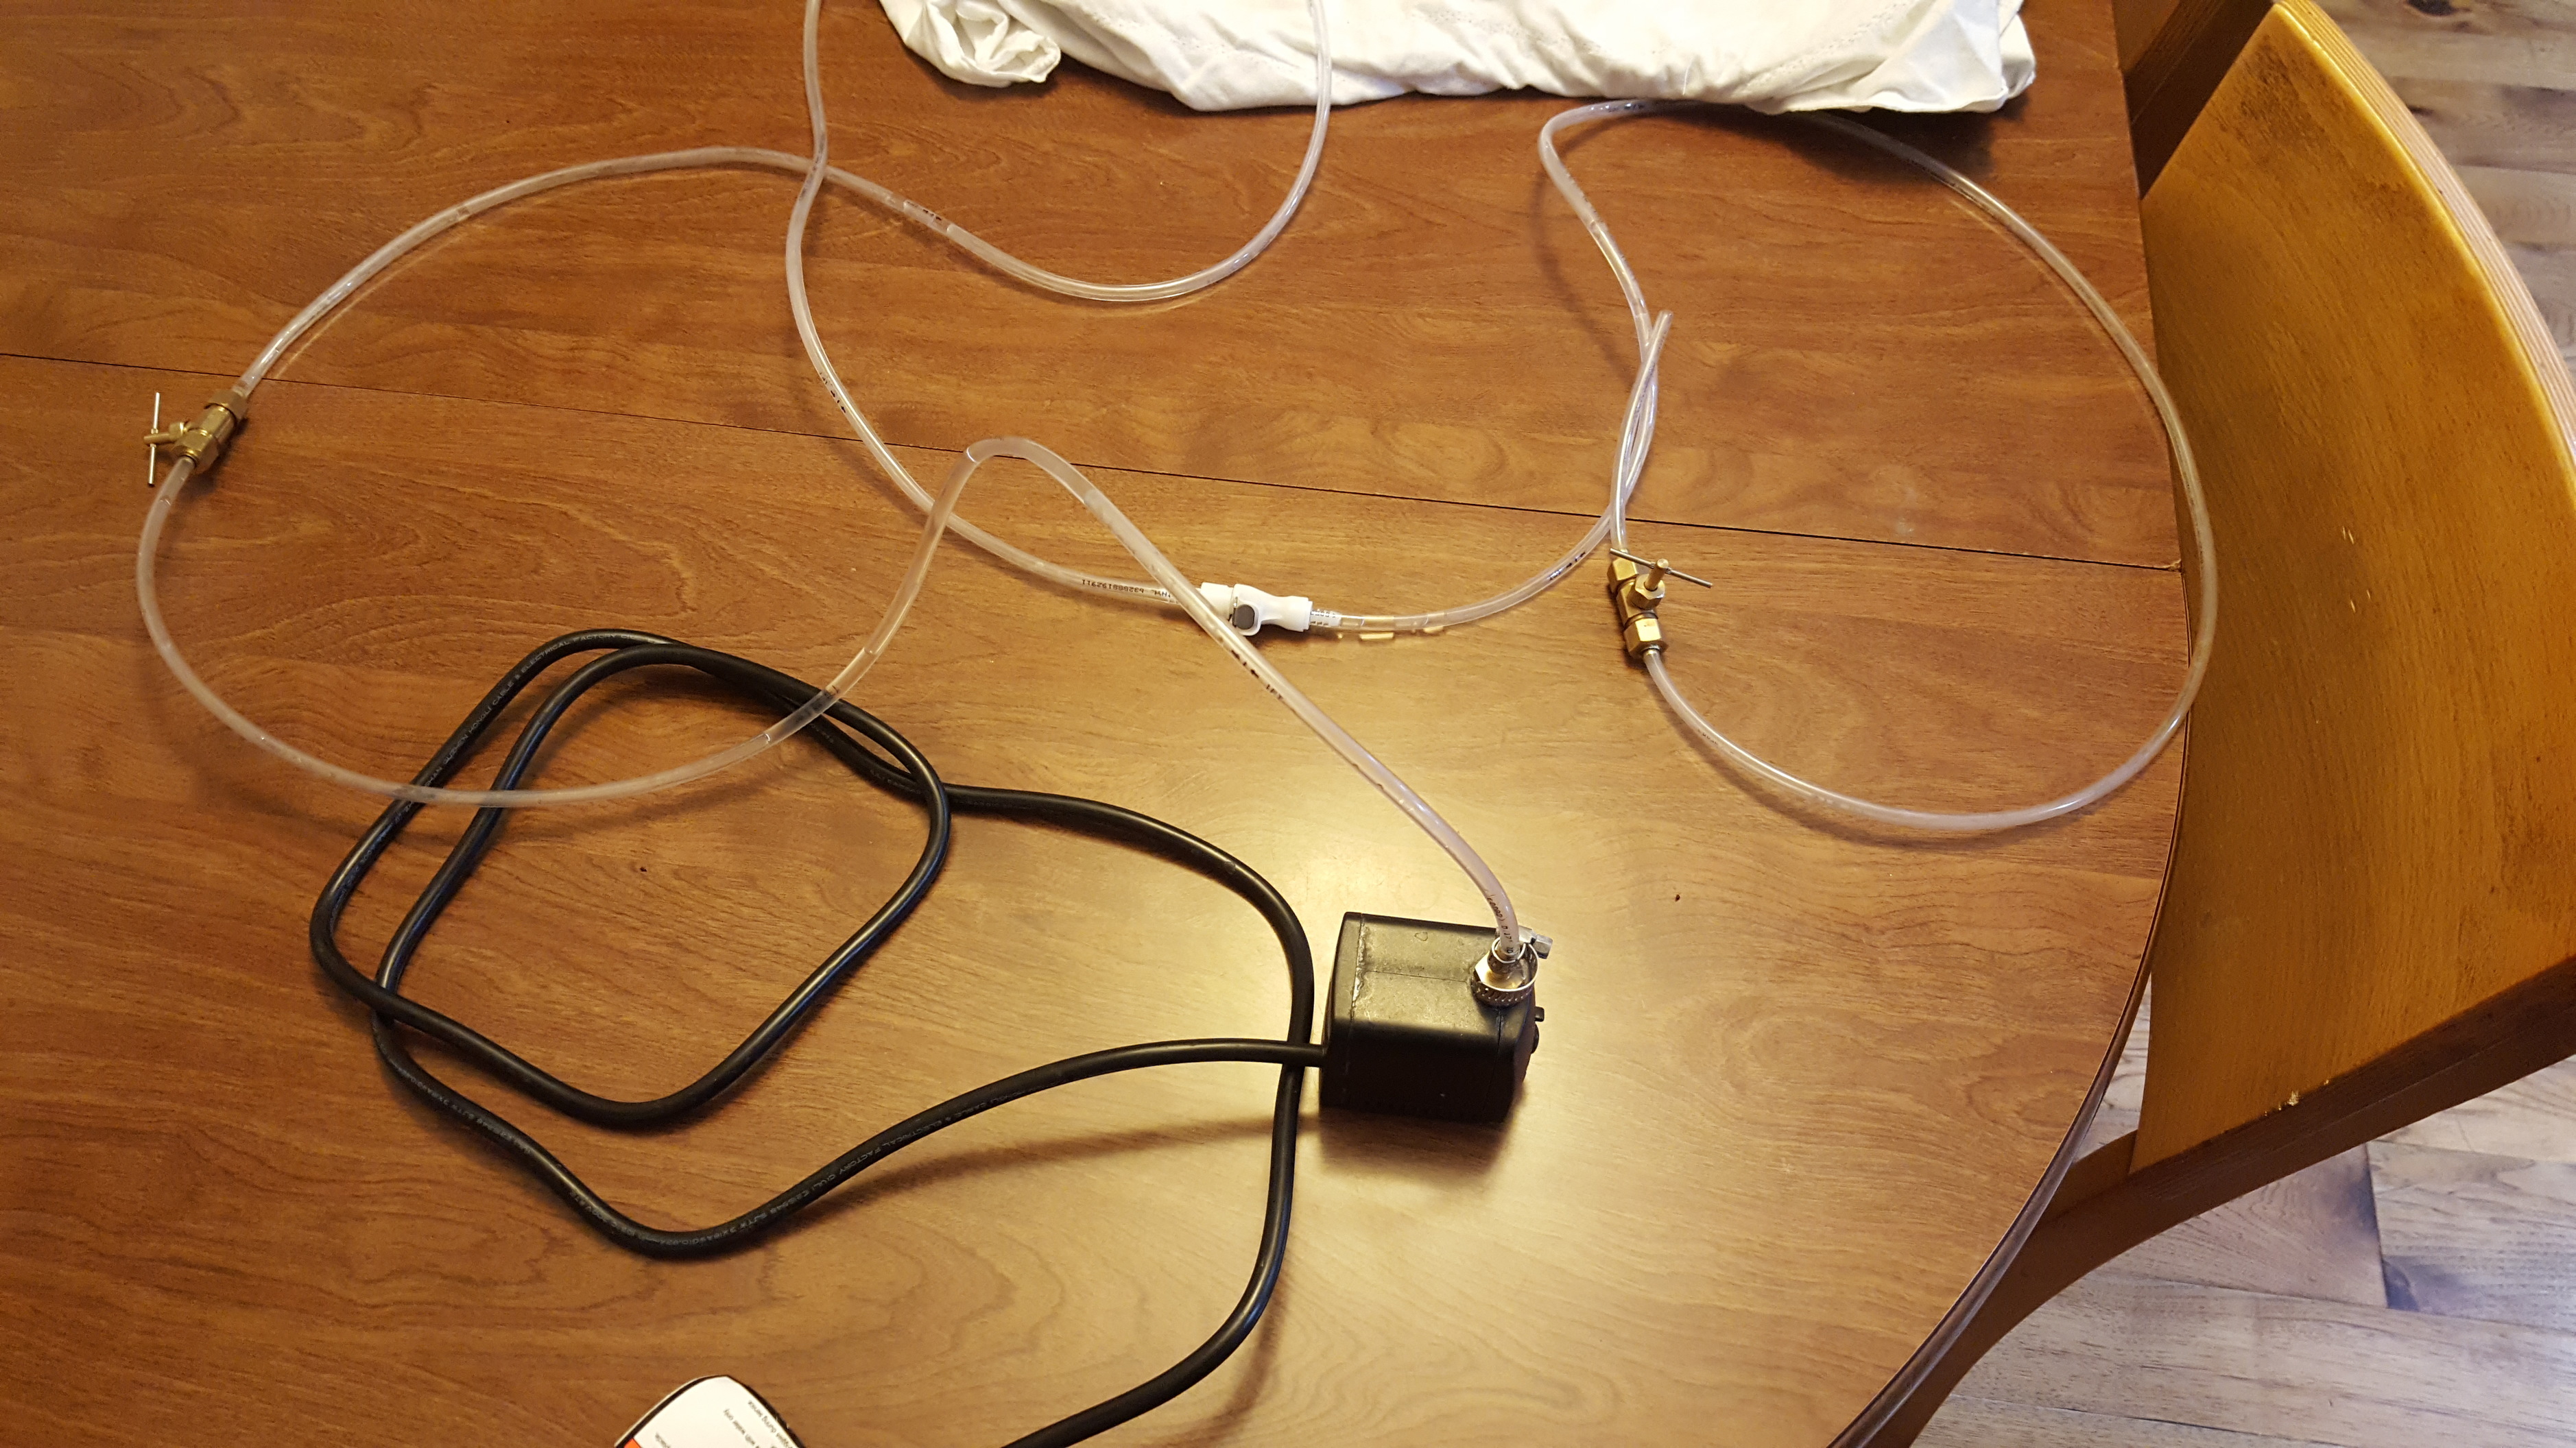
The pump, hooked to itself. The white dry break connectors hooked up to each other. Both needle valves in place.
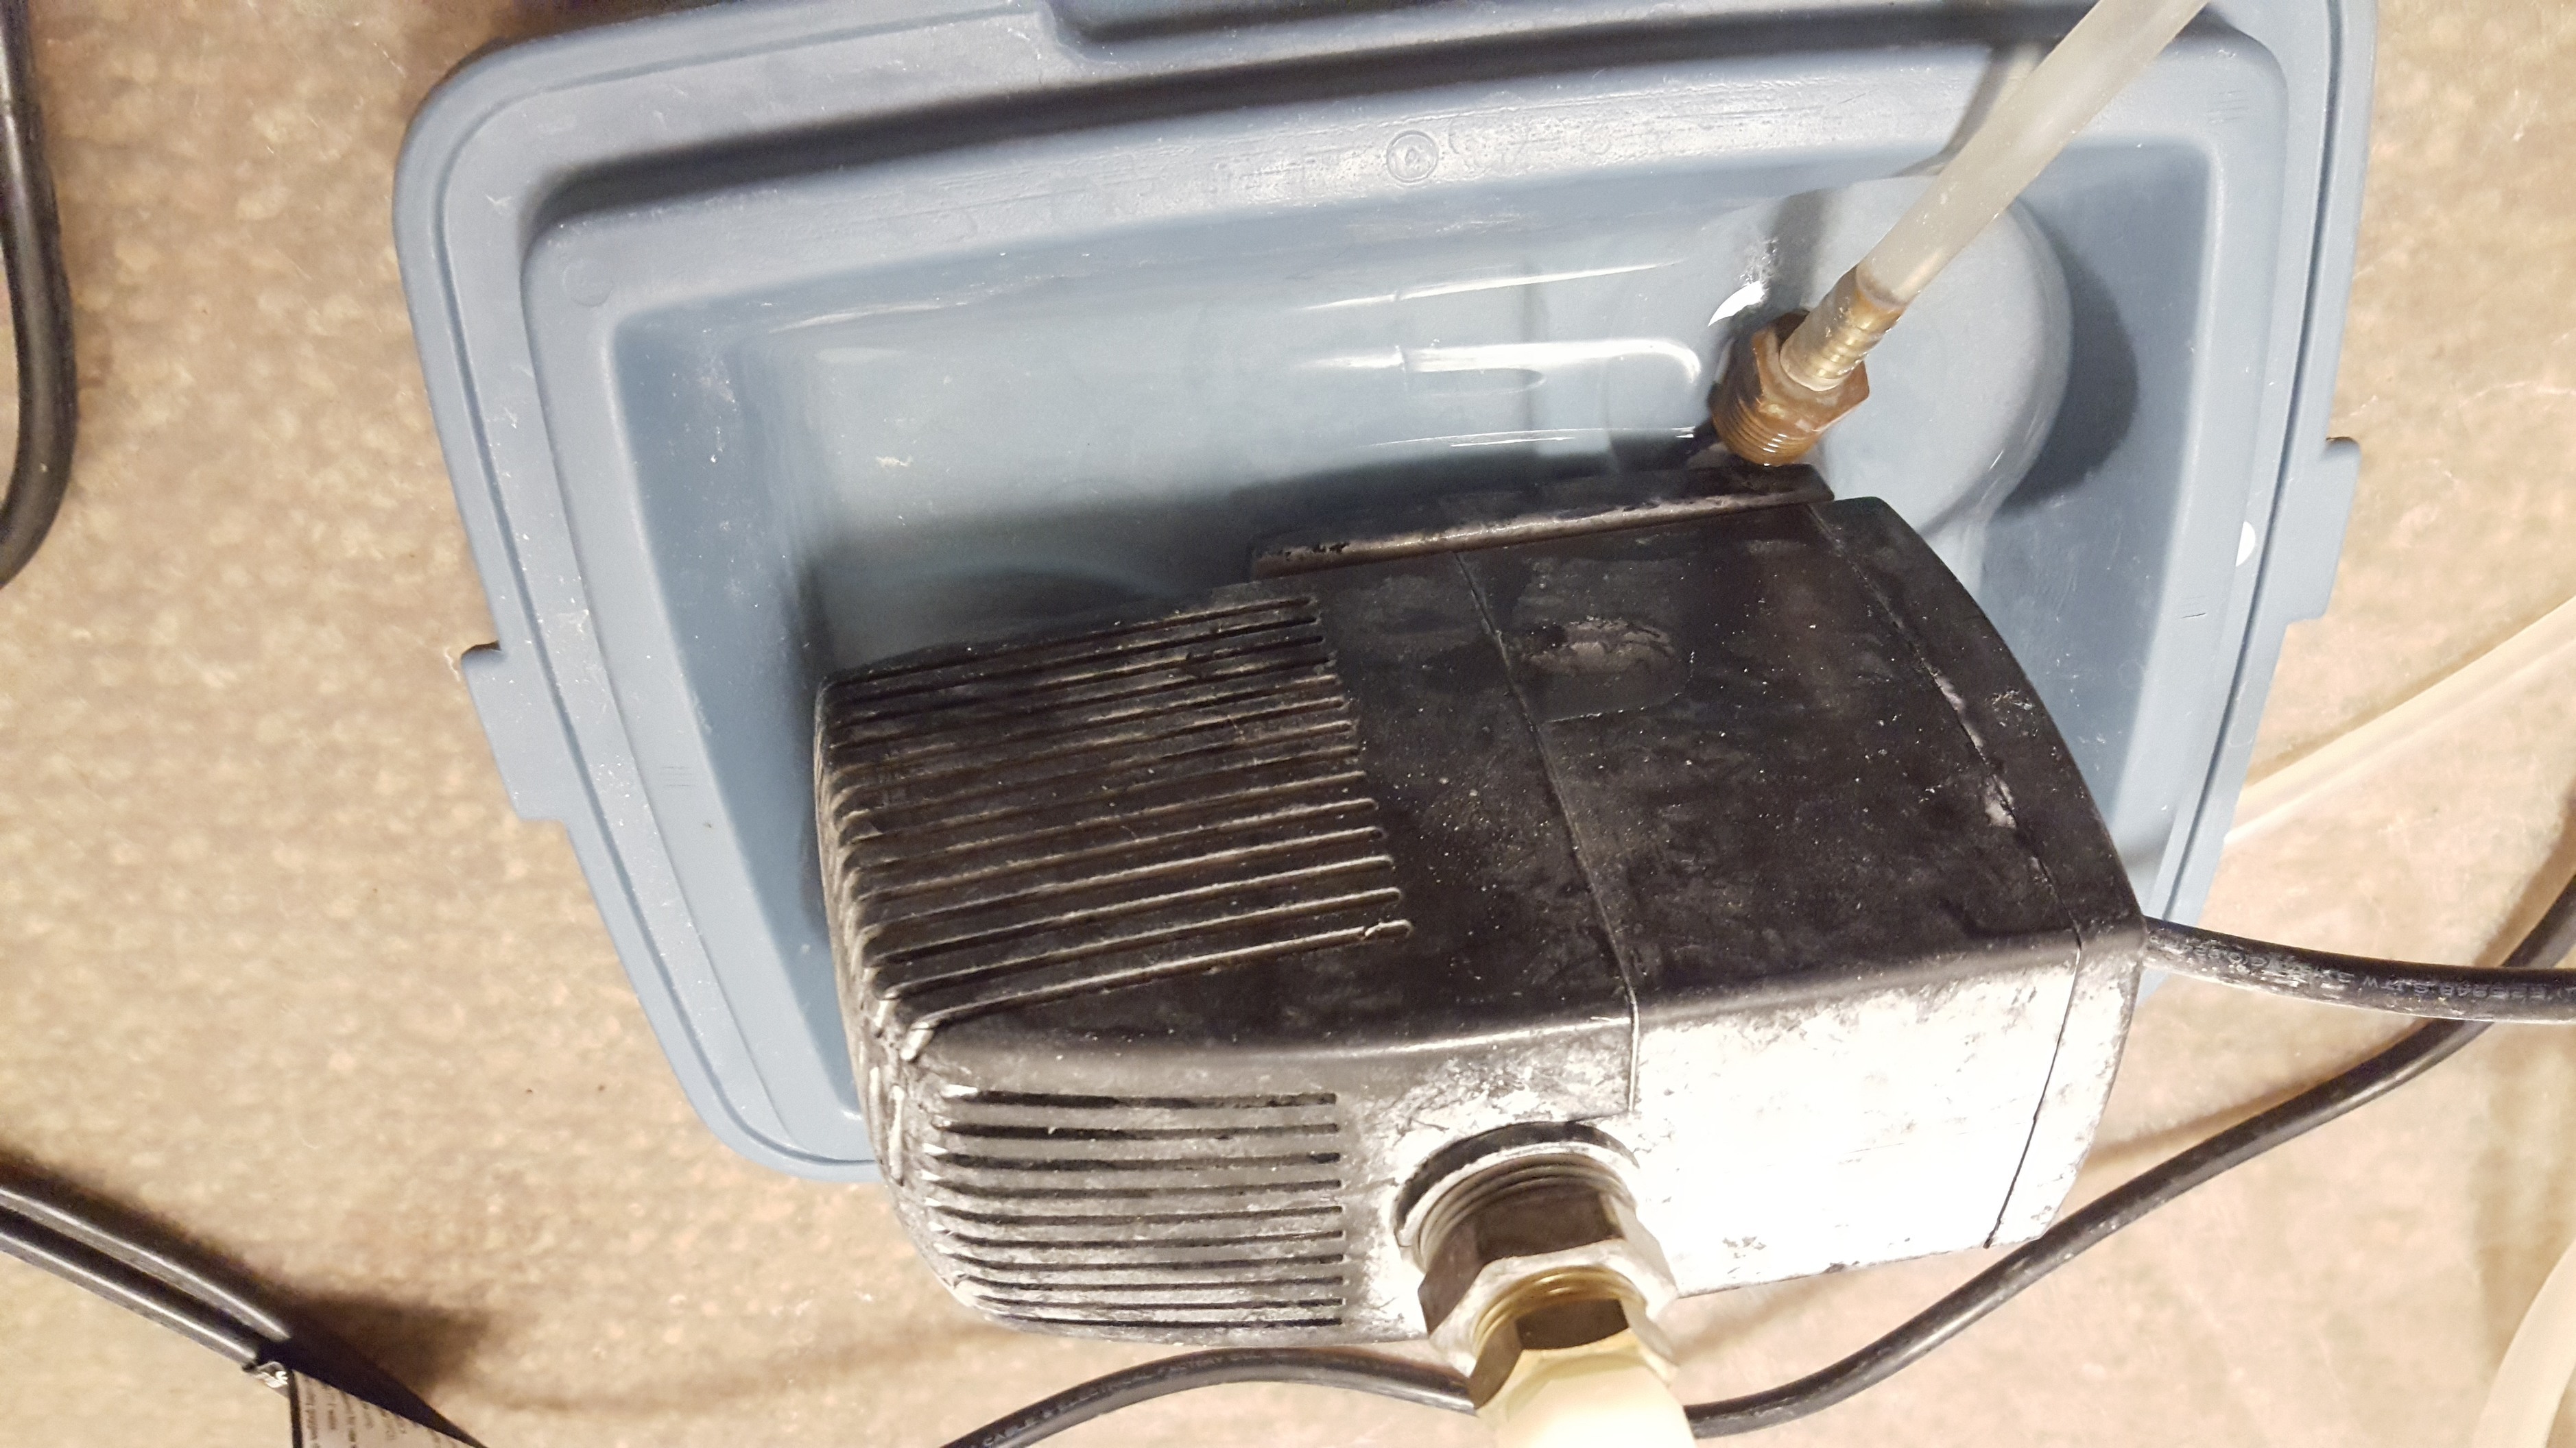
This is the smallest pond or fountain pump sold by Harbor Freight (a US company that sells cheap imported stuff).

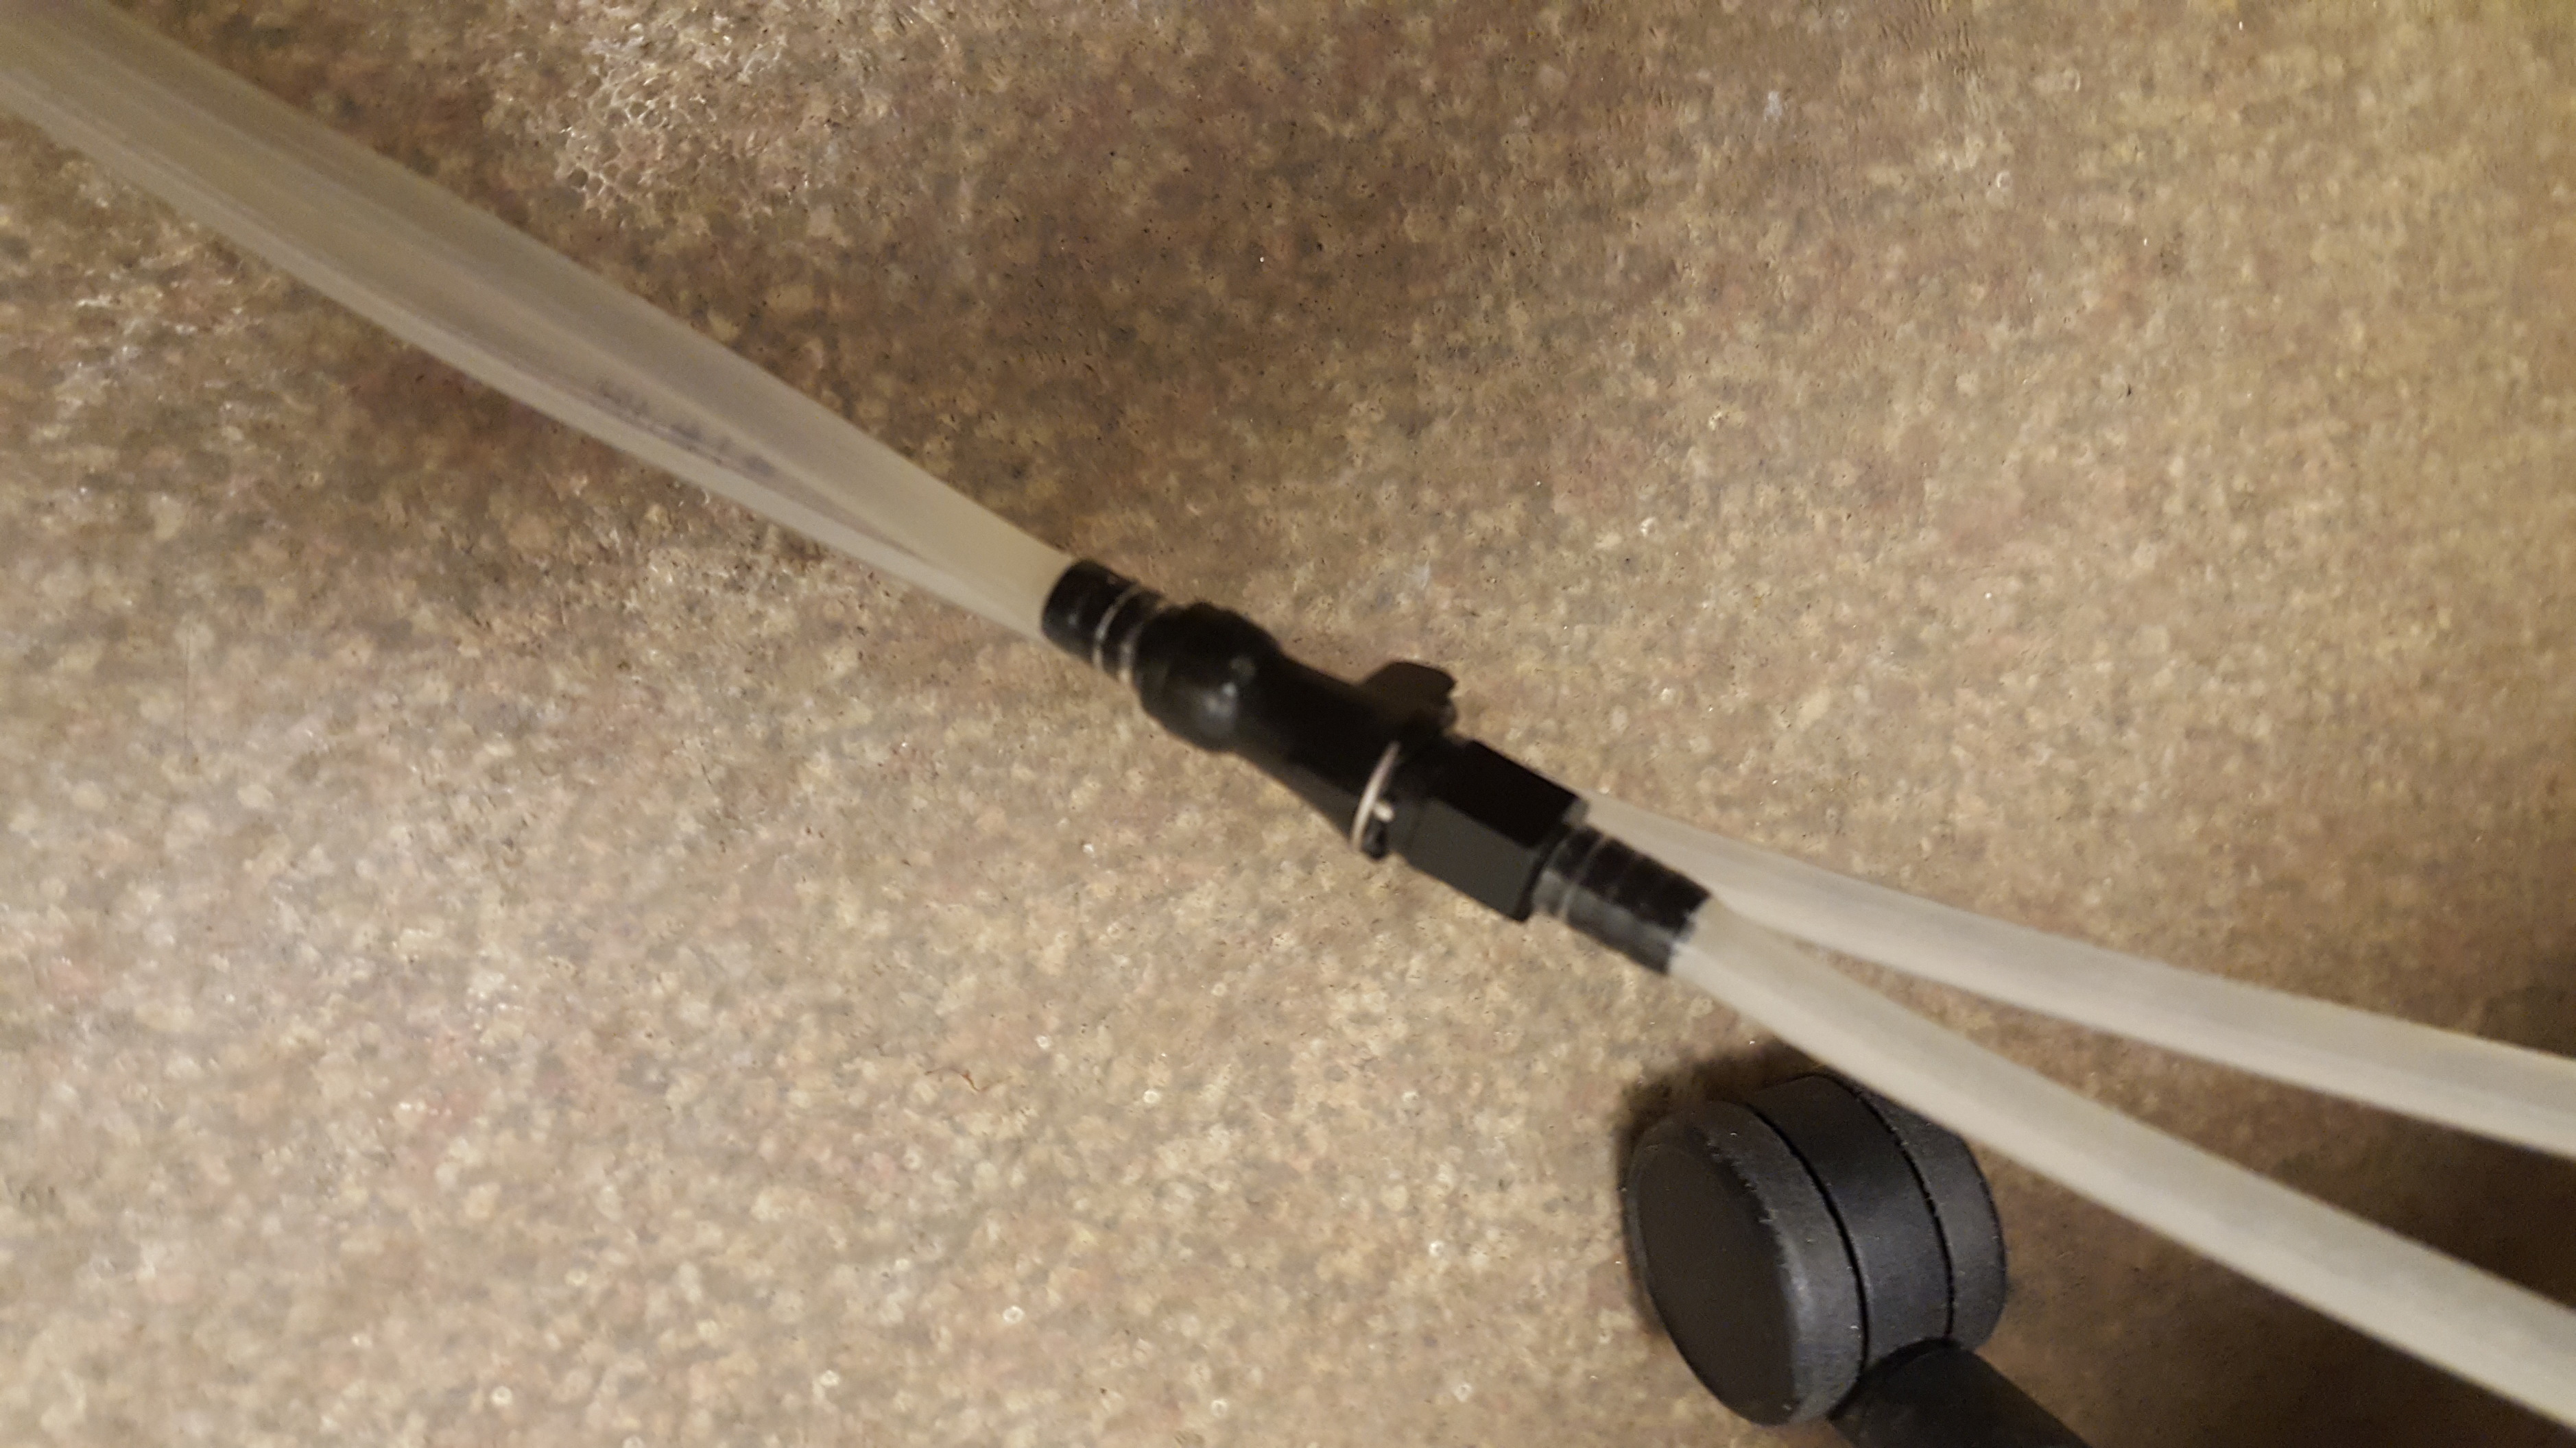
This is how the connectors look when connected to each other, hooking the shirt into the pump water circuit.

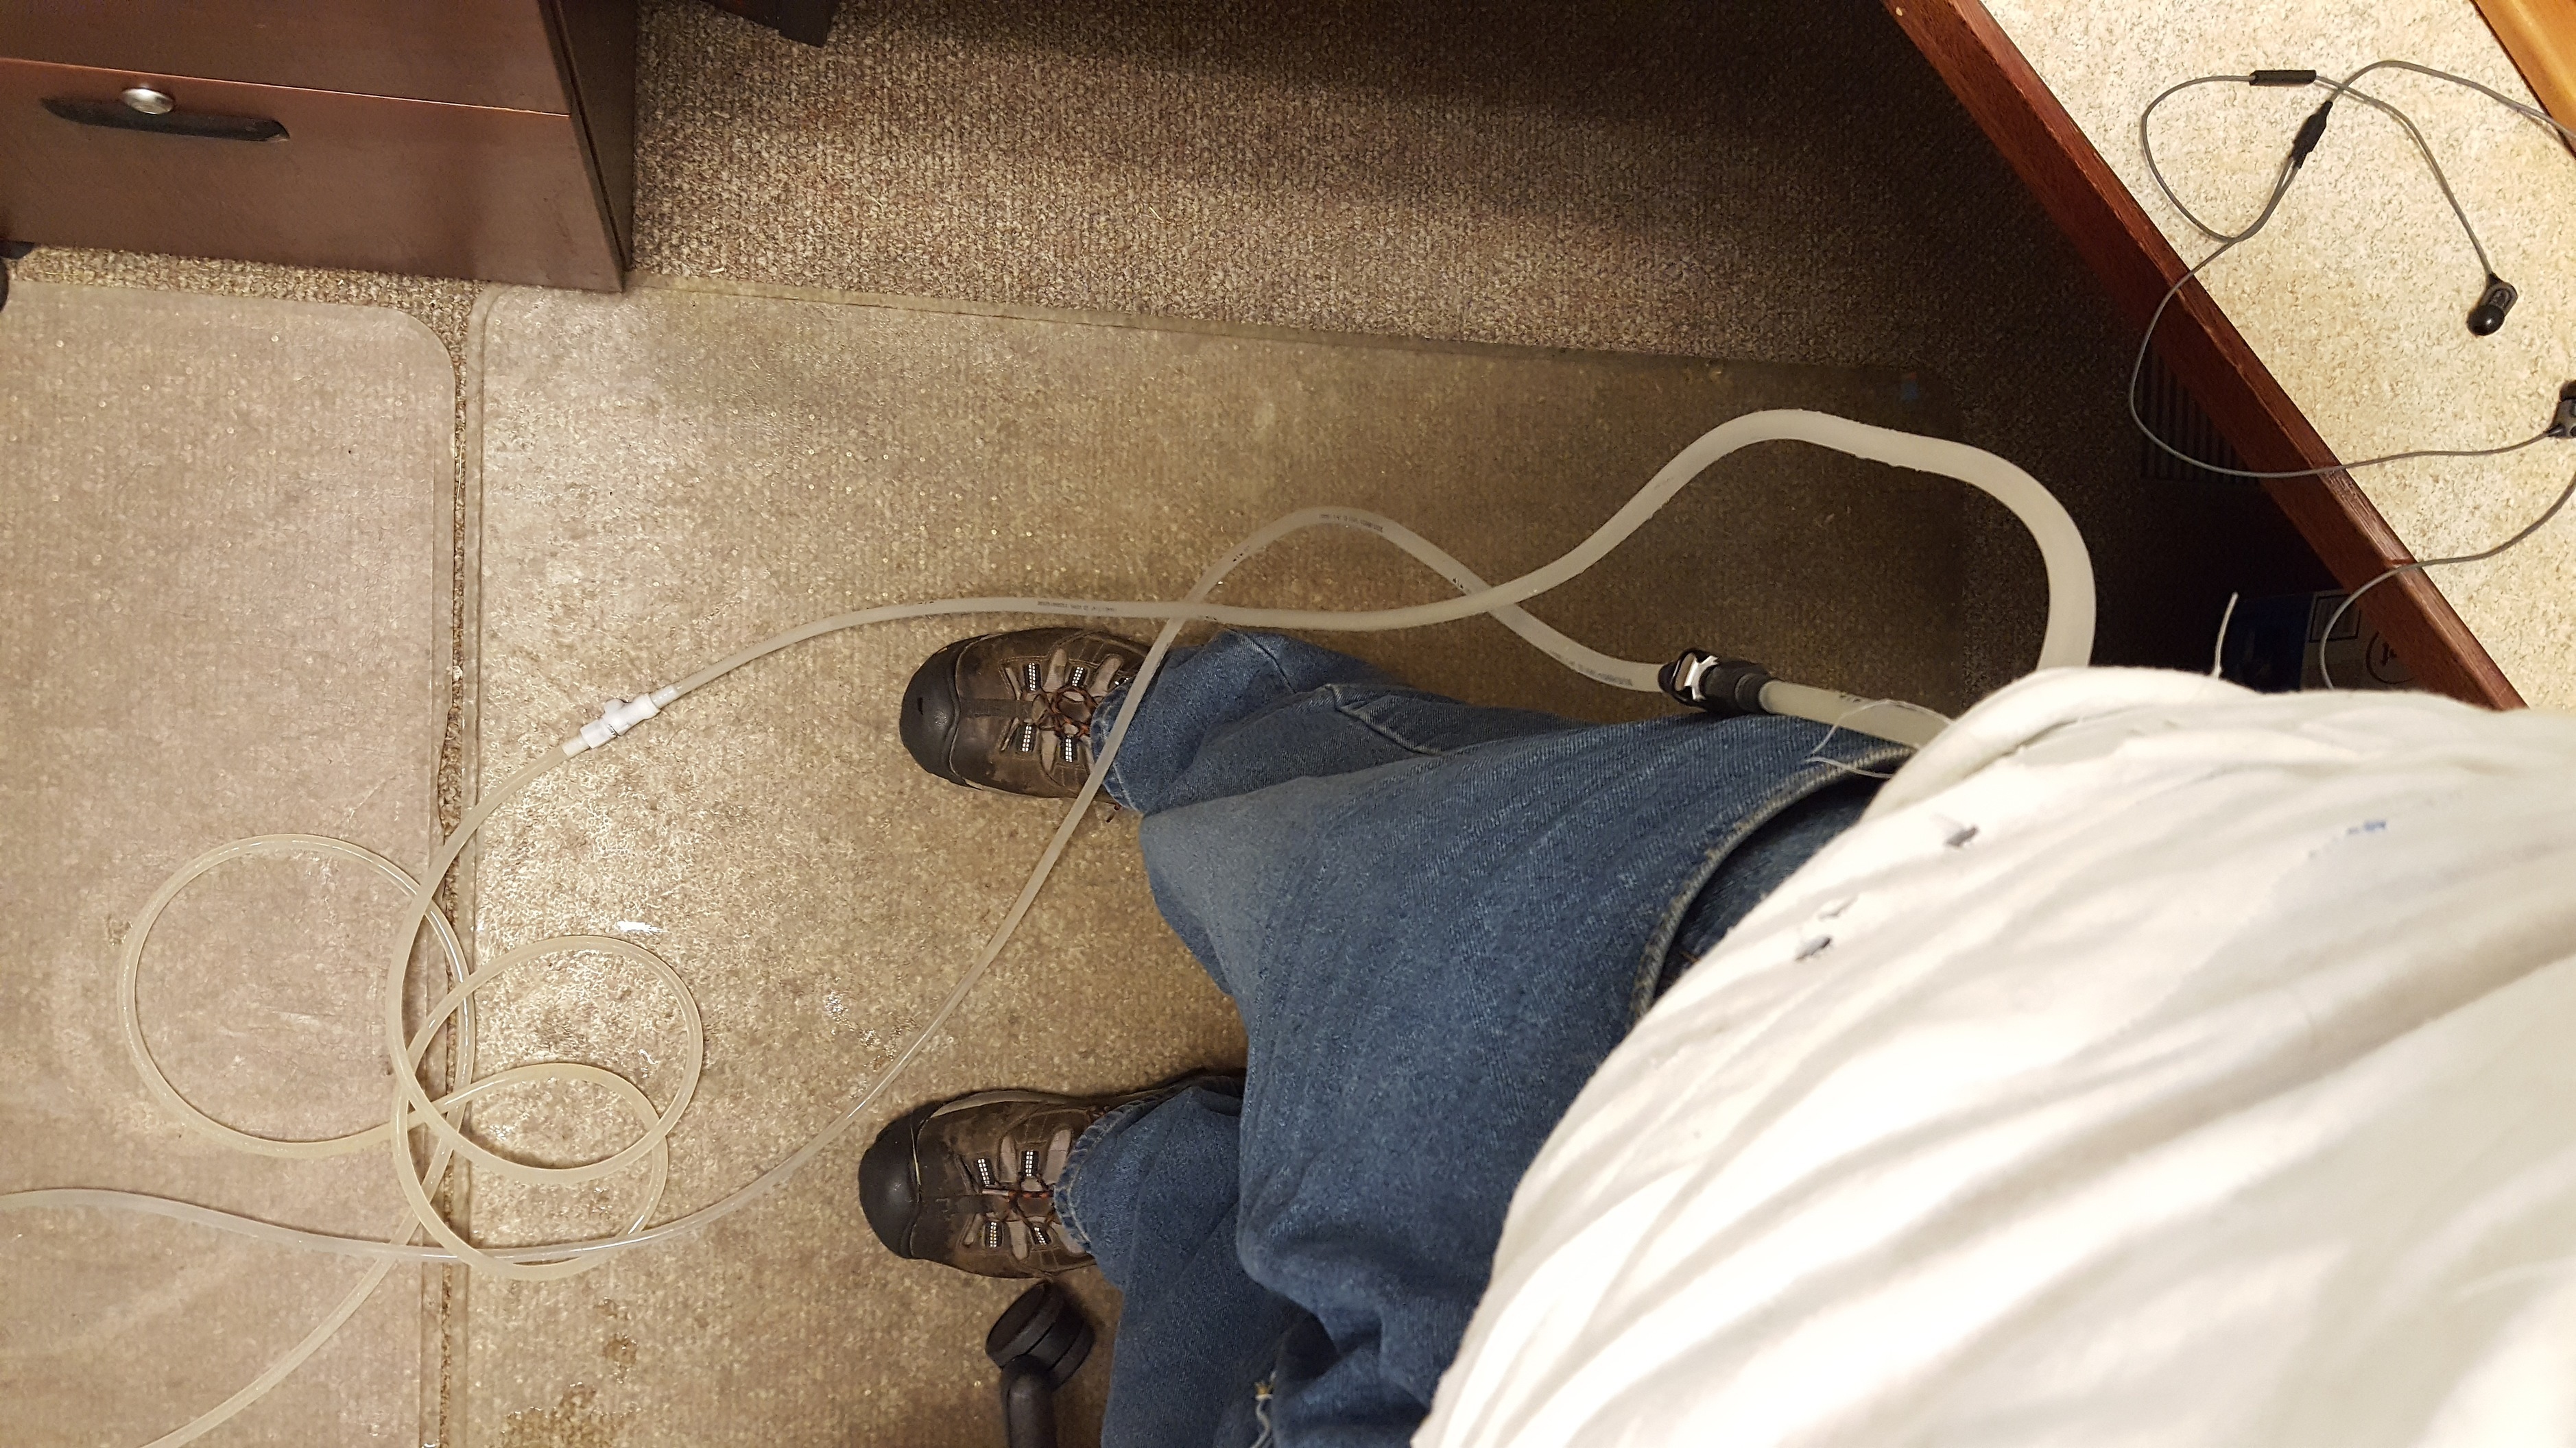
This is the shirt running right now, just using my sous vide water oven as a water tank. The final valve is visible here, in the open position.

The shirt still running, with the tube pulled out so you can see the low flow rate.

Regarding the second iteration of this shirt. Its at work, so I’ll have to take some pictures tomorrow.

Teaser about gen 2 shirt:


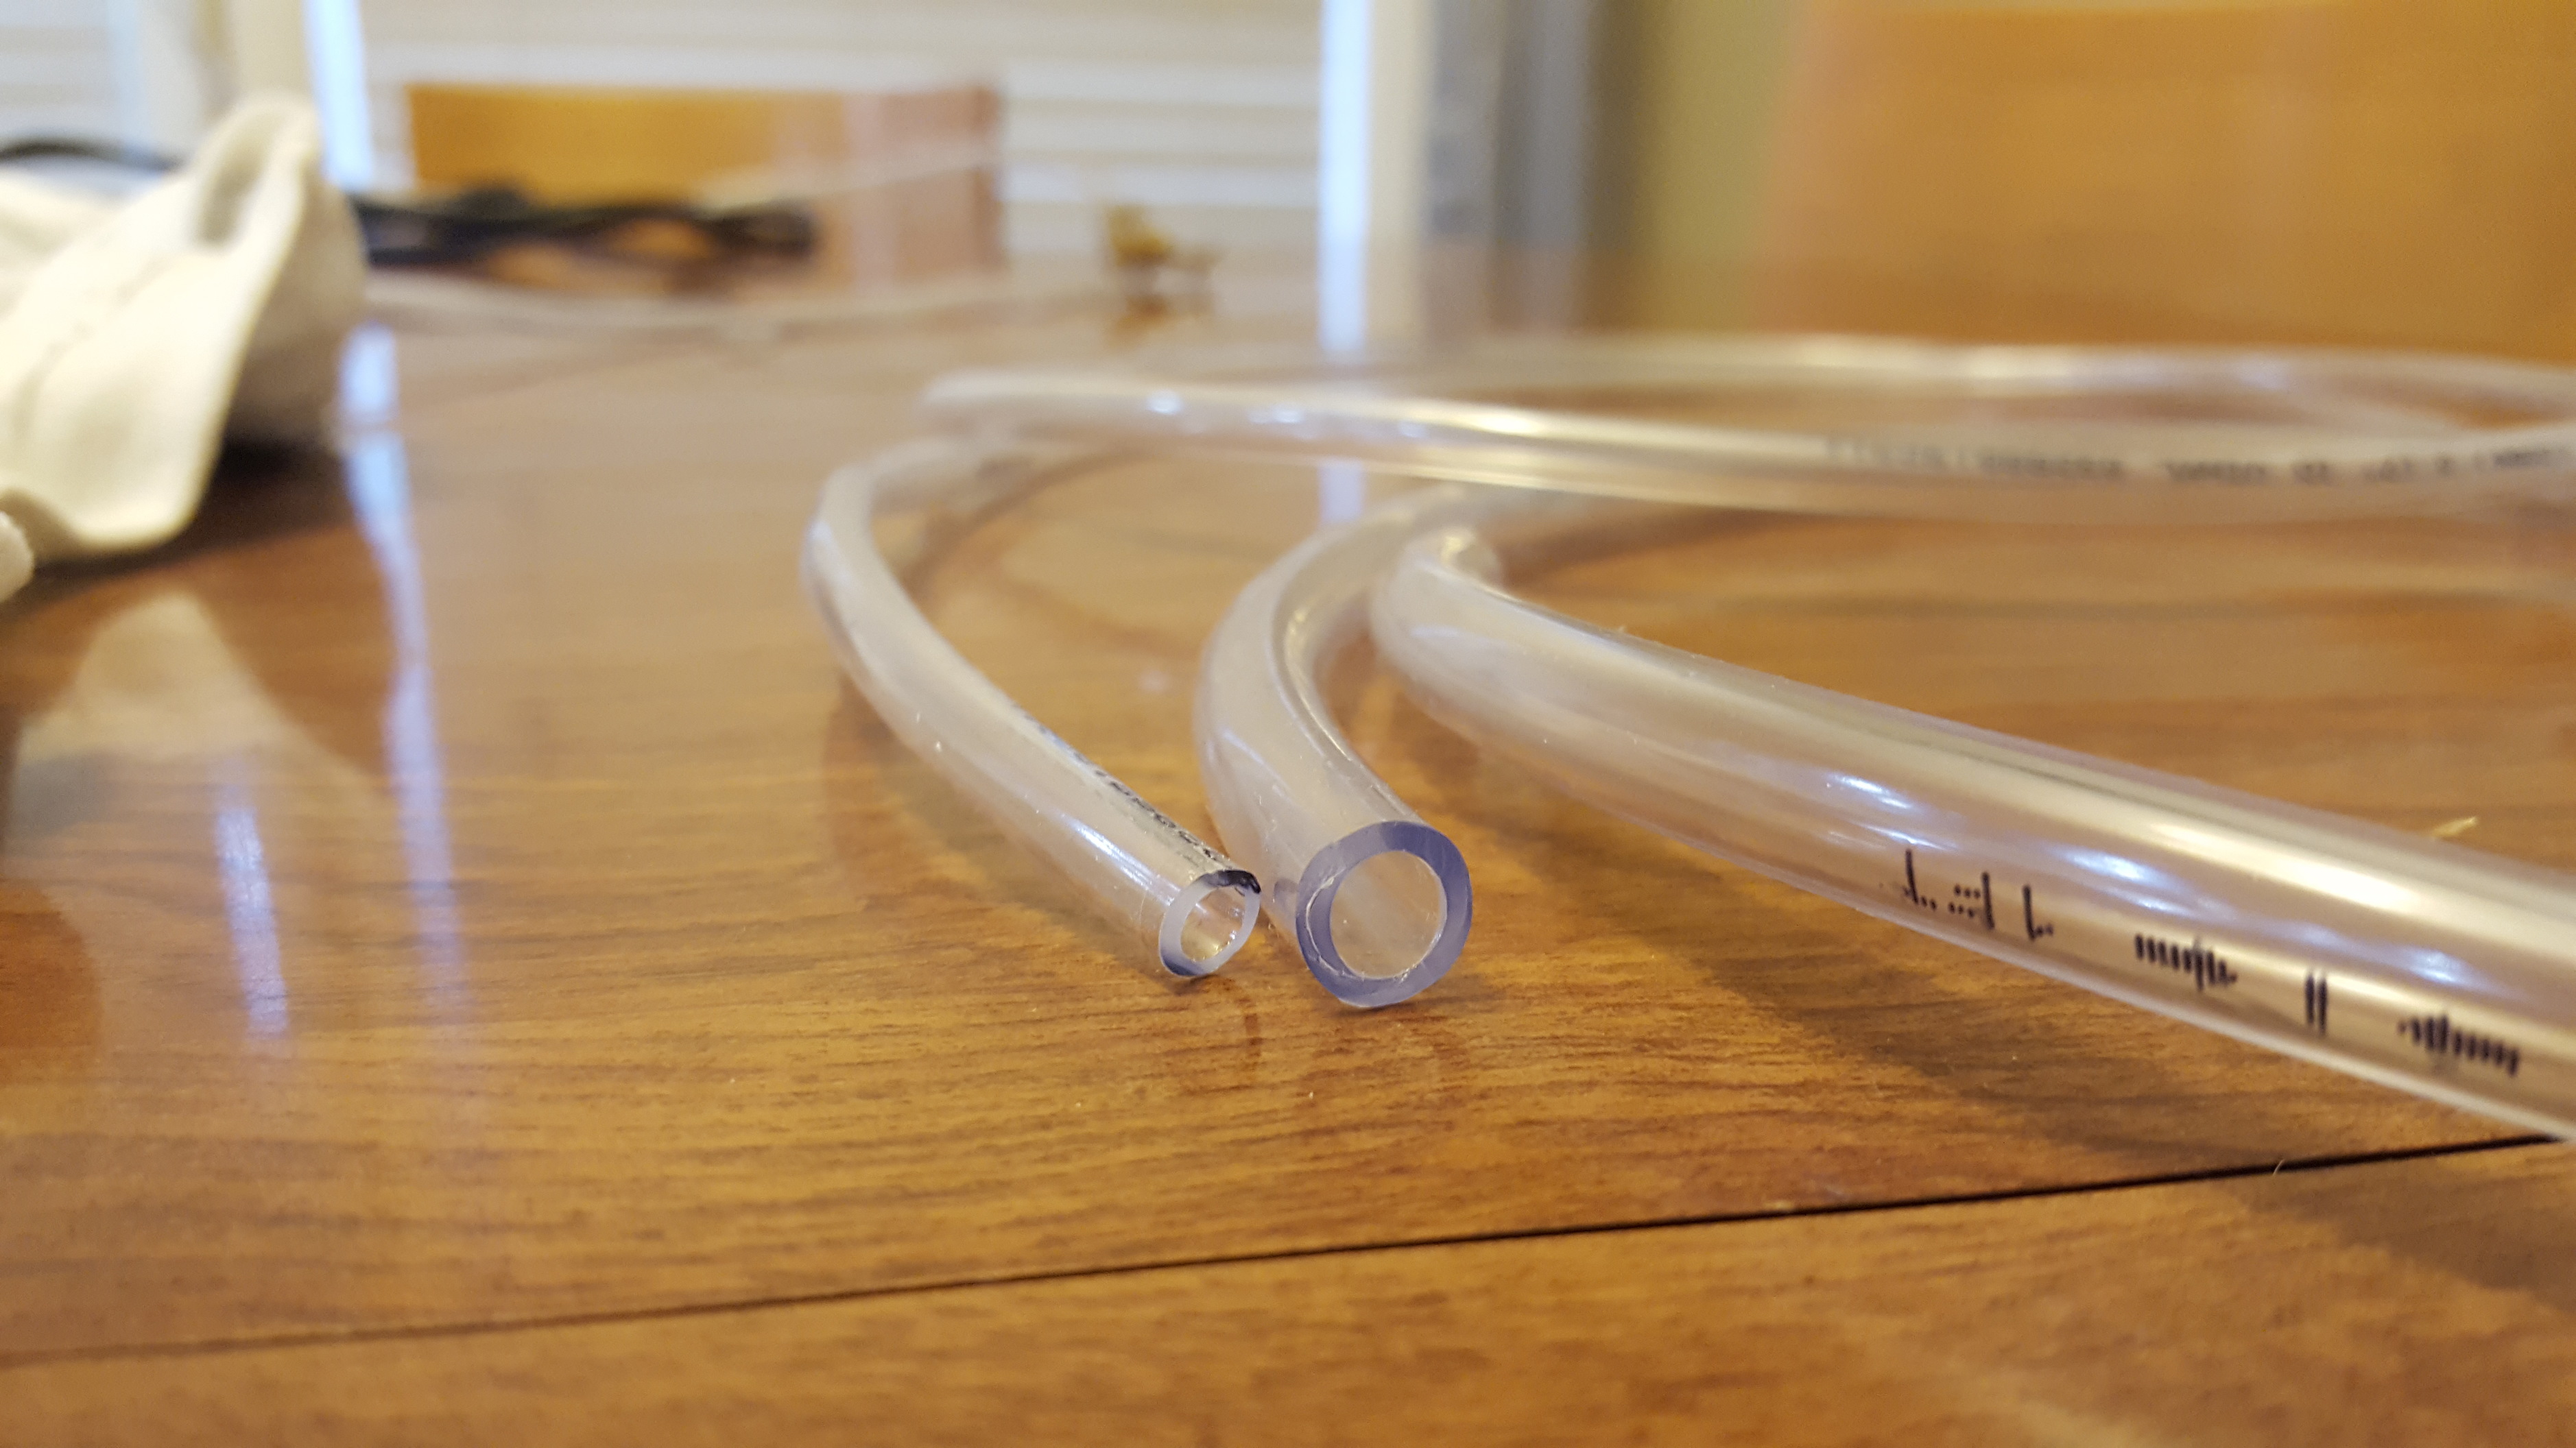
This is the comparison of the two tubing types. The smaller is the gen 1 tubing, with a 1/4" OD (outside diameter). The larger is the second gen tubing, with an ID (inside diameter)of 1/4" and an OD of 3/8".

I’ll be happy to answer questions about this iteration. I’ll post about the gen 2 tomorrow, and probably add the things I would do differently if I made a gen 3.


Day 8 of a TBD water/mineral fast, (but 10 was wishful thinking)
#2

The gen 2 shirt.

Where the gen 1 was “designed” to keep me cool when working with hot metal in hot clothing on hot days, this one is “designed” to force my body to dump energy into heat in the pursuit of staying alive. As such, I changed some things to add to the cold load it can create.

I suppose the shirt in action might actually be the gen 2.1 or something. As I tried to slightly cheap out on the fittings at first.

Original fittings for it, obviously no longer in use:


Rubber band solved a very slow leak. Note that these fittings are only dry break on the female side. the male side will leak (not a lot due to the nature of water in a tube with one end sealed, but some drops can come out.)

The whole setup.


What you’re seeing here is the cooler from a thrift store, dont know its full capacity, but when full it will hold over 6 trays of ice cubes, the pump, 1 gallon of water from the fridge, and a 52oz ice block sticking out of it ready to melt in. The pump is much larger than the other one, moving about 3x the water. Unfortunately, it makes more sound, and so if I made another version,I would use 4 of the small ones instead, and just make zones on the shirt, and either 4 connector sets, or pump into a manifold or some sort and go out from there.

I used scraps from my daughters shark dress for the inner lining that holds the tubes in place, and tried making it another way. Cant say it went any better, and full disclosure, the sewing the tubing into the shirt is by FAR the most labor intensive part. I hope to develop an easier way for this part.

Changed the way I setup the connectors. Now when its white to white, and black to black, the shirt is connected, and when disconnected its white black on both sides. No particular reason for this, except that these cheaper dry break connectors, at first I had some leakage issues. Not huge leaks, but I don’t want them to leak at all. I had found that the least leakage under load was going from white to black, so I did that. Since then, as there was still some intermittent leaking, I went to a hardware store and spent 63 cents each on some #5 O rings. I think #4 might have even been better, but 5 was the smallest they had. replaced O rings, the connectors are a bit more effort to plug in, but 0 leaks.


This is the pump. Its rated to move around 300gph.

I have no idea why its upside down. It isn’t that way on my end.
You’ll notice that I had to use a couple of fittings to get it down to the right size. This pump is made to feed something the size of a garden hose.

The shirt, front view. This tubing is more stiff, and I went around my body rather than up and down, so there is a bit of a Michelin man effect.

Ugh, now its sideways?

I seriously rotated the image… reuploaded it… and its still turned sideways. forum gurus, help?
You can see some holes where I screwed up and had to use a seam ripper, which doesn’t work that well on a t shirt. However, since this is worn as an undershirt, I don’t really care.

A view of the inside of the shirt (where the image didn’t turn on me!) mostly shows the Michelin man effect.)

[

Back of the shirt. Also turned sideways for no reason I can see. Mostly showing that I didn’t take much care to make it look nice, again because it wont be seen.

Shirt inside out.

This is looking down at me wearing it, and showing off a sort of NSV. When I made it, both plugs were sticking out about 3 inches. the white side is the one that goes around my body, and I’ve had to continue pulling it out to keep the shirt tight on my body. At this point it drags the ground. This was by design. The shoulder and neck area are not just loops, but I wanted to be able to pull out slack as I lost belly.


#3

reserving this spot for answering questions, if there are any.

I’ve now posted the details of both shirts. If you have questions about either one, feel free to ask.


(John) #4

I like it, not half as bad as i was picturing from the other thread. Cool theory too, if cold showers are supposed to work that should do the trick. Is there a way to measure brown fat?


#5

I am told there is, but its probably FMRI or something.

One thing I have noticed, is that it seems to have deserted me during my fast. I’m not sure what to make of this, as I had assumed BAT is for surviving the winter… the same time when ancient humans would have had to fast. However, to be fair, I suspect that even after thousands of cold showers and now months in my cold shirt, my BAT is still super duper wimpy compared to those ancient humans.


(SuzyS) #6

When I worked in the operating room, some of our surgeons used to wear something similar to your cold therapy shirt. It was made into a vest for our docs and It had some of the same connectors, and hooked up to an igloo cooler on wheels. A little water & ice, plug it in and it was good to go.
The surgeons wore these during long, intense cases to keep them cool while operating.


(Jim Russell) #7

This is similar. I have backed it, but not yet received it.

https://www.indiegogo.com/projects/thin-ice-2-0-a-next-gen-weight-loss-clothing-line


#8

That thing looks pretty cool (/rimshot). I hadn’t seen this one, but after I made my gen one a coworker found some commercial products that do a similar thing.

However, I am just one of those people who sees a $1000 price tag and immediately thinks, “I can make that for less”. I realize that the one you linked isn’t that much, but all the ones I found when I started looking were rather closed systems, and some were $1000+. Also, I don’t need tons of mobilitiy. The shirt has about 3/4 a liter of water in it when running, so if I need to move and stay cool, I just plug in for a minute and circulate the cold water in. Or more likely, since I am always hooked to it at my desk, I just unplug and take the cold water in it with me.

In this case, my total cost for both shirts might be $100 at this point.

Shirts from goodwill (thrift store with dubious internal practices in the US). So $2-3 each.
Pumps from Harbor Freight. small one is $7-8, large is 19(or 20 something with the 2 year warranty, which I got as I run it 8-10 hours a day 5 days a week). Tubing from big box home stores, paying about 19cents a foot for 1/4" tube and about 27cents a foot for the 3/8" tube. Brass fittings cost between cents, and dollars each, but I used stuff from my box of random parts so didn't have to buy them. Also, note that the gen 2 has far fewer of these parts. Fittings I first used air hose fittings (I'll show those in the gen 2 post). Then moved to dry(ish) break fittings. They cost around 11 per set, on average. This isnt a great idea for reasons I’ll explain in the gen 2 post.


(KCKO, KCFO 🥥) #9

The geekgrl in me loves this. Thanks for posting it in detail.

I just passed on the discounted sous vide device, maybe that was a mistake.

I’d love to sit around watching old movies while wearing something like this. :joy:


#10

I should note that the sous vide and this item have nothing in common except they both work with water. I just happened to have it handy and why get something else wet?

However, you’re right, you should have gotten one, We use ours nearly every single day, its awesome.


(Jim Russell) #11

That’s cool that you can disconnect it and not be tethered down. I’m a big fan of DIY. I might just make one for the fun of it. :slight_smile: Keep us updated with the build progress.


(Ruth A Rodgers) #12

This is ingenious! I don’t know if you are a man or a woman but to be able to sew, weld, invent and cook (on top of your knowledge about physiology and nutrition) I’d say you’re very well rounded in the talents department. Your children have a high bar to attain your level of expertise! Thank you for sharing and I personally feel grateful for members like you with knowledge on such a vast array of topics. :heart:


#13

I just received my ThinIce vest, it’s not exactly the same as the link shows and doesn’t distribute cold like I thought it would of but it does work… https://www.indiegogo.com/projects/thin-ice-2-0-a-next-gen-weight-loss-clothing-line#/


#14

What temperatures does it get down to?


#15

Thanks, I love hearing how awesome I am :blush:

Its funny you mention that, I grew up reading Robert Heinlein, and watching McGuyver, and really wanted to be like the characters portrayed. I mentioned that to my wife (who has also ready many RAH books) once, and without missing a beat she replied “Well you succeeded.”

I took it as a compliment.

My absolute favorite quote of his.

“A human being should be able to change a diaper, plan an invasion, butcher a hog, conn a ship, design a building, write a sonnet, balance accounts, build a wall, set a bone, comfort the dying, take orders, give orders, cooperate, act alone, solve equations, analyze a new problem, pitch manure, program a computer, cook a tasty meal, fight efficiently, die gallantly. Specialization is for insects.”


(Jim Russell) #16

Yes, the comments on the indiegogo page are pretty negative. A lot of people are disappointed. Still haven’t gotten mine.